-7-
1
2
3
4
5
6
7
8
8
8
8
9
10
11
12
13
14
15
16
17
18
19
20
21
22
23
24
25
26
27
28
29
30
31
32
33
34
35
36
Remote Control Functions
MUTE
FWD EPG/
STOP
AUTO
REPEAT
NUMBER 0 9(~)
▲
Remote button
POWER
DISPLAY
SUBTITLE
LANGUAGE
SLOW
MENU
ENTER
TTX
REV RADIO/
PLAY
PP.
SLEEP
MODE
MUTE
EPG
AUTO
NUMBER 0 9(~)
▲
DVB
POWER
DISPLAY
SUBTITLE
LANGUAGE
MENU
ENTER
TELETEXT
RADIO
PLAY
PP.
SLEEP
MODE
MUTE
AUTO
NUMBER 0 9(~)
▲
ATV
POWER
DISPLAY
LANGUAGE
MENU
PP.
SLEEP
MODE
This table explains the functions of the buttons on the remote control in each mode:
MUTE
FWD
STOP
REPEAT
NUMBER 0 9(~)
▲
Card & USB
POWER
DISPLAY
SUBTITLE
SLOW
(video only)
MENU
ENTER
REV
PLAY
PP.
SLEEP
MODE
RETURN
EXIT
PRLIST
AUDIO
FAV
NEXT
PREV
VOL+
VOL-
RED
GREEN
BLUE
YELLOW
ZOOM
RETURN
EXIT
PRLIST
AUDIO
FAV
VOL+
VOL-
RED
GREEN
BLUE
YELLOW
ZOOM
RETURN
VOL+
VOL-
EXIT
NEXT
PREV
VOL+
VOL-
ZOOM
AUDIO
REC REC
Notice
If earphones are used, sound is only transmitted through the earphones,
and no sound is available from the stereo speakers of the TV.
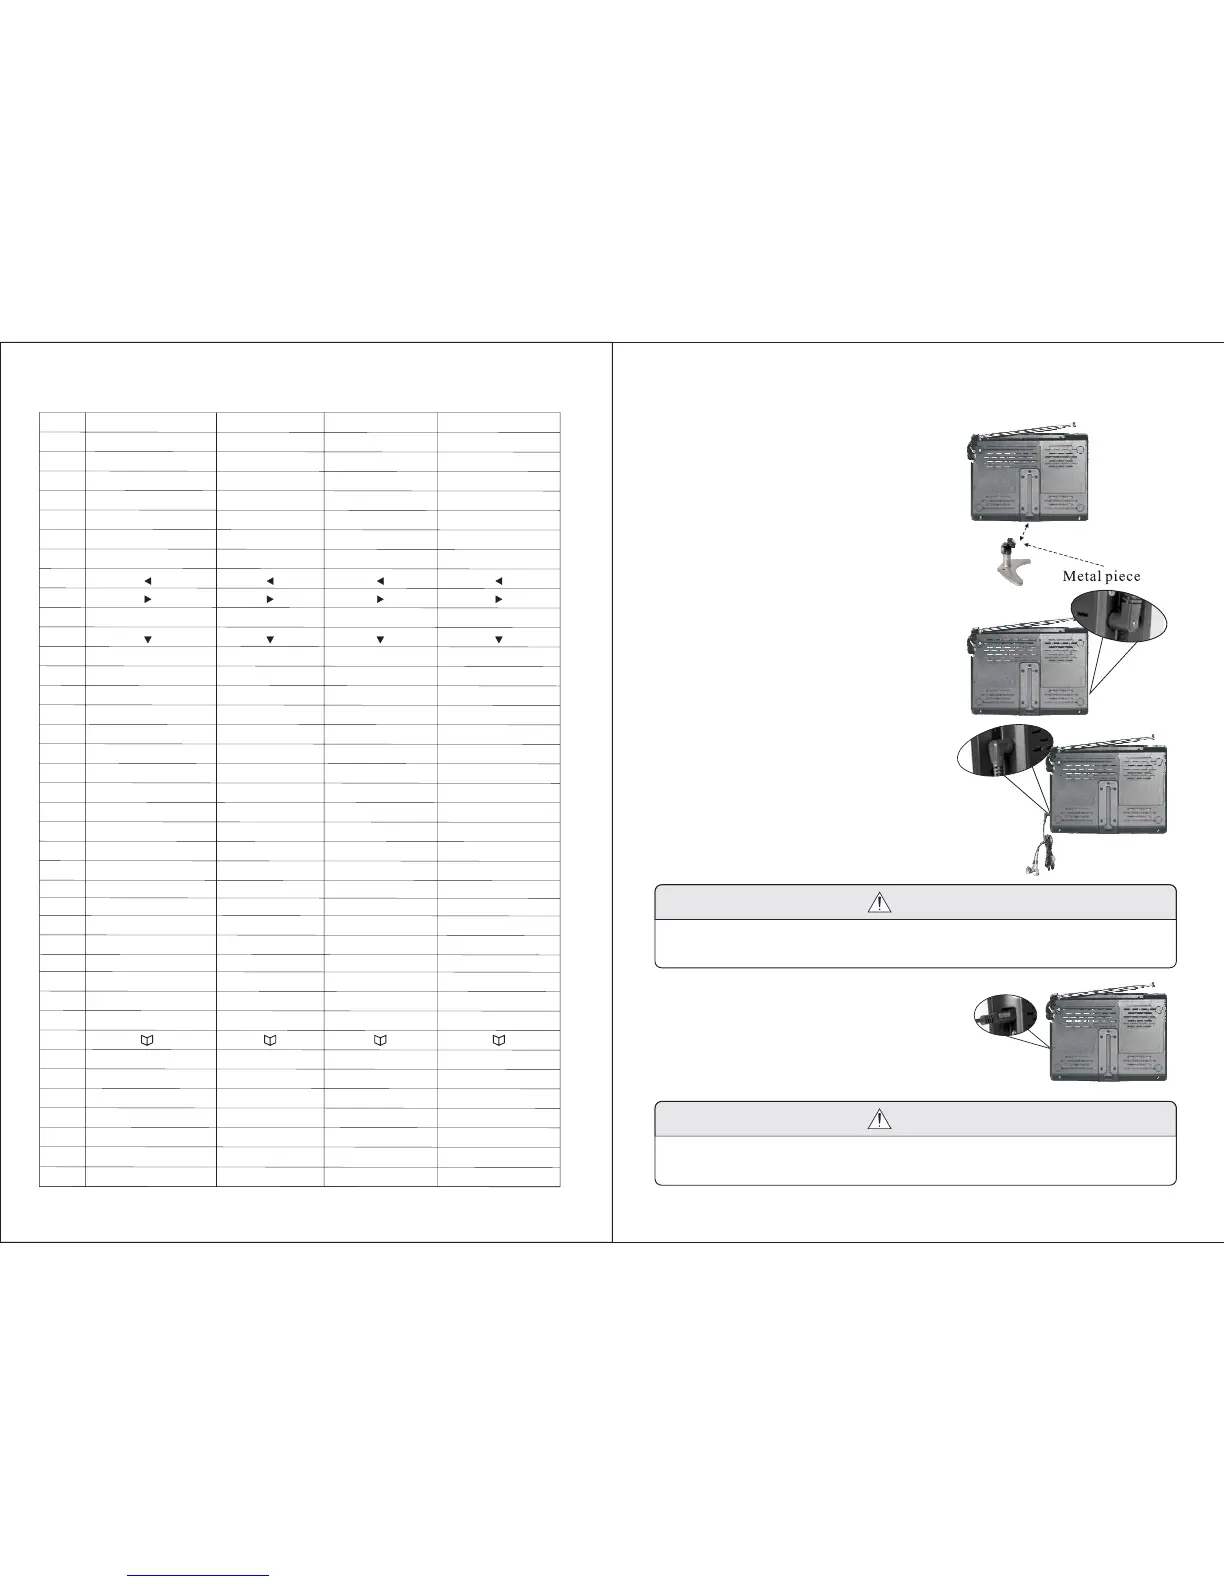
5. Connections
5.1. Installing the base support
Unscrew the oval handle on the ball-joint,
it will split into halves, embrace them on
the top of the base support, then tighten
the oval handle. Slide the metal surface
of the ball-joint into the slot on the back
of the TV, then tighten the wheel screw.
5.2. Connecting the power supply
Insert the power supply plug on the AC
adapter to the jack on the TV marked
DC IN 9V.+
Insert the earphone plug to the jack
on the TV marked earphones.
5.3. Connecting the earphones
5.4. Connection of AV Output
Connect the yellow port of the AV
cable to video jack, the white port to
the left audio jack and the red port
to the right audio jack, then insert
the AV head into the AV output jack
on the TV.
Notice
The AV output function is only available in DVB-T and Media player
mode.
-8-