4
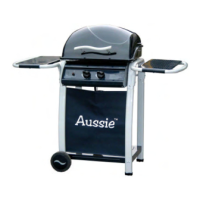
Preparation for Assembly
Remove grill, Hanger Bracket, Carry Bag and all packaging materials from the carton and place on a clean level sur-
face. Some parts are packed inside the grill body. Remove, unpack and inspect these parts as well. To remove Cooking
Grid with attached parts box, see instructions below.
NOTE: Before using your grill, read the instructions and your manual.
For easier set-up and assembly, follow instructions of each step in the order they are written as you look at the dia-
grams. If accessories mentioned in certain assembly steps do not come with your model, skip that step and proceed to
the next step that applies to your model.
If you have any questions or need help, go to www.aussiegrills.com or contact Customer Service at 1-800-251-
7558. Be sure to have the grill model number and serial number printed on the label located on the inside surface of the
rear leg. If you need replacement parts, look in the Parts List Section to find the exact parts you need. If you need a
replacement part under warranty, a proof of purchase will be necessary. You will be asked to forward your
proof of purchase via e-mail to csr@aussiegrills.com or to fax your proof of purchase to 423-639-1055 and reference
your model and serial number. It is important to register your grill and retain your receipt.
Unpacking
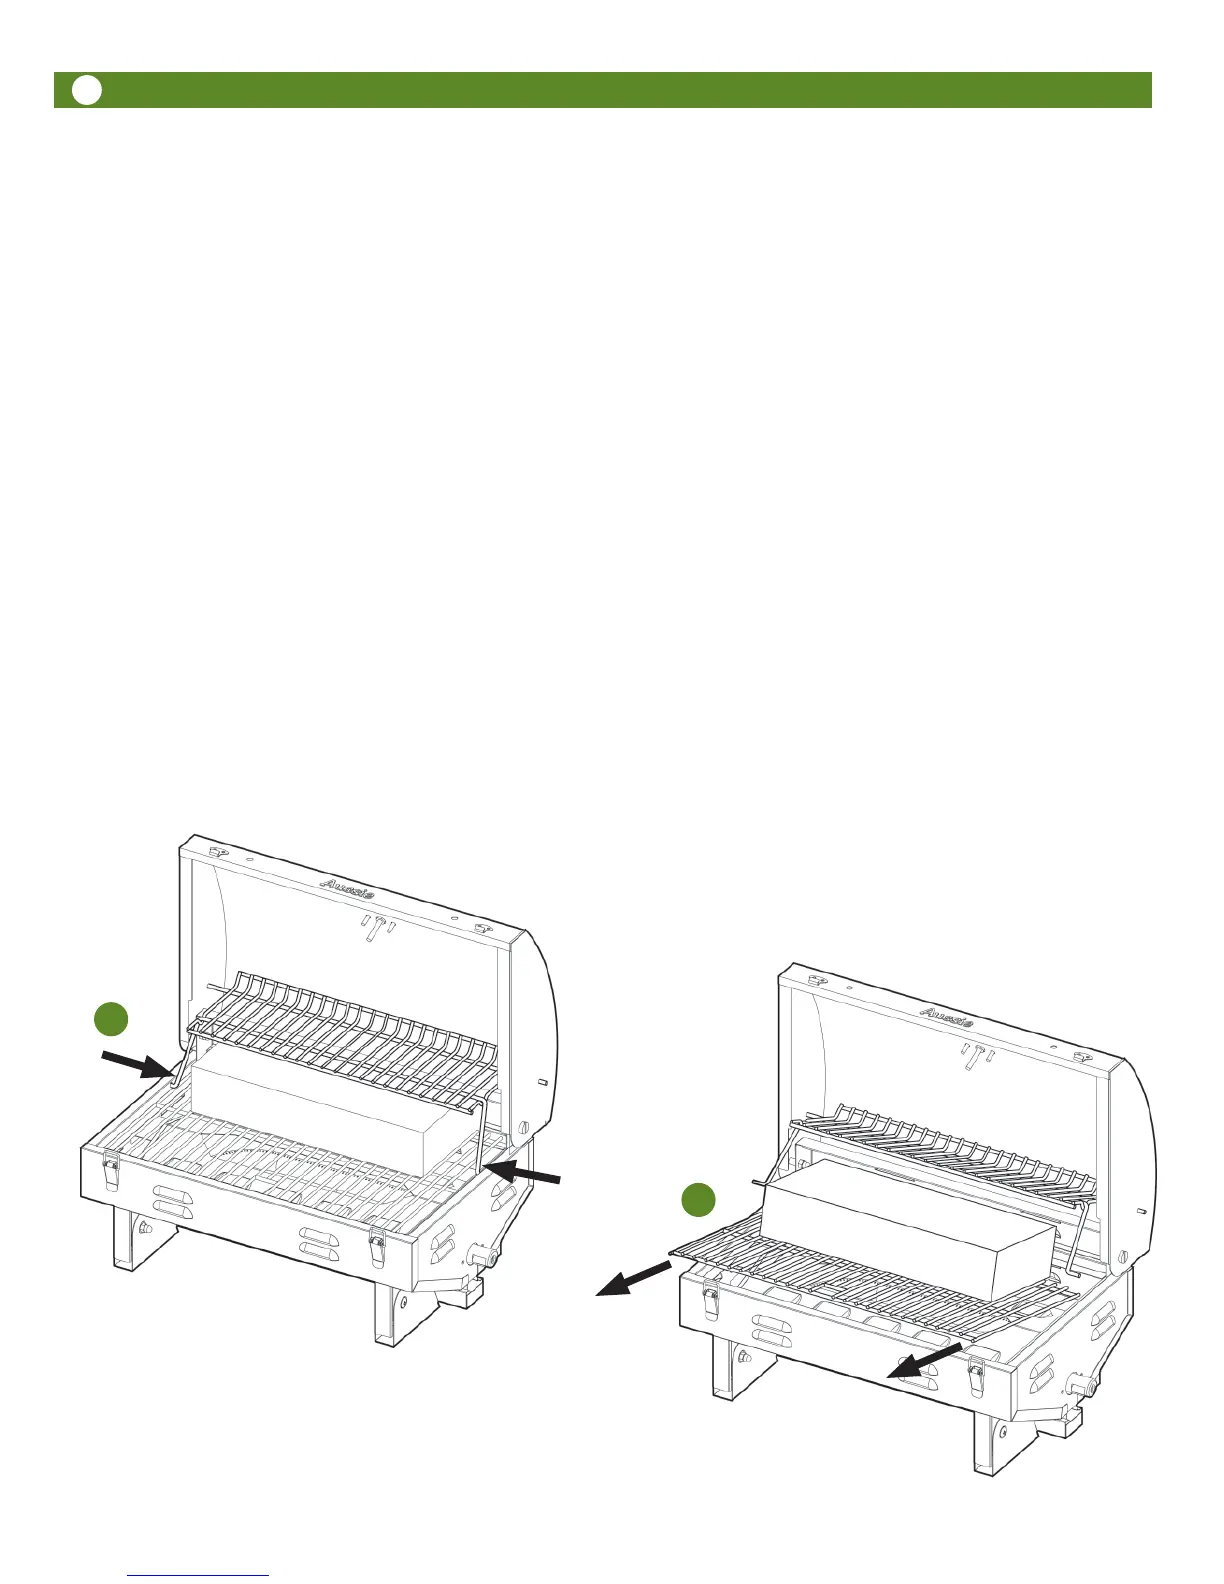
A. Flex the legs of the Warming rack inwards, as indicated by the arrows, until they are out of the holes in the ends of
the grill bowl.
B. Rotate the Warming Rack up and remove the Cooking Grid with attached parts box. (Warming Rack may be re-
moved or left in place during assembly) Remove other packing materials. Unpack and inspect parts. Proceed with
assembly as instructed on next page.
B
A