...
'Cl
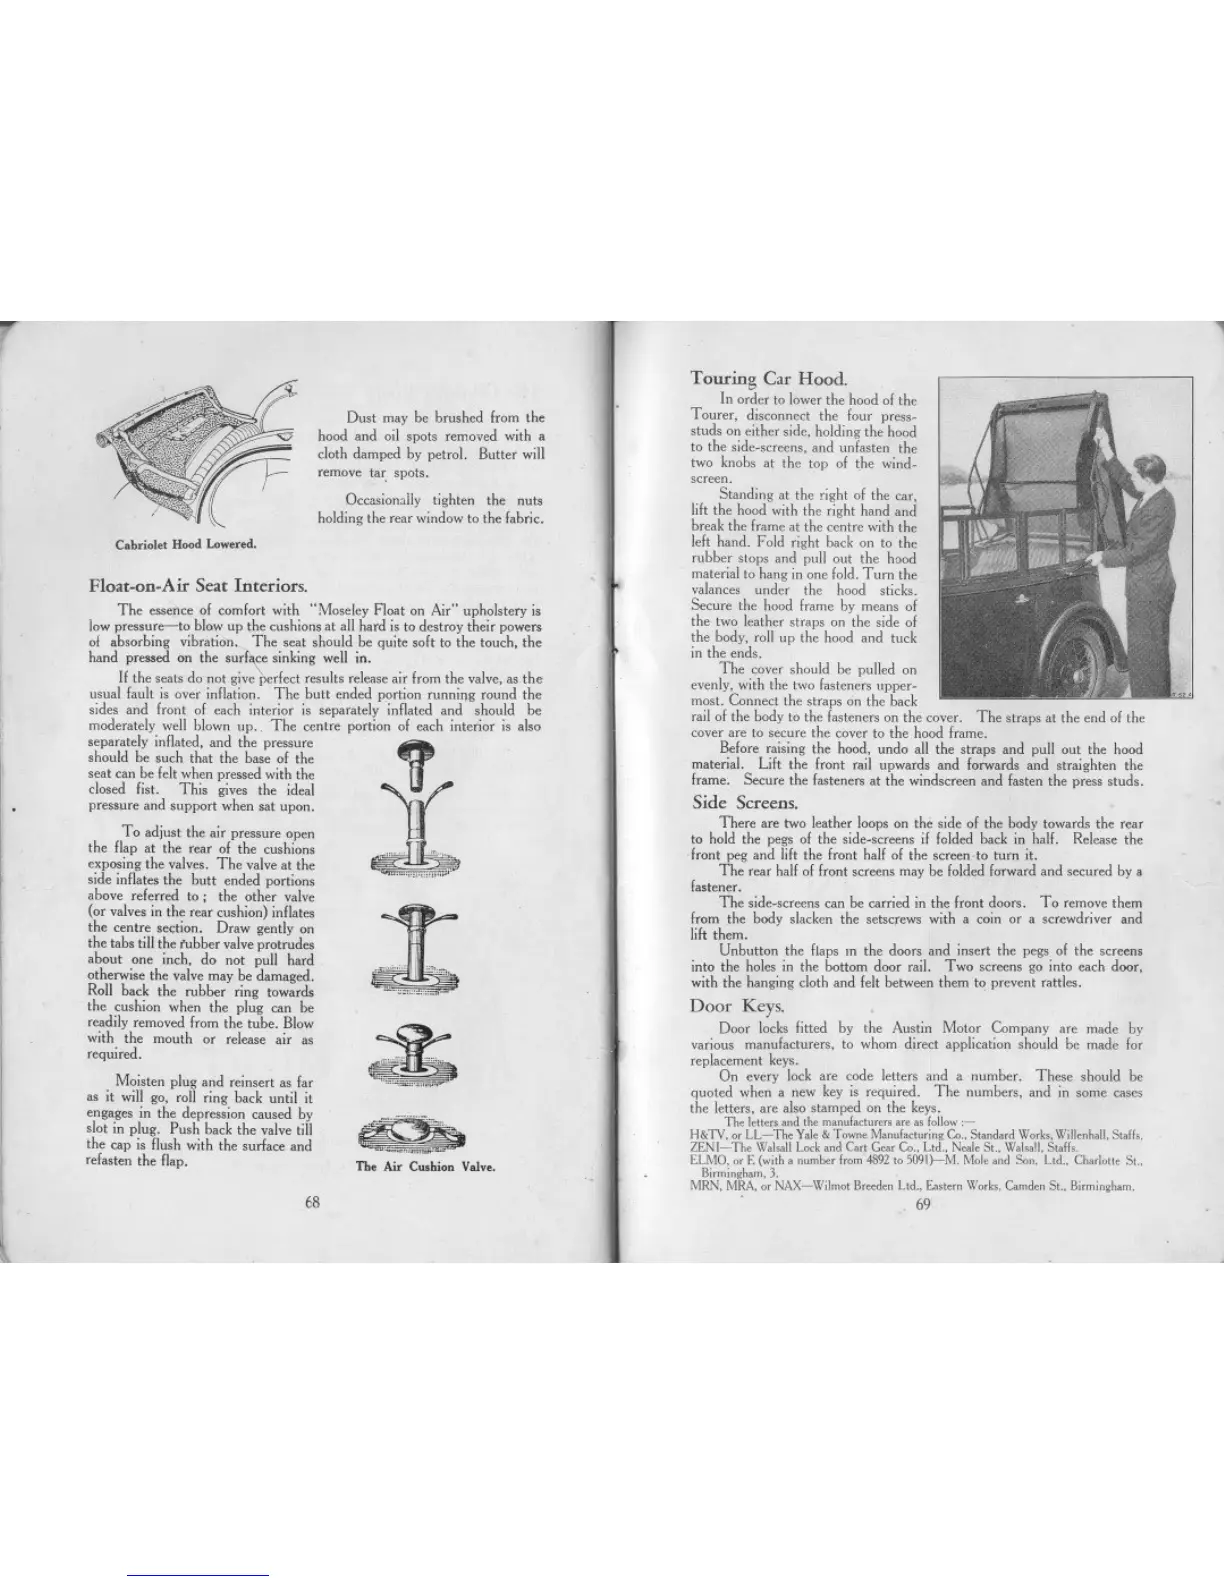
Touring Car Hood.
In order to lower the hood of the
Tourer, disconnect the four press-
studs on either side, holding the hood
to the side-screens, and unfasten the
two knobs at the top of the wind-
screen.
Standing at the right of the car,
lift the hood with the right hand and
break the frame at the centre with the
left hand. Fold right back on to the
rubber stops and pull out the hood
material to hang in one fold. Turn the
valances under the hood sticks.
Secure the hood frame by means of
the two leather straps on the side of
the body, roll up the hood and tuck
in the ends.
The cover should be pulled on
evenly, with the two fasteners upper-
most. Connect the straps on the back
rail of the body to the fasteners on the cover. The straps at the end of the
cover are to secure the cover to the hood frame.
Before raising the hood, undo all the straps and pull out the hood
material. Lift the front rail upwards and forwards and straighten the
frame. Secure the fasteners at the windscreen and fasten the press studs.
Side Screens.
There are two leather loops on the side of the body towards the rear
to hold the pegs of the side-screens if folded back in half. Release the
front peg and lift the front half of the screen.to turn it.
The rear half of front screens may be folded forward and secured by ,
fastener.
The side-screens can be carried in the front doors. To remove them
from the body slacken the setscrews with a coin or a screwdriver and
lift them.
Unbutton the flaps m the doors and insert the pegs of the screens
into the holes in the bottom door rail. Two screens go into each door,
with the hanging cloth and felt between them to prevent rattles.
Door Keys.
Door locks fitted by the Austin Motor Company are made by
various manufacturers, to whom direct application should be made for
replacement keys.
On every lock are code letters and a number. These should be
quoted when a new key is required. The numbers, and in some cases
the letters, are also stamped on the keys.
Th, I,tt", ,nd th, m,nuf"tu"" 'cc " follow,-
H&TV.orLL-Th, y,le &TowneM,nuf'duringCo..St,nd"d Worb,Will,nh,ll.St,ff,.
ZENI-Th, W,lo"]lLo,k,nd C", GeMCo..Ltd.,N"le St.. W,J"ll. S"ff,.
ELMO,orE (with, numh" fwm4892to 509I)-M. Mol, ,nd Son, Ltd.,Ch,rlotte St.,
Sirmingh,m,3. .
MRN,MRA,orNAX-WilmotS"d,n Ltd.,Ea""n Worb, c.md,n St., Sirmingh,m.
69
Dust may be brushed from the
hood and oil spots removed with a
cloth damped by petrol. Butter will
remove tar. spots.
Occasiomlly tighten the nuts
holding the rear window to the fabric.
Cabriole. Hood Lowered.
Float-on-Air Seat Interiors.
The essence of comfort with "Moseley Float on Air" upholstery is
Iow pressure-to blow up the cushions at all hard is to destroy their powers
of absorbing vibration. The seat should be quite soft to the touch, the
hand pressed on the surl¥e sinking well in.
If the seats do not give perfect results release air from the valve, as the
usual fault is over inflation. The butt ended portion running round the
sides and front of each interior is separately inflated and should be
moderately well blown up., The centre portion of each interior is also
separately inflated, and the pressure
,
should be such that the base of the I
seat can be felt when pressed with the
closed fist. This gives the ideal
pressure and support when sat upon.
To adjust the air pressure open
the flap at the rear of the cushions
exposing the valves. The valve at the
side inflates the butt ended portions
above referred to; the other valve
(or valves in the rear cushion) inflates
the centre section. Draw gently on
the tabs till the fubber valve protrudes
about one inch, do not pull hard
otherwise the valve may be damaged.
Roll back the rubber ring towards
the cushion when the plug can be
readily removed from the tube. Blow
with the mouth or release air as
required.
Moisten plug and reinsert as far
as it will go, roll ring back until it
engages in the depression caused by
slot in plug. Push back the valve till
the cap is flush with the surface and
refasten the flap.
J:
-""""",",..
~
.sJD
The Air Cushion Valve.
68
,
 Loading...