20
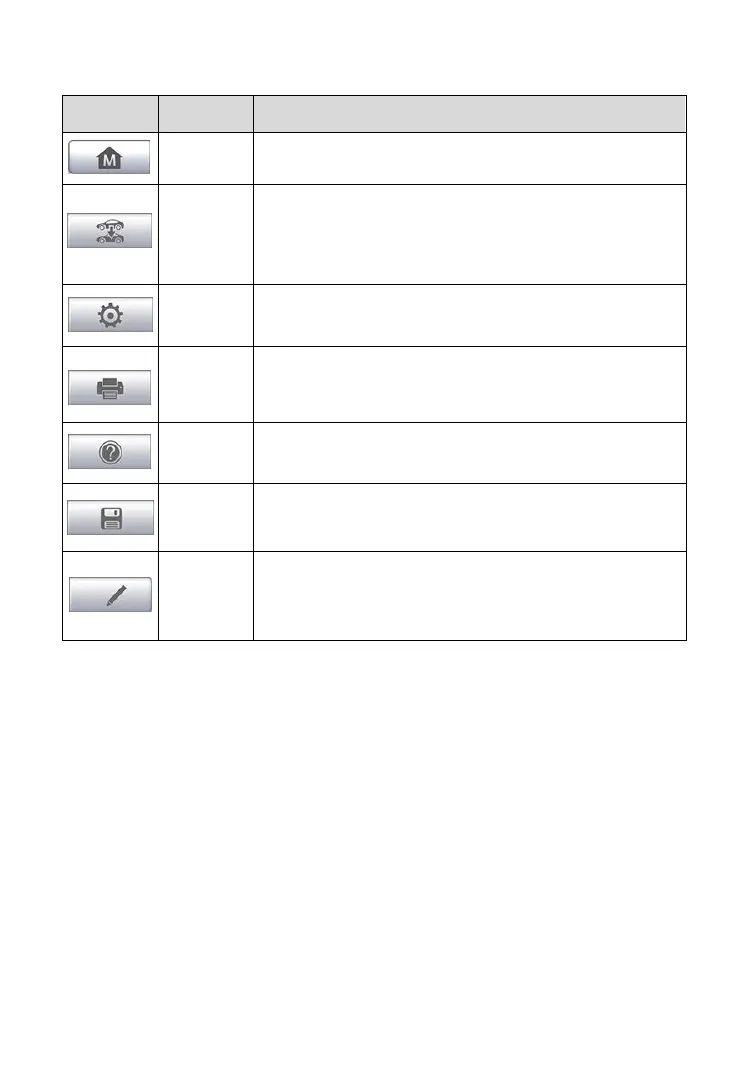
Table 4-2 Diagnostics Toolbar Buttons
Returns to the MaxiDAS Job Menu.
Exits the diagnostic session of the currently
identified test vehicle and returns to the vehicle
menu screen.
Opens the settings screen. See Settings on page 68
for details.
Prints a copy of the displayed data. See Printing
Setting on page 70 for details.
Provides instructions or tips for operations of various
diagnostic functions.
Saves the page. See Data Manager on page 63 for
details.
Records the communication data and ECU
information of the test vehicle. See Data Logging on
page 84 for details.
To print data in Diagnostics
1. Tap the Diagnostics application button from the MaxiDAS Job
Menu. The Print button on the diagnostic toolbar is available
throughout the whole Diagnostics operations.
2. Tap Print whenever you want to make a printing. A drop-down menu
appears. Tap Print This Page to print a screenshot copy of the
current screen.
3. A temporary file will be created and send to the computer for printing.
4. When the file is transferred successfully, a confirmation message
displays.
To submit Data Logging reports in Diagnostics
1. Tap the Diagnostics application button from the MaxiDAS Job
Menu. The Data Logging button on the diagnostic toolbar is
available throughout the whole Diagnostics operations.