5. Functional Test
5.1 Preliminary Inspection
Before testing, inspect the instrument for physical damage (cracked or
broken screen, case, bent connector pins, etc.).
Take off the rear cover and check for signs of water ingress. Check for
damage to the PCB, in particular, overheating on the power supply input
and output pins and PCB tracks.
Clean off any grease, dirt or deposits in or on the instrument.
Check the connectors on the rear case for corrosion and burning. Clean or
replace as required.
Press each button in turn; check that all have a positive feel to the action
and give an audible click when pressed.
5.2 Test Equipment
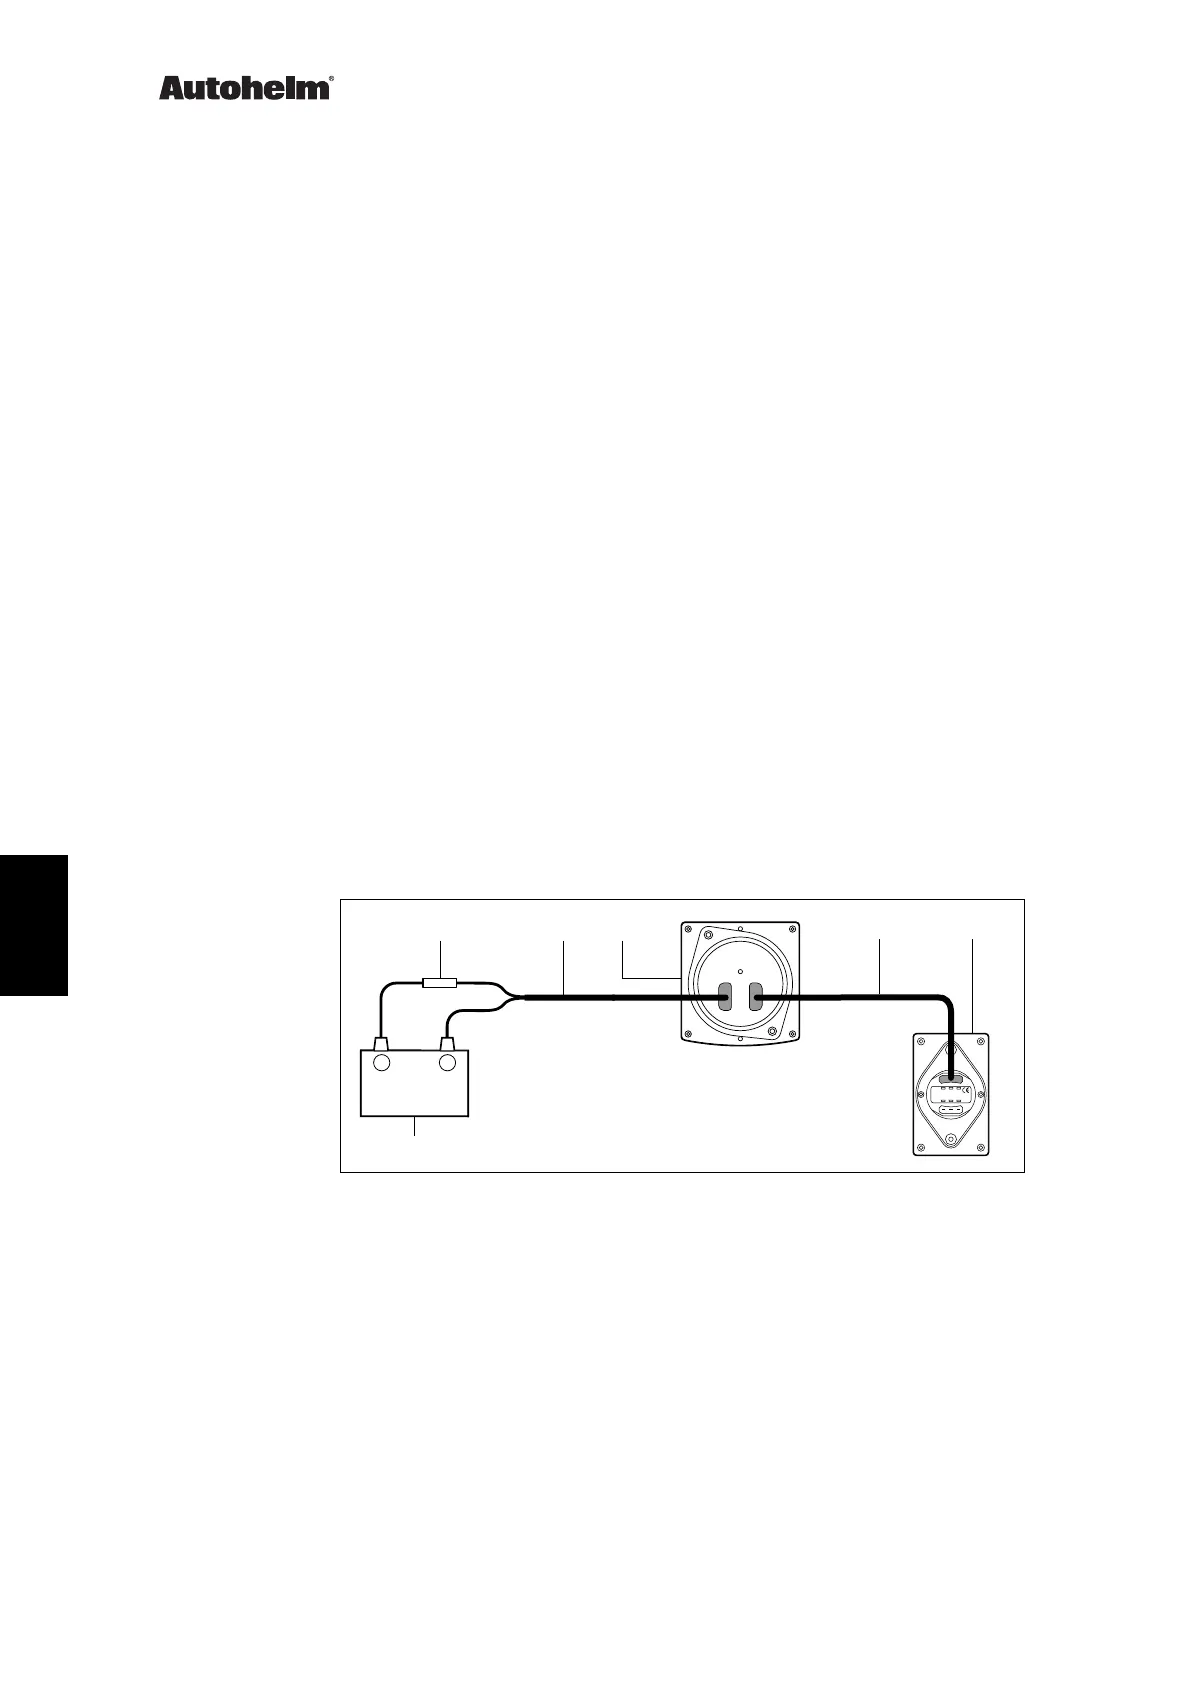
Connect the equipment as shown in Figure 2.
Before testing, ensure that the instrument is not grouped (i.e. tied in to a
particular system) by carrying out the ungrouping procedure set out in the
Operations manual.
SeaTalk
1. 5A Fuse/Circuit Breaker
2. ST80 Power Cable
3. ST80 Masterview under test
D2602-1
+
+
4. ST80 Daisychain Cable
5. ST80 Remote Keypad (Known good)
6. 12V 5A Power Supply
6
23
4
5
1
Figure 2 Test Equipment Connection
The keypad is present only to act as a receiver and transmitter of SeaTalk
information and could be replaced by any known good ST80 instrument or
keypad.
References to key operations in the flowchart are to Masterview keys.
Z211Z211
Z211Z211
Z211
ST80 Masterview
8 Masterview Service Manual 83028_1