EasyManuals Logo

Automation Dr. Nix QNix 5500 User Manual

Automation Dr. Nix QNix 5500
16 pages
To Next Page IconTo Next Page
To Previous Page IconTo Previous Page
Page #7 background imageLoading...
Page #7 background image
7
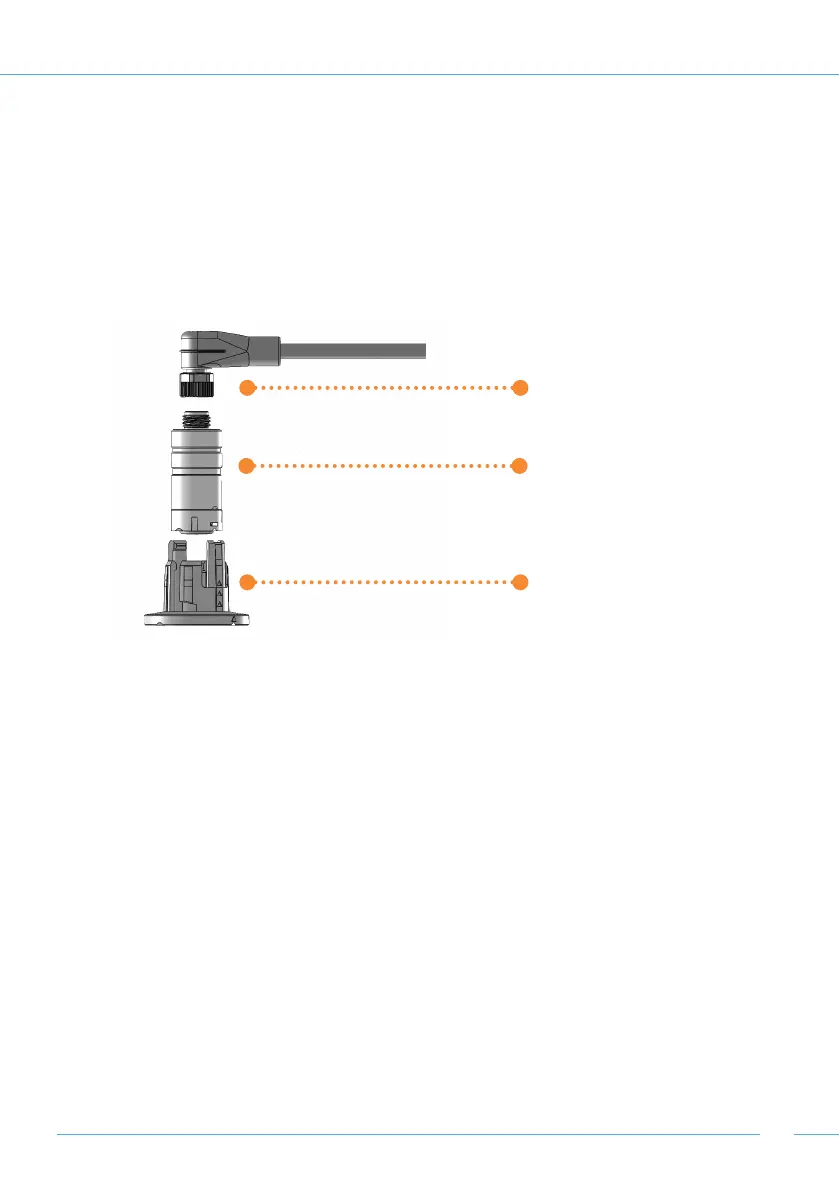
Connect the probe to the probe cable
Screw the probe together with the cable. For this purpose, always turn only the union nut
of the cable. A turning movement of the angled cable connection can lead to permanent
damage of the electrical contacts. This entails the loss of guarantee.
For better probe guidance, insert the probe into the probe holder of the gauge.
The gauge is now ready for use. To remove a probe, follow the above steps in reverse order.
Probe cable
Probe
Probe holder

Other manuals for Automation Dr. Nix QNix 5500

Questions and Answers:

Question and Answer IconNeed help?

Do you have a question about the Automation Dr. Nix QNix 5500 and is the answer not in the manual?

Automation Dr. Nix QNix 5500 Specifications

General IconGeneral
BrandAutomation Dr. Nix
ModelQNix 5500
CategoryMeasuring Instruments
LanguageEnglish

Related product manuals