B-33
(A)
Photo
electric
sensor
(B)
Fiber
optic
sensor
(C)
Door/Area
sensor
(D)
Proximity
sensor
(E)
Pressure
sensor
(F)
Rotary
encoder
(G)
Connector/
Socket
(H)
Temp.
controller
(I)
SSR/
Power
controller
(J)
Counter
(K)
Timer
(L)
Panel
meter
(M)
Tacho/
Speed/ Pulse
meter
(N)
Display
unit
(O)
Sensor
controller
(P)
Switching
mode power
supply
(Q)
Stepper
motor&
Driver&Controller
(R)
Graphic/
Logic
panel
(S)
Field
network
device
(T)
Software
(U)
Other
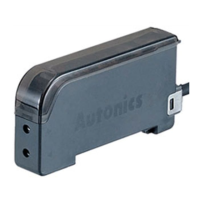
Fiber Optic Amplier
※
1. The sensitivity can be set at unstable sensing area.
※
When the power is OFF, the set sensitivity is saved.
※
After completing sensitivity setting, do not move or bend ber cable.
It may not detect it properly.
Change the mode selection switch to SET
Sensitivity setting
Set interference protection function
Press ON+OFF at the same time for 2 sec.
STAB indicator flashes continuously
Set the mode selection switch to LOCK (Completes setting)
STAB indicator turns off
Cancellation of interference
protection function
(Normal mode)
Setting of interference
protection function
(Differential frequency mode)
Light ON Dark ON
Select the
frequency 1
Select the
frequency 2
Press [ON], [OFF] buttons
at the same time
(Normal mode, Response
time : Max. 0.5ms)
Press [ON] button
(Frequency 1,
Response time
: Max. 0.5ms)
Press [OFF] button
(Frequency 2,
Response time
: Max. 0.7ms)
Press [ON] button
at light ON
STAB indicator flashes one time when the
difference of sensitivity between ON and OFF
is enough, but STAB indicator flashes
5 times when the difference is not enough
Press [OFF] button
at light ON
Press [OFF] button
at light OFF
Press [ON] button
at light OFF
SET
LOCK
SET
LOCK
Sensitivity adjustment
Adjustment by the sensitivity setting button(Common)
● Light ON
The control output turns on at Light ON status and turns off
at Light OFF status.
Setting mode
● Dark ON
The control output turns off at Light ON status and turns on
at Light OFF status.
<How to set sensitivity>
Most of adjustments except
③
&
⑤
are same as Light ON
mode.
- ③
state
Diffuse reective: Press [ON] button without a sensing target.
Through-beam: Press [ON] button with a sensing target.
- ⑤
state
Diffuse reective: Press [OFF] button with a sensing target.
Through-beam: Press [OFF] button without a sensing target.
Light ON
Light ON
Mark (Low
reflectance)
Background
(High
reflectance)
<Transmitted beam>
<Diffuse reflective >
Mark (Low
reflectance)
<Transmitted beam>
<Diffuse reflective >
Light ON
Light ON
Background
(High
reflectance)
Order Setting method
①
Mount the ber optic cable within sensing distance.
②
Change the mode selection switch to [SET].
③
Diffuse reective: Press [ON] button with a sensing target.
Transmitted beam: Press [ON] button without a sensing target.
④
Stability indicator ashes at ON state.
(Check the target position)
⑤
Diffuse reective: Press [OFF] button without a sensing target.
Transmitted beam: Press [OFF] button with a sensing target.
⑥
• When there is enough sensitivity difference between ON state
and OFF state, the STAB indicator ashes one time only at
stable sensing level.
• When there is not enough sensitivity difference between ON
state and OFF state, the STAB indicator ashes ve times at
unstable sensing level.
※
1
⑦
Change the mode selection switch to [LOCK], even
though the sensitivity setting button is touched,
setting sensitivity shall not be changed.
OUT
STAB
Light ON
Light ON
Mark
(Low reflectance)
Background
(High
reflectance)
<Transmitted beam>
<Diffuse reflective >
Light ON
<Transmitted beam>
<Diffuse reflective >
Light ON
Mark (Low
reflectance)
Background
(High
reflectance)

 Loading...