EasyManua.ls Logo

Autopage TRX950 - User Manual

Autopage TRX950
30 pages
Print Icon
To Next Page IconTo Next Page
Loading...
1
TRX950;XT90S
PROFESSIONAL REMOTE CAR STARTER
WITH ALARM SYSTEM
&
2-WAY LCD COMMUNICATION
OPERATION MANUAL
THIS PRODUCT IS DESIGNED FOR PROFESIONAL INSTALLATION ONLY

Table of Contents

Question and Answer IconNeed help?

Do you have a question about the Autopage TRX950 and is the answer not in the manual?

Overview

This document outlines the operation and features of the Autopage TRX950/XT90S, a professional remote car starter with an alarm system and 2-way LCD communication. It is designed for professional installation only.

Function Description

The Autopage TRX950/XT90S serves as a comprehensive vehicle security and remote start system. Its primary functions include:

  • Remote Car Starting: Allows users to start their vehicle remotely, useful for pre-heating or pre-cooling the car. It includes features like "Safe Start" (child safety mode), "Temporary Stop" to keep the engine running after the key is removed, and "Turbo Timer Start" for cooling down turbo engines.
  • Alarm System: Provides security against intrusion with various trigger zones (warn-away, trunk/hood, door, shock sensor, ignition). It features active and passive arming, silent arming/disarming, and a shock sensor bypass.
  • 2-Way LCD Communication: The LCD remote transmitter provides visual feedback on the vehicle's status, including door lock/unlock, armed mode, engine running, temperature, and trigger events. It also indicates when the remote is within range and displays low battery warnings.
  • Car Locator: Helps locate the vehicle in a parking lot by chirping the siren and flashing the parking lights.
  • Panic Function: Manually triggers the alarm in an emergency.
  • Anti Car-Jacking: Offers active and passive anti car-jacking modes to prevent vehicle theft.
  • Trigger Check & Status Check: Allows users to review past trigger events and check the current status of the alarm system via the LCD remote.
  • Dome Light Convenience Delay & Supervision: Controls the interior dome light for convenience and as an intrusion indicator.
  • Channel Outputs: Provides programmable timer outputs (Channels 3, 4, 5, 6) for controlling additional electric devices like trunk release, headlights, power windows, or sunroof.
  • Second Vehicle Security Operation: The 5-button remote transmitter can be programmed to control a second vehicle's security system.
  • Power On Memory: The system remembers its alarm state if power is lost and then reconnected.

Usage Features

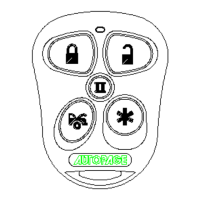
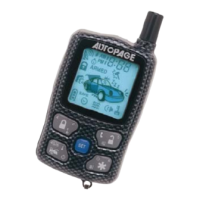
The system is operated primarily through the LCD remote transmitter, which features a "SET" button and other function buttons.

  • Remote Transmitter Operation:
    • Arming/Disarming: Pressing the lock button arms the system and locks doors (one chirp, one parking light flash). Pressing the unlock button disarms the system and unlocks doors (two chirps, two parking light flashes). Silent arming/disarming is achieved by pressing the lock/unlock and function buttons simultaneously.
    • Shock Sensor Bypass: Pressing the function button twice within 3 seconds arms the system while bypassing the shock sensor for one cycle.
    • Remote Start: Pressing the remote start button once initiates the remote start sequence. The parking lights activate, the engine starts, and the LCD displays "Engine Running" along with a countdown timer.
    • Temporary Stop: Pressing the remote start button twice before turning off the engine allows the vehicle to remain running after the key is removed.
    • Turbo Charge Mode: Activated by pulling the hand brake and placing the transmission in park, then pressing and holding the lock and unlock buttons simultaneously before turning off the engine.
    • Timer/Temperature Start: Can be programmed to start the engine every 3 hours or at a specific time, with or without temperature control (requires optional sensor).
    • Car Locator: Pressing the function button under armed mode activates the car locator.
    • Panic: Pressing and holding the lock or unlock button for 3 seconds triggers the panic alarm.
    • Trigger/Status Check: Using the "SET" button and other function buttons allows checking trigger records and system status.
    • Channel Control: Specific button combinations activate programmable channel outputs.
  • LCD Remote Transmitter Programming: The "SET" button is central to programming various remote features:
    • Screen Lamp ON: Pressing "SET" for 1 second turns on the LCD lamp.
    • Power Save Mode: Pressing "SET" for 5 seconds activates power save mode, indicated by a "SAVE" icon.
    • Clear Flash Icon and Melody Sound: Pressing "SET" within 3 seconds clears flashing icons and melody sounds.
    • Stop Trigger Melody Sound: Pressing any button stops the melody sound during an alarm trigger.
    • Button Lock: Pressing "SET" then the lock button for 2 seconds locks/unlocks the remote buttons.
    • Vibration/Melody Mode: Pressing "SET" then the function button for 2 seconds toggles between vibration and melody alerts.
    • Enable/Disable Bi Sound: Pressing "SET" then the remote start button for 2 seconds enables/disables the "bi" sound when pressing buttons.
    • Fixed Count Down Timer: Pressing "SET" then the function button for 2 seconds sets a countdown timer (10, 20, 30 minutes, 1, 1.5, 2 hours).
    • Clock & Timer Setting: The "SET" button is used in conjunction with other buttons to set the clock, alert alarm time, countdown timer, and daily timer start.
  • Disarming Without a Transmitter:
    • Override with Pin Code: Turn the ignition to "ON," then within 5 seconds, press and release the valet switch a programmed number of times (first digit). Turn ignition "OFF" then "ON," then within 15 seconds, press and release the valet switch a programmed number of times (second digit). Turn ignition "OFF" to disarm.
    • Override without Pin Code (Factory Default): Turn ignition to "ON," then within 10 seconds, push and release the valet switch.
  • Valet Mode: Allows temporarily bypassing all alarm and remote start functions, useful for parking attendants or mechanics. Enter by turning ignition "ON" and holding the valet switch for 2 seconds. Exit by returning ignition "ON" and holding the valet switch for 2 seconds.

Maintenance Features

  • Battery Replacement: The remote transmitter uses one (1) 3-volt lithium ion battery (#CR2032). Replacement involves removing a small Philips head screw, prying open the case, noting the positive (+) terminal direction, replacing the battery, and snapping the case back together.
  • Low Battery Indication: The LCD remote transmitter flashes a low battery icon and emits two short "bi" sounds when the battery power weakens, prompting replacement.
  • Disabling Remote Start: The remote start system can be temporarily disabled via an optional toggle switch, useful when the vehicle is being serviced or stored in an enclosed area.
  • Warranty Provisions: The product comes with a limited lifetime warranty, requiring proof of purchase for service. Damages from misuse, improper installation, or unauthorized accessories are not covered. Professional installation is required to maintain the warranty.

Autopage TRX950 Specifications

General IconGeneral
Remote StartYes
Keyless EntryYes
Security SystemYes
Number of Buttons5
Two-Way CommunicationYes
Operating RangeUp to 1 Mile
Remote Start ConfirmationYes
RangeUp to 1 Mile
CompatibilityMost vehicles
Engine Immobilizer BypassYes
LCD DisplayYes
Battery LifeUp to 1 year

Related product manuals