12
Section 4a –SERVICE and MAINTENANCE
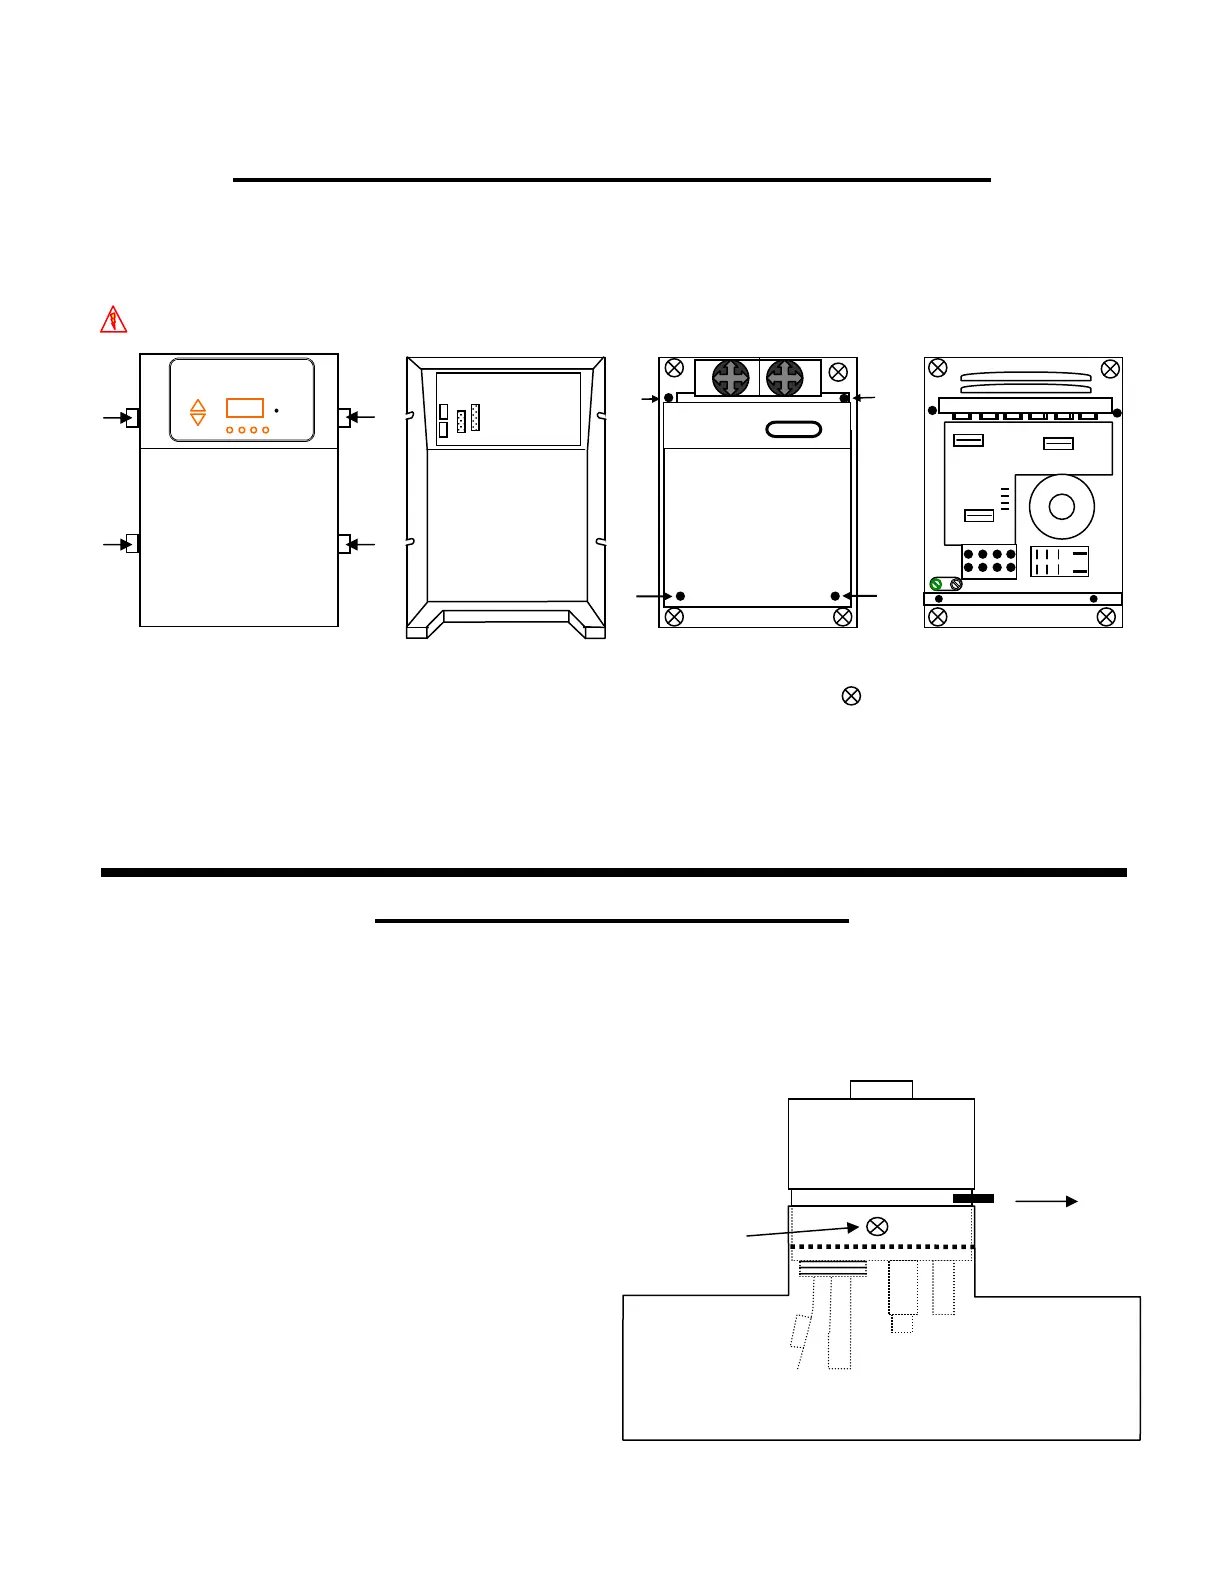
CONTROL BOX AND FUSE LOCATIONS
There are little serviceable parts on the Pool Pilot™ Digital Control Box except the fuses. For any other problems with the
Control Box, please contact the Factory or Authorized Dealer/Service Center.
To remove the Control Box Cover and access the fuses, follow these steps.
DANGER: TURN OFF THE POWER FROM THE CIRCUIT BREAKER BEFORE SERVICING THIS UNIT.
POOL PILOT™
Digital
Control Circuit Board
F3
F2
Front of Unit
Wire Harness Connection
Inner Metal
Top Cover
Inside Top Cover
Cover
F1
Loosen (4) knobs Lift off cover and disconnect Remove (4) screws and Access is gained to
(you do not need to) wire harnesses (Control Circuit lift off metal cover. electrical connections,
(remove these). board removes with cover). The (4) Mounting holes, at fuses, and pump/aux
each corner are accessed here relay.
(without removing metal cover).
Fuse Location and Ratings
F1 Main AC Power Fuse 3 Amps 250 VAC (6 Amps @ 115 VAC)
F2 Control Panel Circuit Board Fuse 3 Amps 250 VAC
F3 Cell Fuse 20 Amps 250 VAC
TRI-SENSOR ASSEMBLY
The Tri-sensor assembly tests for Flow, Salt, and Water temperature. A minimum flow rate of 15 gpm (3.4 m³/hr) is required
to activate the flow switch. As the water flow closes the paddle, a magnet activates a micro switch to verify proper flow. The
Salt sensor protects against low salt levels, and the temperature sensor protects against cold water temperature operation and
over chlorination when cold. Both of which can contribute to accelerated cell failure.
Note: The use of high strength magnet devices in the close proximity of the tri-sensor can cause the flow switch to read
incorrectly.
Remove the Tri-Sensor as follows (with pump off):
Remove both screws from the sides of the Tee Assembly.
With the aid of large Channel-lok® (or similar) pliers, firmly
grip the Tri-Sensor assembly and move back and forth
while removing the Tri-Sensor from the tee.
Inspect the thin metalic paddle for erosion and straightness.
Take care not to twist or tweak this paddle, which can cause
inaccurate flow readings.
Inspect the salt sensor blades for scale and debris and clean
if necessary. See page 13 for cleaning instructions. Follow
the directions for Manual Cell Cleaning.
Check the tri-sensor assembly for any damage to the plastic
housing and replace if needed.
directional
arrow
screws
one on each side