Quick Summary
+ Ensure the elevator has been marked clearly as out of
service
+ Installation of Smart 3D Sensor
+ Connecting up and powering the Smart 3D Sensor
+ Conguration and testing of Smart 3D sensor
1. Elevator Safety
Ensure the elevator has been clearly marked as out of
service to potential passengers. Clearly mark out that work
is being conducted on the elevator and is therefore not in
use.
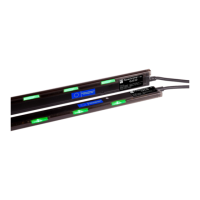
2. Selecting the correct Sensor Insert
2.1 Measure out the header height of the elevator
(indicated in gure 1)
Installation
Header Height
6.20 - 7.20ft
1.90 - 2.20mm
7.21 - 8.20ft
2.21 - 2.50mm
8.21 - 9.20ft
2.51 - 2.80mm
Black 65 Grey 67 White 70
2.2 Using the height measurement, refer to Table 1 shown
below, this will indicate the correct insert to use for your
installation. The number in the table matches the number
on the part as shown in Fig. 2. This insert tailors the
detection zone of the sensor to your elevator.
*Please Note - Do not remove the foam insert located
inside of the Smart 3D casing.
2.3 Check which insert is currently mounted in your Smart
3D. If the insert is correct proceed to step 3, if it needs
replacing then follow the steps below
Using a PH1 screw driver unscrew screws A and B located
either side of the sensor which hold the insert in place.
This will then allow you to remove the sensor and its
insert.
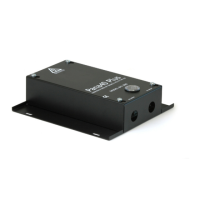
Once the insert has been removed, unscrew screw C
which will then detach the insert from the sensor.
C
C
B
A
Next select the insert required and repeat the process
above in reverse giving you the correct insert for your
Smart 3D conguration.
3. Position of the Smart 3D sensor on the header
3.1 Measure out the correct position on the header of the
elevator dependent (this is dependent on door opening).
3.1.1 Center Opening Doors
The Smart 3D sensor should be mounted in the center of
the door opening, on the header of the elevator car, with
the at face of the sensor pointing outwards from the
elevator.
B
A
B
A
Figure 1
Table 1
Figure 2
Figure 3
 Loading...