61
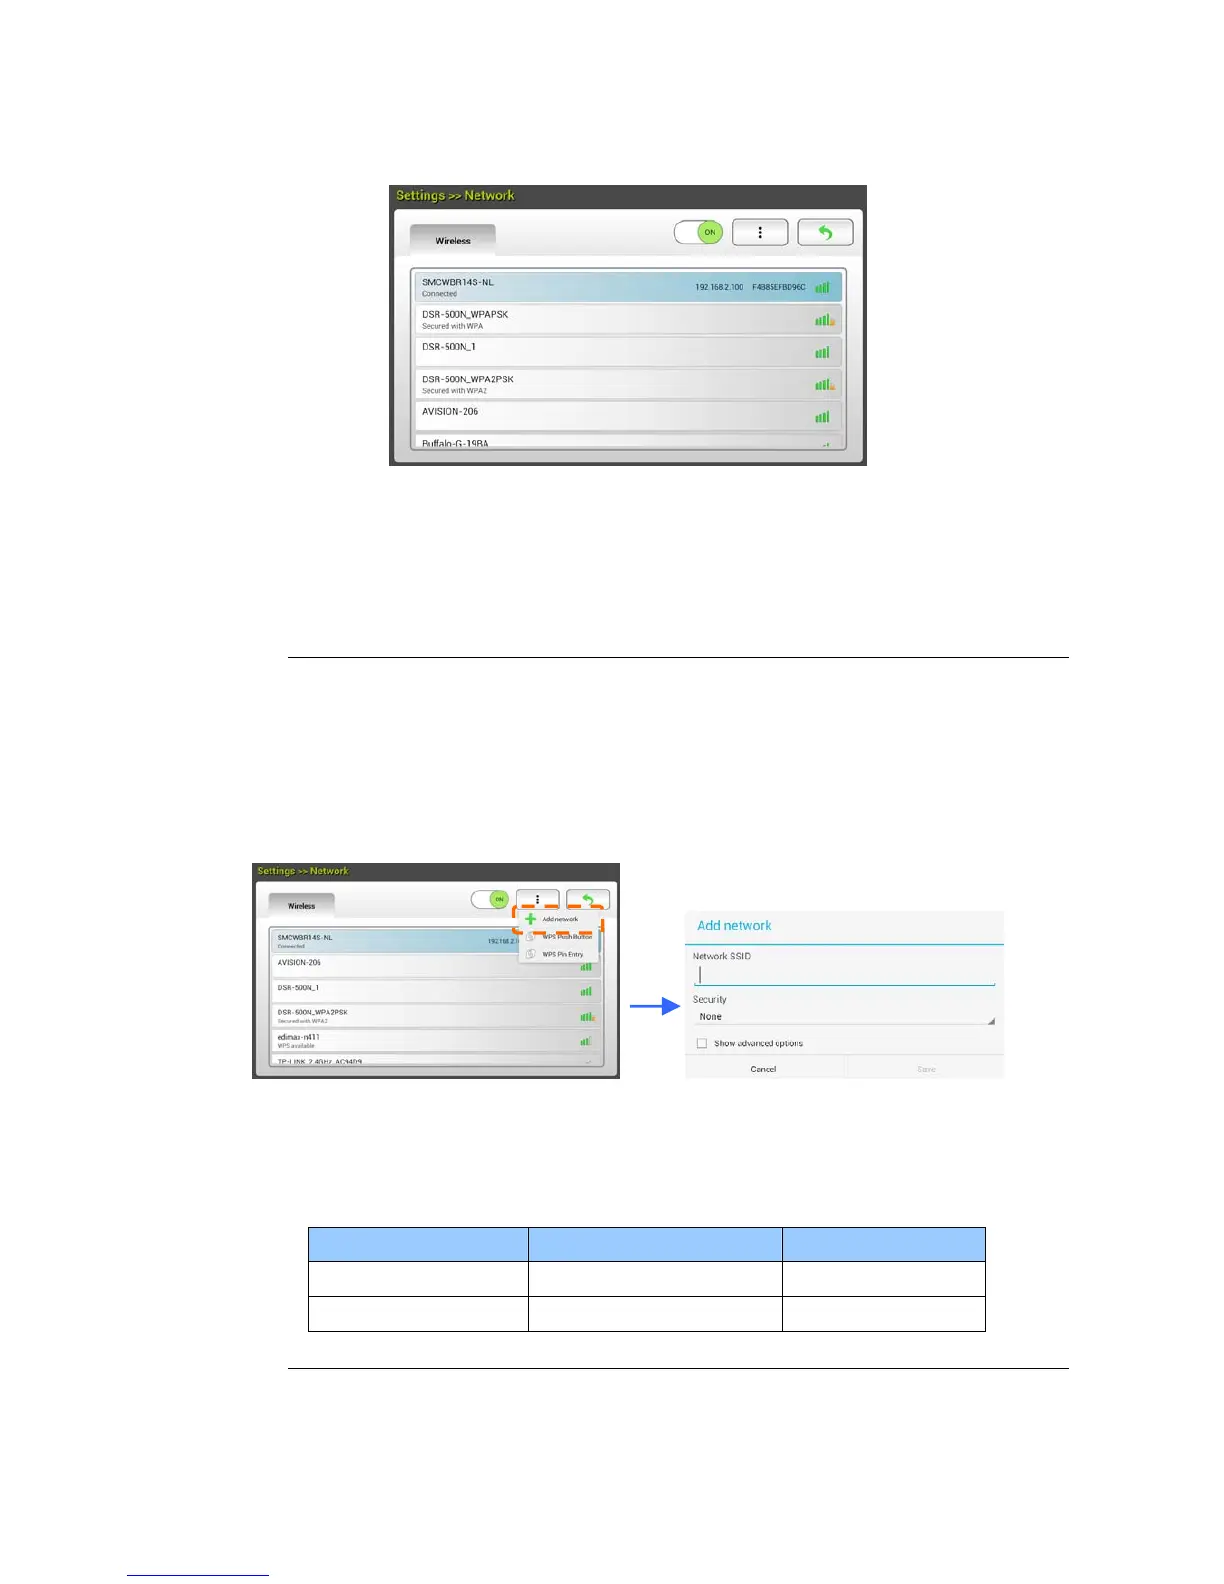
4. In a second, current wireless networks near you will be displayed as shown
below.
5. Select an Access Point and click [Connect] to connect the scanner to a
specified Access Point, for example, SMCWBR14S-NL. In a few seconds, if the
connection is successful, the IP address and Mac address of the scanner will
be displayed as indicated above.
Note:
If your access point is set to not broadcast the SSID, please follow these steps to
manually add the SSID name (network name):
1. On the wireless page, tap the [More Settings]> button and then choose
[Add network]. The [Add network] page will be displayed.
2. Enter the Network SSID name and choose the security mode, encryption
type, and network key and then tap [Save] to search the wireless network
manually.
Your scanner supports the following authentication methods:
Security mode Encryption method Key Index
WPAPSK TKIP, AES, TKIPAES X
WPA2PSK TKIP, AES, TKIPAES X
 Loading...