3
Functions & controls
Please familiarize yourself with the parts and accessories listed below
What’s included
• 1 x Sound bar
• 1 x Subwoofer
1 x Audio Cable (HDMI1.4)•
2 x Power adaptor 24V 1.5A•
1 x Instruction manual•
1 x Audio Cable(Coaxial)•
• 1 x CR2025 battery
• 1 x Remote control
• 1 x Audio cable (RCA - 3.5mm).
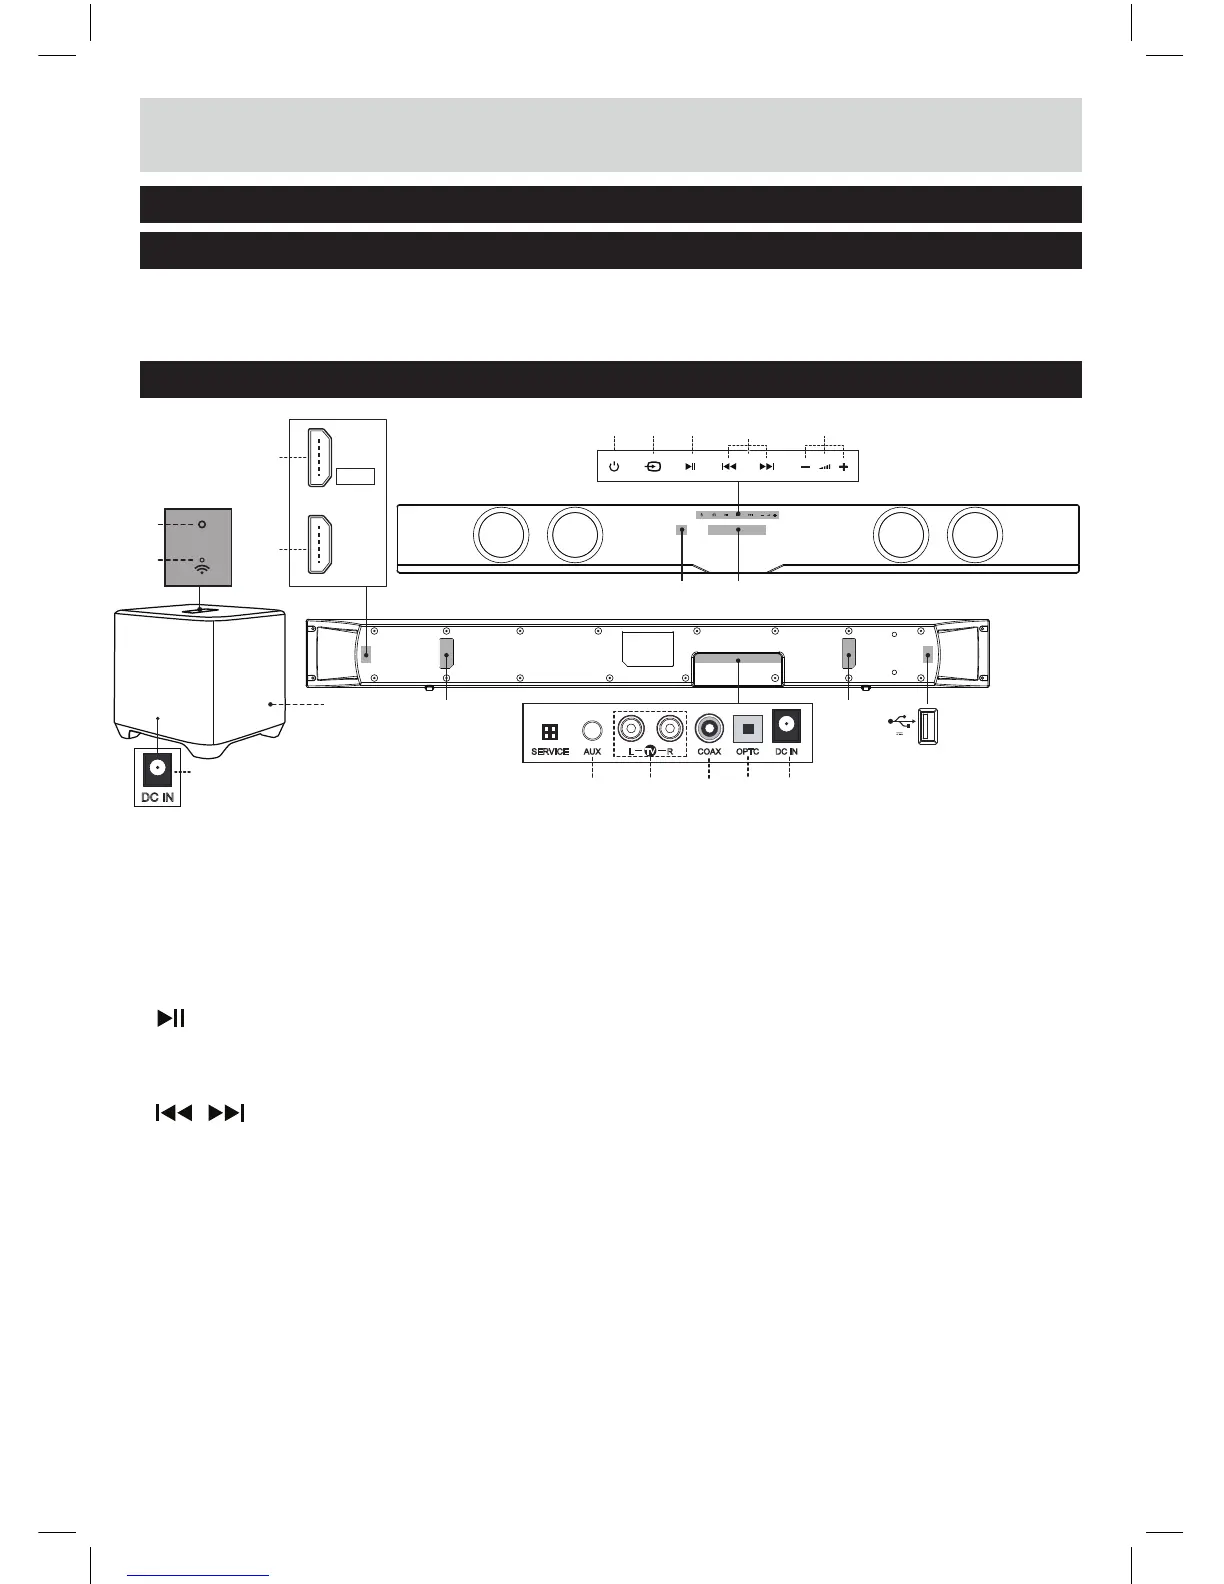
Overview of controls
8
8
21 3 5
6
4
7
1 STANDBY touch button: Switch
on the Sound bar or switch to
STANDBY mode .
2 SOURCE touch button: Select an
audio source from TV, AUX, COAX,
BT, OPTC, USB or HDMI inputs.
3 PLAY/PAUSE touch button:
4
SKIP touch button:
5 VOLUME + / - touch buttons:
Increase or decrease the output
volume.
6 DISPLAY: Indicates the current
status of the unit.
7 NFC mark
8 WALL-MOUNT BRACKETS:
Use these brackets to fix the
Sound bar to a wall.
9 AUX AUDIO INPUT (3.5mm):
Connect the analogue audio
output from an MP3 player or
similar using a 3.5mm audio
cable.
10 TV AUDIO INPUT (RCA):
Connect the analogue audio
output from a TV or other
audio source.
11 COAXIAL AUDIO INPUT
(RCA): Connect the digital
audio output from a TV, DVD
or Blu-ray player.
12 OPTICAL AUDIO INPUT:
Connect the digital audio output
from a TV, DVD or Blu-ray player.
9
17
11
12 1310
AUX OPTC DC INCOAXRL
TV
14
START, PAUSE or RESUME play
in USB mode and Bluetooth mode.
Skip to the previous or next track
in USB mode and Bluetooth mode.
SERVICE
13 DC IN SOCKET of sound bar:
Connect to the power adaptor
24V, 1.5A
15
16
HDMI
IN
HDMI
OUT
TO TV
(ARC)
18
ID SET
19
20
DC IN
14 USB PORT: Audio input from a
USB storage device.
15 HDMI IN:
16 TO TV- HDMI OUT (ARC):
Connect to the HDMI
output on a digital device.
17 SUBWOOFER
Connect to the HDMI input on
the TV.
18 ID SET button:
19 Indicator:
Press and hold
Indicates the current
the pairing
unit and
the 1st
20 DC IN SOCKET of subwoofer:
Connect to the power adaptor
24V, 1.5A
working status of the wireless
suwoofer.
5V 1A
for 5 seconds to enter
mode between main
wireless subwoofer when
use.