OPERATION
This chapter describes all the camera features to help you to understand how the camera can be used. This is
subdivided into the following sections:
1. WebGUI
2. Using the Remote Control
3. Other Key Combinations
4. OSD Menu
5. Using the System Select
If you want to read more about the functionality of the camera than is documented in this chapter, it is
recommend to read the support articles from the list in appendix F.
WebGUI
You can access change settings in the camera by using the WebGUI. The WebGUI can be accessed over IP using
your local network.
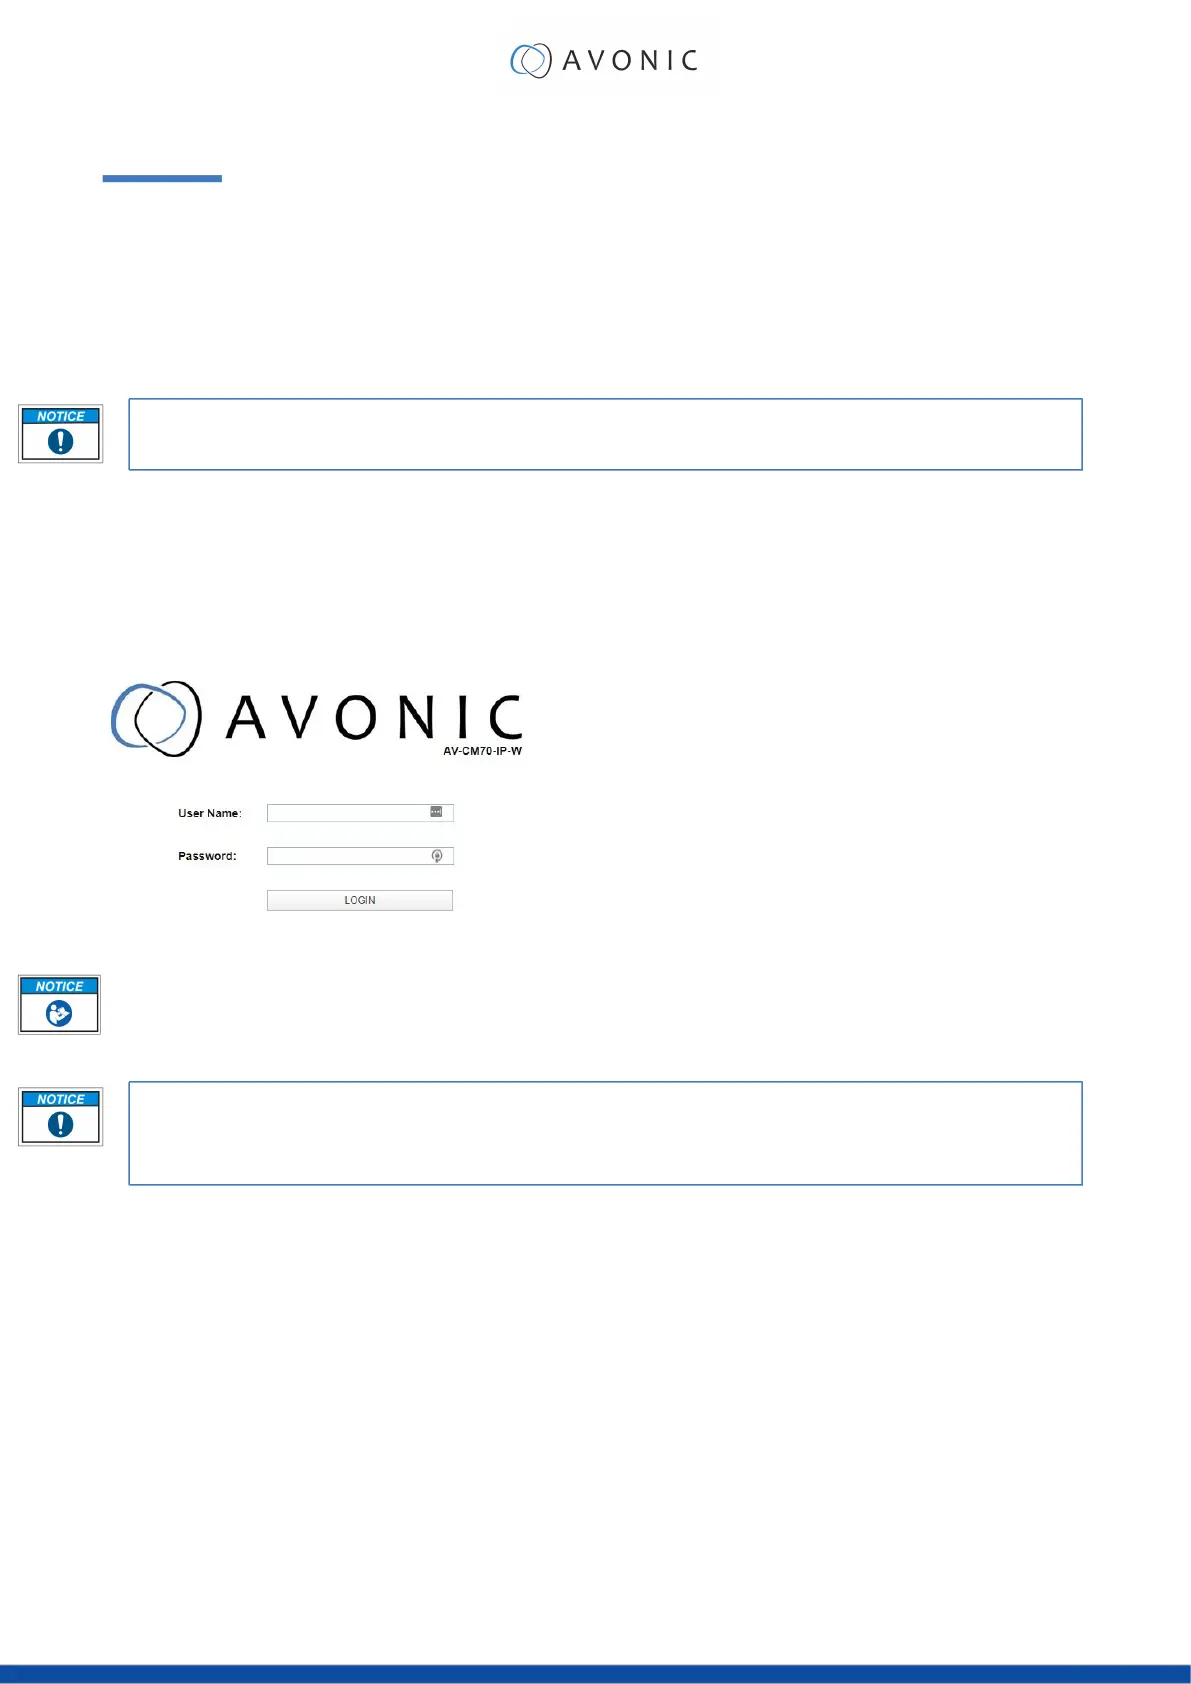
Login
Figure 13: WebGUI > Login
Execute the following steps to log on to the WebGUI:
1. Open your web browser. Enter the default IP address "192.168.5.163". The "Login" screen appears.
2. Enter "admin" for both the Username and Password and Click LOGIN to continue. There is also a
possibility to automatically fill in the Username and Password (see User).
• If DHCP is enabled and no DHCP server is available, the camera will automatically appoint an IPv4 link-
local address between 169.254.0.0 and 169.254.255.255. The IP address is shown on the screen at start-up
• If you don't know the cameras IP address read: How do I know the IP address assigned to my
camera?
After a successful logon, the WebGUI is displayed. Here, you can select various tabs that are described below.
19
 Loading...