You can manually set the time and date, or synchronize the time and date via a computer or an external server
on the LAN or WAN.
Either click SAVE to apply your manual settings, or SYNC to synchronize the time and date.
User
Figure 41: WebGUI > SYSTEM > User
You can define different users with specific permission levels and different username / passwords combinations.
There are 2 levels of users: administrators with access to all features, and user-1 and user-2 with access to the
preview and PTZ controls. Click SAVE to apply your settings.
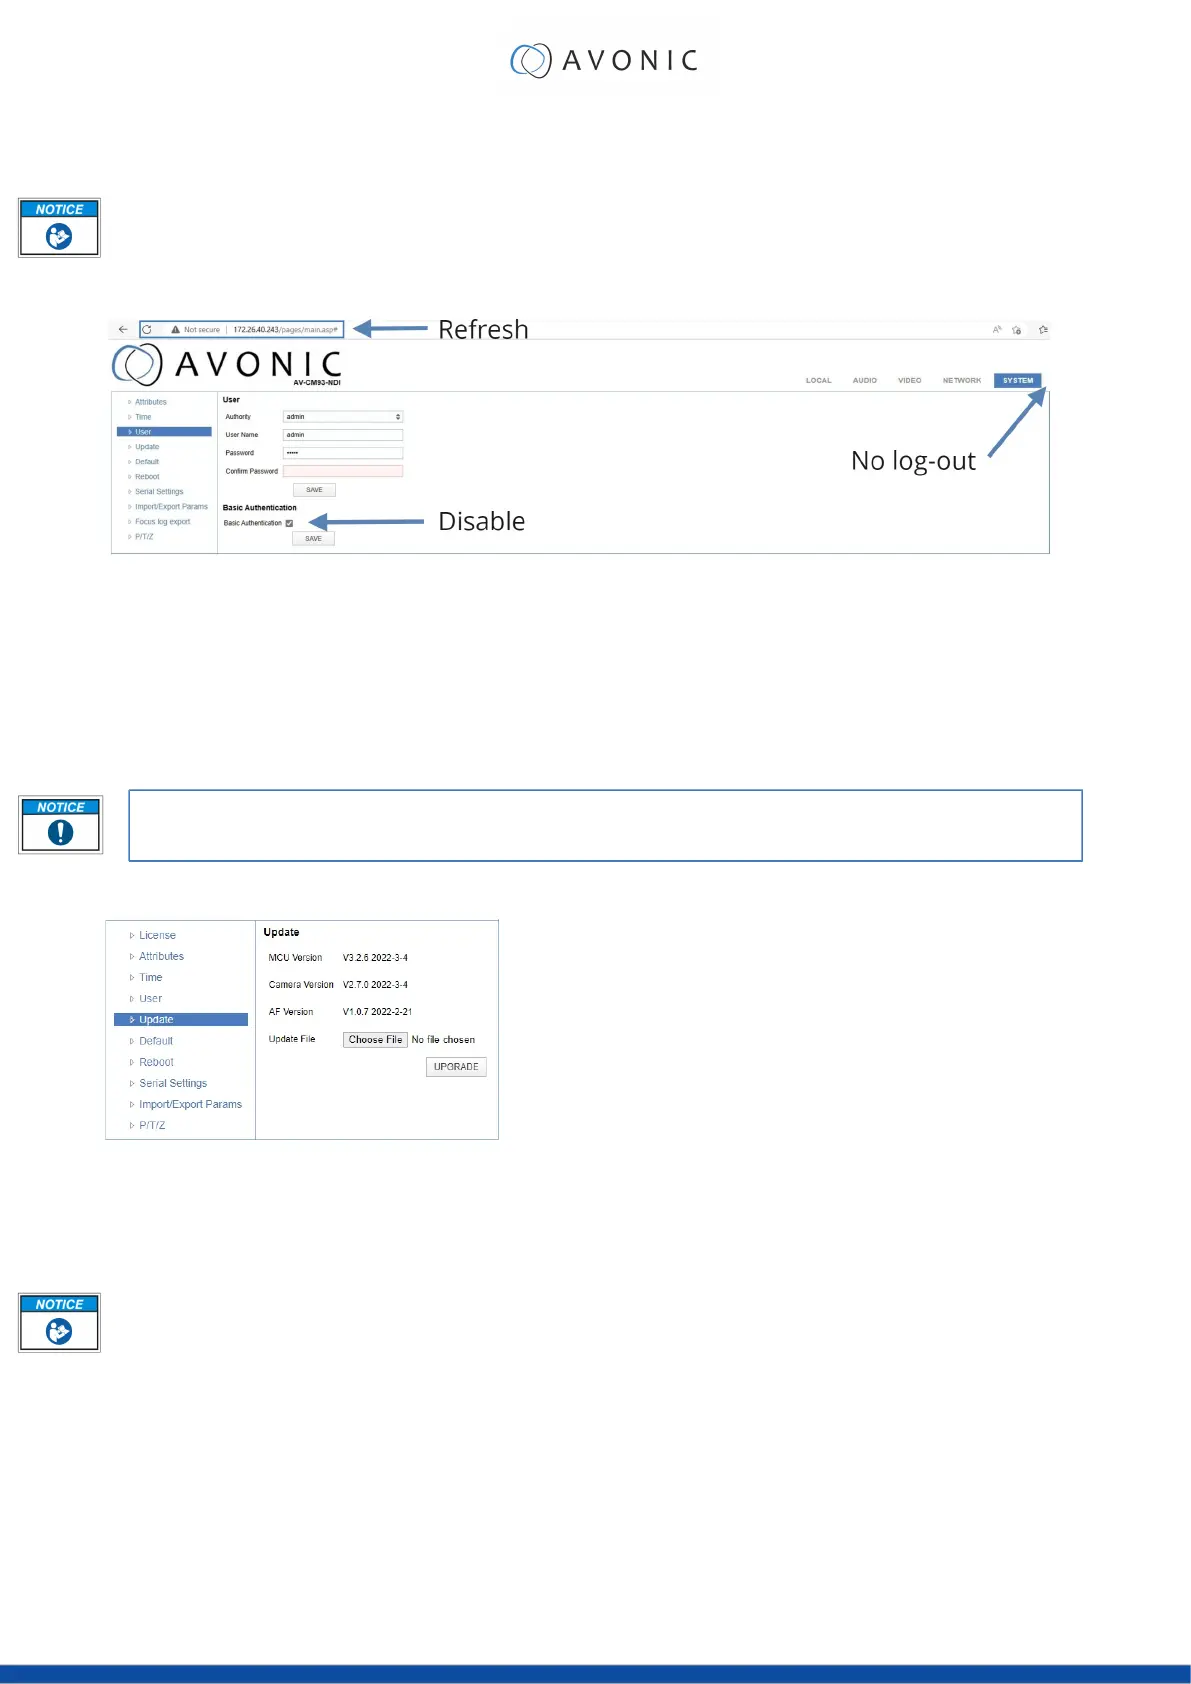
It is also possible to fill in automatically your user name and password using your browser. To do this save your
username and password in your browser, enable the HTTP Basic Authentication and click SAVE. Read also HTTP
Basic Authentication on the website for more.
Note that, if you enable the HTTP Basic Authentication (and save it), you cannot log out in the traditional
way! To log out from the WebGUI, disable this option and refresh your browser. See the picture above.
Update
Figure 42: WebGUI > SYSTEM > Update
By default, this screen shows a readout of the current firmware versions. The Update file provides a firmware
upgrade functionality via this screen. When the camera is done uploading and processing the update, it will
automatically reboot.
Execute the following steps to perform a firmware upgrade.
1. Click Choose File to select the firmware update file.
2. Click UPGRADE to start the firmware upgrade wizard.
3. Follow the steps in the wizard.
4. Wait until the process finishes and reboots.
5. Refresh your browser and log in again after the reboot.
Default
If necessary, you can perform a factory reset. This restores all default settings.
38
 Loading...