EasyManua.ls Logo

AVS Bugflector - User Manual

AVS Bugflector
9 pages
Print Icon
To Next Page IconTo Next Page
Loading...
Bugector
®
- Bugector II
®
- Carector
®
Page 1 of 3
Installation Instructions
I - Sheet Number BF51 Rev.B
Important Safety Information
• CAUTION - Before driving, ensure that the hood shield is properly secured to vehicle.
• Do not use automatic “brush-style” car washes.
• Do not use cleaning solvents of any kind.
• Periodically check all components for tightness.
For proper installation and best possible fit, please read all instructions BEFORE you begin.
For technical assistance or to obtain missing parts, please call Customer Relations at 1-800-241-7219.
NOTE: Actual product may vary from illustration.
Bump On x4
Tools Required
Contents
Preparation Before Painting / Installation
• A trial fit is recommended to ensure proper positioning and fit.
• Check fit of parts before painting as we will not accept the return of modified or painted parts.
• Wash and dry your vehicle to remove any debris and/or dirt from the installation area.
Clean TowelCar Wash Supplies
Installation Steps
NOTE: Actual application may vary slightly from illustrations.
1
2
Open hood.
Phillips Screwdriver
Hood shield Screw x2
10 mm
Socket Wrench
Locate and remove (8) nuts that secure front grill to the
hood. Set grill aside.
10 mm
Alcohol Pad x2
Washer x2
Question and Answer IconNeed help?

Do you have a question about the AVS Bugflector and is the answer not in the manual?

Summary

Important Safety Information

Tools Required

Preparation Before Painting; Installation

Installation Steps

Step 1: Open Hood

Open the vehicle hood to prepare for the installation.

Step 2: Remove Grill Nuts

Locate and remove 8 nuts securing the front grill.

Step 3: Clean Mounting Locations

Clean hood shield mounting locations with an alcohol pad.

Step 4: Prepare Tape Liner

Peel back 2 inches of tape liner from each end of the hood shield.

Step 5: Position and Align Hood Shield

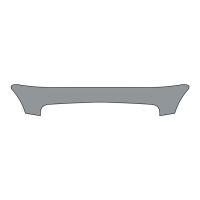
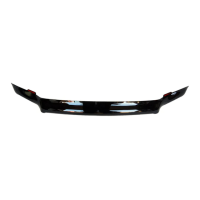
Place and align the hood shield onto the vehicle's hood.

Step 6: Secure Hood Shield

Install self-tapping screws and washers to fix the shield.

Step 7: Reattach Front Grill

Reinstall the front grill with the hood shield flange positioned.

Step 8: Install Bump Ons

Attach bump ons to the hood surface where the shield contacts.

Care and Cleaning

AVS Bugflector Specifications

General IconGeneral
CategoryAutomobile Accessories
MaterialAcrylic
ColorSmoke
Fit TypeVehicle Specific
TypeBug Deflector
Mounting TypeHood
FunctionProtection
InstallationNo-drill installation

Related product manuals