This document serves as an Installation Guide and User Manual for the Awoco Super Quiet Split Series Under Cabinet Range Hoods, specifically models RH-SP08 (30” and 36”). These range hoods are designed with a 6" height, an 8" top vent, and a 1mm thickness.
Function Description:
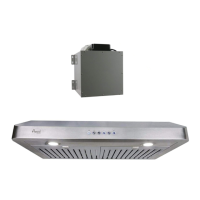
The Awoco Super Quiet Split Series Range Hoods are designed to provide efficient ventilation for kitchens, removing cooking odors, smoke, and grease from the air. Unlike traditional range hoods, this model features a "split series" design, meaning the blower unit is separate from the hood unit. The hood unit is installed under the cabinet, while the blower unit is intended to be kept inside the home, such as in the attic or crawl space, to minimize noise in the kitchen. This design contributes to a "super quiet" operation, enhancing the user experience. The system works by drawing air from the cooking area through baffle filters in the hood unit, then channeling it through ductwork to the remotely located blower unit, which exhausts the air outdoors. The hood unit includes a control panel for managing fan speeds and lighting.
Usage Features:
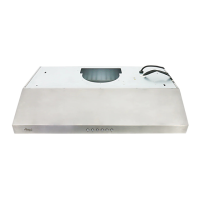
Before installation, it is strongly recommended to test the unit for any defects or damage from shipment. This involves unpacking the hood and accessories, removing baffle filters, checking for dents or loose parts, and then placing the hood and blower unit on a flat, stable surface. The Speed Control Cord from the hood unit must be connected to the blower unit's five corresponding wires inside the top connection box. After plugging into a 120V AC power source, users should press the power button and speed buttons to turn on the unit, checking for unusual metal touching noises, speed variation, and proper light function. All functions should be verified according to Section 9, "RANGE HOOD OPERATIONS," and any malfunctions addressed using Section 10, "TROUBLESHOOTING." It is crucial to remove the white protective film from the stainless steel baffle filters before using the range hood.
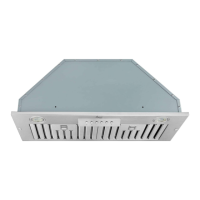
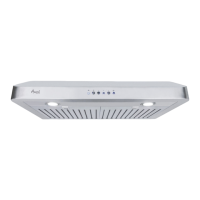
The range hood operates via a soft-touch electronic control panel with LED lights.
- Light Control: Pressing the Light Control button once turns the lights on, and pressing it again turns them off. The light control operates independently of the Power Control (On/Off) button. Users should turn off LED lights before activating the power-off delay function, as the Light Control button will not be affected by this function.
- Turning Fan ON: For optimal performance, it is advised to turn the fans on a couple of minutes before cooking to establish airflow and allow them to run for a few minutes after cooking for cleaner air in the kitchen. The Power Control (On/Off) button must be pressed before any Speed Control button can be activated.
- Blower Speed Selection: When the range hood is OFF, pressing the Power Control (On/Off) button once illuminates the LED on the Power Control button. While this LED is illuminated, users can select one of four speed control buttons (Quiet, Low, Medium, and High) to activate the desired speed, with the corresponding LED illuminating. To change fan speed, simply press another speed control button.
- Power-Off Delay Function: While the fans are operating at any speed, pressing the Power Control (On/Off) button once activates a 3-minute power-off delay function. If users wish to turn off the fans immediately during this delay mode, they can press the Power Control (On/Off) button again.
- Power Control (On/Off): To turn off the fans immediately when they are operating at any speed, press the Power Control (On/Off) button twice.
Installation requires careful planning and execution. The blower unit must always be kept indoors (attic, crawl space, etc.) and never installed outside. The range hood is designed for 8" top venting through the roof or wall. Two 8" round ducts are recommended for maximum airflow efficiency, preferably rigid or semi-rigid metal/aluminum ducts. A straight, short vent run is ideal for efficient performance, minimizing transitions, elbows, and long runs. The air damper is recommended to be installed on the top vent of the Blower unit. All connections should be fastened with sheet metal screws and sealed with certified Silver Tape or Duct Tape, and caulking should be used to seal exterior wall or roof openings around the cap.
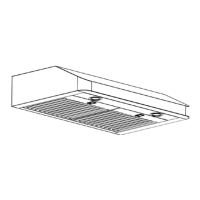
The recommended distance between the stove top and the bottom of the range hood is 24" to 27" for ideal performance, with a minimum of 24" for safety. When installing under a cabinet with a recessed bottom, 4-inch wide wood filler strips (not provided) should be attached to each side. The range hood is mounted under the cabinet by puncturing knockout screw holes on the top, drawing the power and speed control cords through cabinet openings, centering the hood, and securing it with screws into the cabinet bottom. Two people are required for this installation. For enhanced security, screws can also be mounted through pre-drilled holes or newly drilled holes from inside the back of the hood to studs or lumber. The blower unit is securely mounted to lumber in the attic. The Speed Control Cord from the hood is connected to the blower unit's top connection box, ensuring wires are securely connected with electrical nuts according to color (black wire is neutral in this cord). The power cord is connected to a designated grounded standard 110V outlet, or the plug can be cut off, and the three wires (black, white, green) connected to house wires with wire connectors (black to black, white to white, green to green).
Maintenance Features:
Regular maintenance is crucial for the range hood's performance and longevity.
- General Cleaning: The accumulation of greasy residue in the blower and filters can increase inflammability. The unit should be kept clean and free of grease and residue build-up at all times to prevent fires. For optimal operation, the range hood, baffle/spacer/filter/grease tunnel, and oil container should be cleaned regularly. Filters must be cleaned periodically and replaced immediately if worn out.
- Safety Precautions: Never operate blowers when filters are removed. Do not disassemble parts for cleaning without proper instructions, and disassembly should only be performed by qualified personnel. Never put hands into the fan housing while the fan is operating.
- Cleaning Exterior Stainless Steel Surfaces: Clean periodically with hot soapy water and a clean cotton cloth. Avoid corrosive or abrasive detergents, steel wool, or scoring pads, as these can scratch and damage the stainless steel surface. For heavier soil, use a liquid degrease cleaner. If the hood appears splotchy, use a stainless steel cleaner, avoiding contact with the control panel. Follow the cleaner's directions, and do not leave it on too long, as it may damage the hood finish. Wipe off the cleaning solution with a soft towel, gently rub stubborn spots, and then dry the hood with a dry soft towel. After cleaning, a nonabrasive stainless steel polish can be used to buff the luster and grain, always scrubbing lightly with a clean cotton cloth and with the grain. Do not allow deposits to accumulate on the hood. Avoid ordinary steel wool or steel brushes, as small bits of steel can adhere and cause rusting. Do not allow salt solutions, disinfectants, bleaches, or cleaning compounds to remain in contact with stainless steel for extended periods; rinse with water and wipe dry with a clean cloth.
- Cleaning Stainless Steel Baffle Filters: Remove all baffles, spacers, filters, grease tunnel, and oil containers, discarding oil and residue. It is important to drain oil from these components before overflow. Wash them with warm soapy water (they are top-rack dishwasher safe). Dry thoroughly before replacing. Filters should be cleaned after every 30 hours of use.
- Replacing Filters: If filters wear out due to age and prolonged use, they should be replaced immediately.
- Replacing Light Bulbs: The range hood uses 3W 12V LED bulbs. To replace a bulb, ensure the range hood is unplugged or the breaker is turned OFF. Gently pull the defective bulb assembly straight out from the edge, disconnect the wires, then connect the new LED bulb's wires and snap the new assembly into the housing hole. Turn on the breaker/power to test the range hood.