HALO – FVP Frame - Assembly Manual V1.1
Designs, Images and Content Copyright © Aeroxcraft Ltd. 2012 – 2016
Page 10
Step 4 – Attach Camera
The camera attaches to the rear of the aluminium camera mount with the pre-
attached self-adhesive foam tape.
Make sure that no electrical parts of the camera can touch the aluminium to
avoid electrical short out. This includes sharp solder points that can pierce the
self-adhesive foam tape. Carefully file down any sharp solder points that may
be affected
Check your camera is supplied with the correct voltage from your power
distribution.
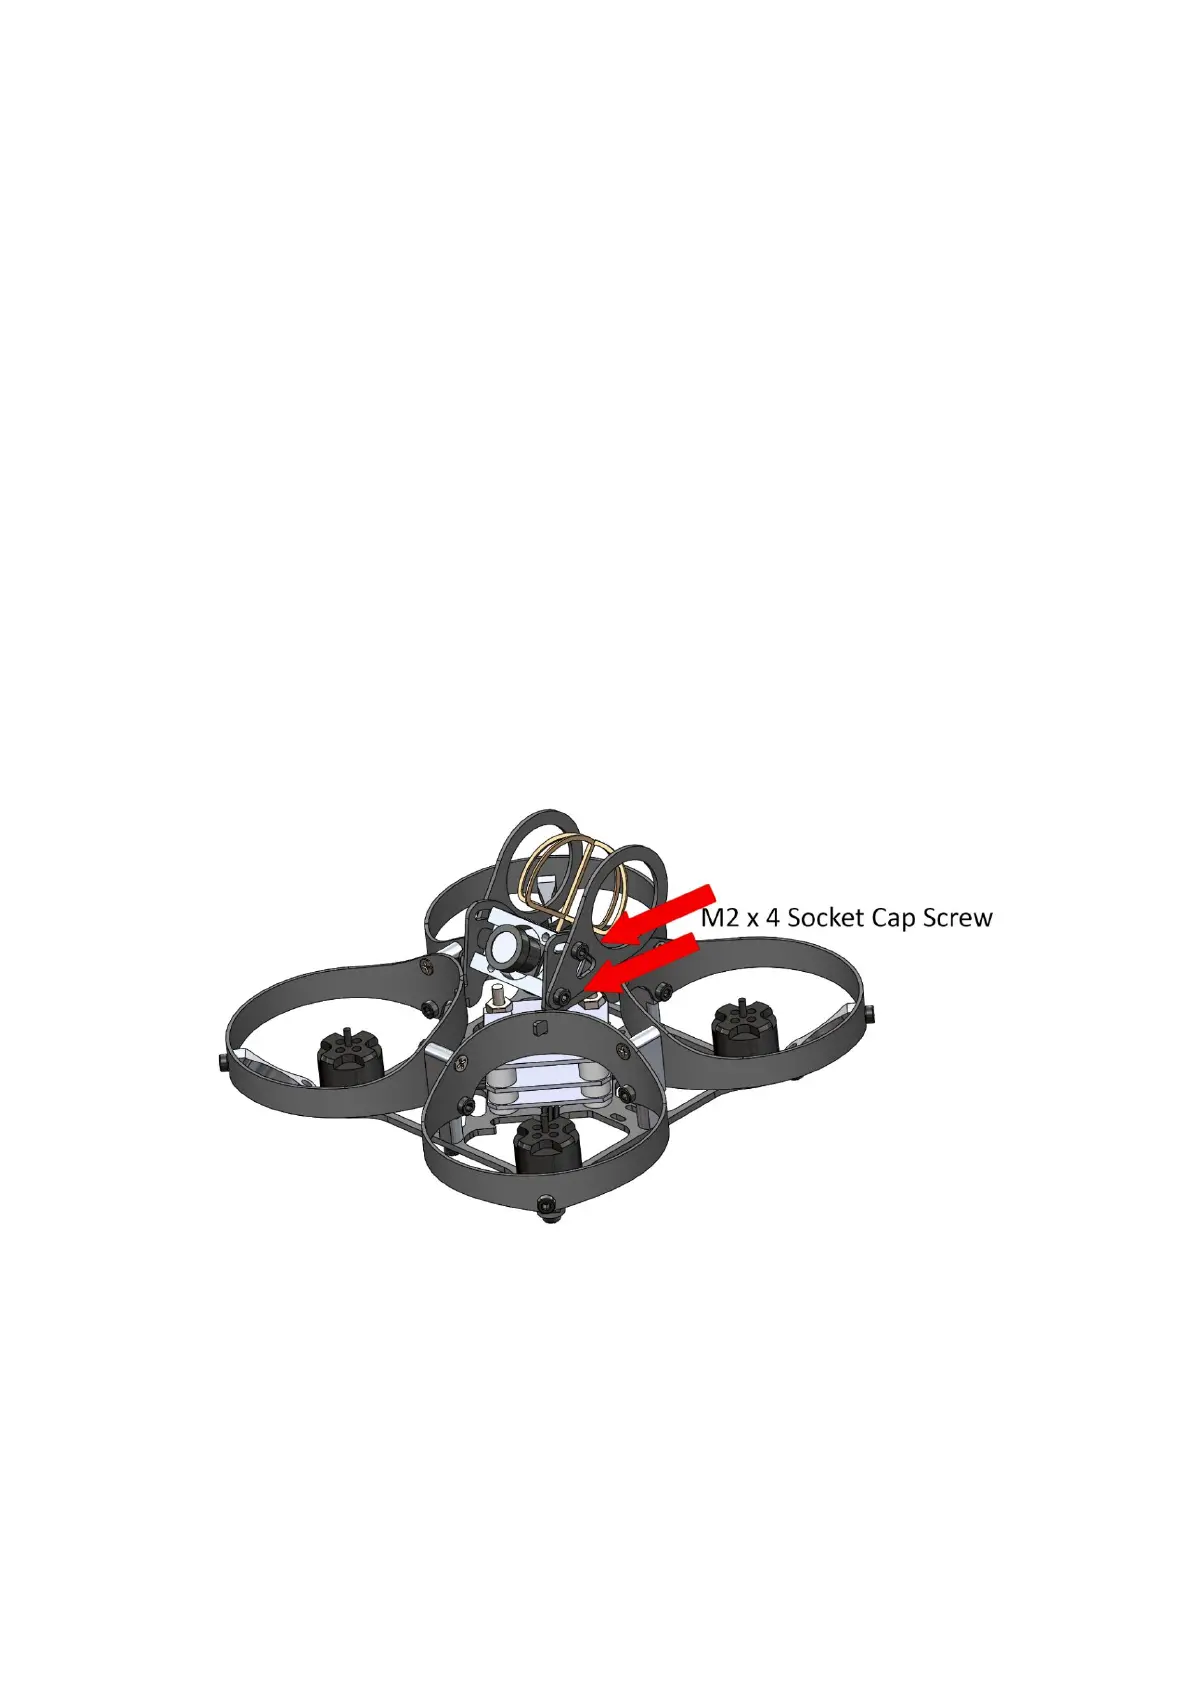
Attach the aluminium camera mount and antenna protectors to the camera
supports.
(1x) Aluminium Camera Mount
(4x) M2 x 4mm Socket Cap Screws
(2x) Antenna protectors
The angle of the camera is adjustable. Slacken the screws, change the
camera angle and retighten the screws.