S – 150 Controller User Manual
MKTF – 429-A 16 08/16
TO DISPLAY OR CHANGE SETPOINTS
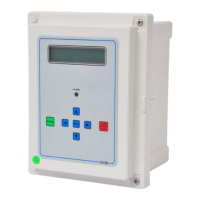
1. Refer to Figure 1 for the location of the keys used to display or change the Setpoints
and Figure 2 for the location of the write protect jumper, J3. For the unit to be able to
accept a change in a Setpoint, the shorting jumper must be in the off position (center
and left pins).
NOTE: Setpoints cannot be changed if the write protect jumper is in the ON position.
2. Use the Left and Right arrow keys to display the Setpoints. Each press of an arrow
key will advance the display to the next Setpoint. The Left arrow key starts with the
beginning Setpoint and the Right arrow key starts with the last Setpoint.
3. The Up and Down arrow keys are used to increment or decrement the Setpoint value.
The value will change by one count each time a key is pressed. If the key is pressed
and held for less than one second, the Setpoint value will change at a fast rate. When
the key is released, the fast rate will be reset. Pressing both the Up and Down arrow
keys together will reset the Setpoint value to zero.
4. Pressing the Alarm Silence / Reset key at any time will cancel the operation and
return the display to the main screen.
5. To accept the new Setpoint value, press the Enter key.
6. The unit will beep twice if the change is accepted. If the write protect jumper is on, the
unit will show WRITE PROTECTED on the display and one long beep will sound.
7. When finished changing Setpoints, the write protect jumper should be placed in the
on position (center and right pins).