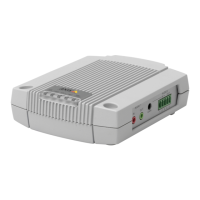
AXISA9188NetworkI/ORelayModule
2.FastentheDINrailonthewall.Makesurethatthescrewsandplugsareappropriatefor
thematerial(e.g.wood,metal,sheetrock,stone)
3.MakesurethattheDINclippositiononthemetalplateisoptimal.See
AXISA9188InstallationGuide–QuickReference
4.AttachtheproducttotheDINrail
5.Connectthecables.Seepage15.
ConnecttheCables
CAUTION
DisconnectpowerbeforeconnectinganywirestotheAxisproduct.Nevermakeconnections
whilepowerisappliedtotheproduct.
NO NO
NO
TICE TICE
TICE
•Theproductshallbeconnectedusingashieldednetworkcable(STP).Allcablesconnecting
theproducttothenetworkshallbeintendedfortheirspecicuse.Makesurethatthe
networkdevicesareinstalledinaccordancewiththemanufacturer’sinstructions.For
informationaboutregulatoryrequirements,seeRegulatoryinformationonpage2.
•IfusingPoweroverEthernet,waitwithconnectingthenetworkcabletothenetworkuntil
alltheotherwireshavebeenconnected.
•Toallowforfuturemaintenance,toavoidexcessivestrainonwiresandconnectors,andto
avoiddamagetoconductorinsulation,leaveaserviceloopandmakesureallcablesand
wiresareproperlysupportedandsecured.
•Toprotectthecircuitsagainstelectrostaticdischarge(ESD),useESDprotectionwhen
connectingwirestotheproduct.
1.Stripthecablesandwiresasrequiredusingacablestrippingtool.
2.Userelayjumperstoprovideinternalpowertoauxiliaryequipmentconnectedtothe
relayconnectors.SeeRelayJumperonpage25.
3.ConnectthewiresbetweentheIORelayModuleandtheexternaldevices.Formore
informationabouttheconnectorsandtheirspecications,seeConnectorsonpage22.
NO NO
NO
TICE TICE
TICE
•Makesureallthewiresareconnectedcorrectly.Incorrectwiringcouldcausedamage
totheproduct.
•Makesuretousewiresthatmeettherequirements.Formoreinformation,seeWire
Areaonpage22.
Note
•Forinformationabouthowtoconnectotherwires,suchaspowerwirestolocksandother
devices,seethemanufacturers’instructions.
15