AXISPTZCamera
Instructions
Note
Thenameandlocationofpartsmayvarybetweendevices.Formoreinformation,seethedevice’sinstallationguide.
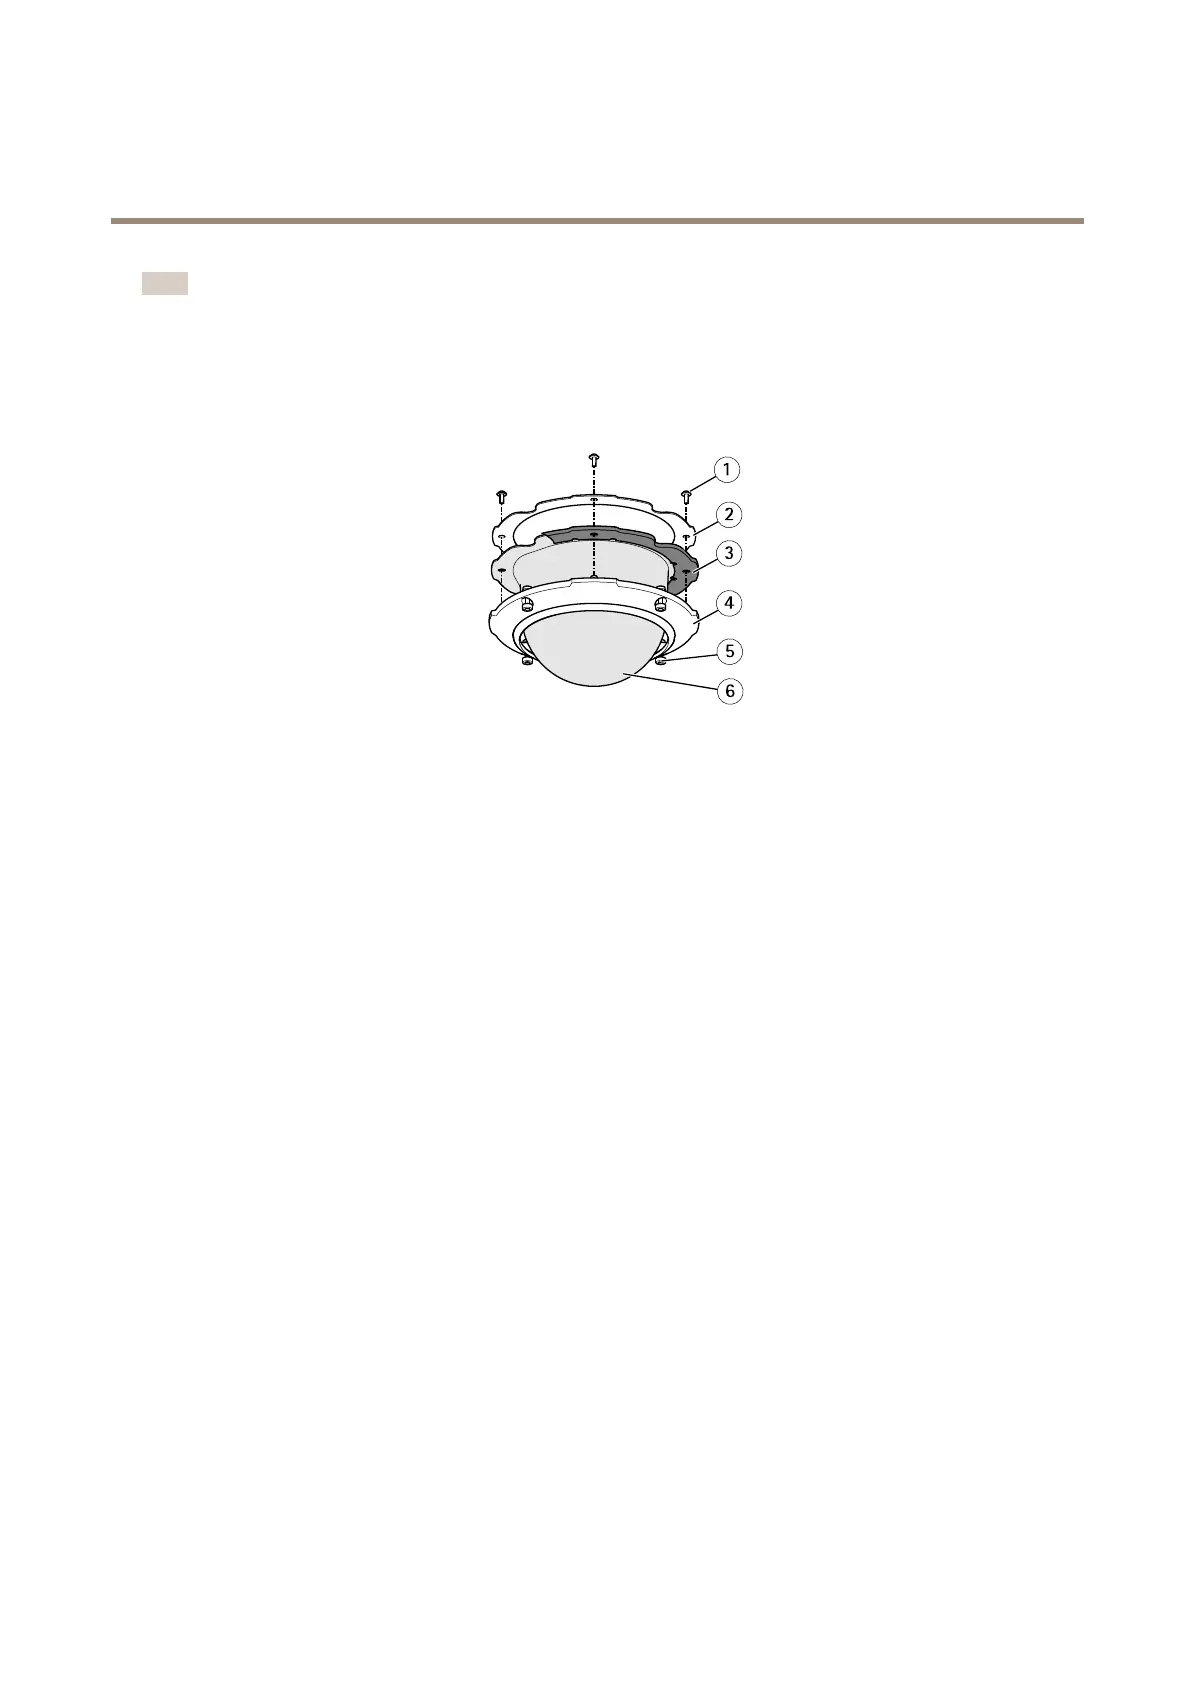
•Inspectthedomeringscrews,thedomebracketscrews,thescrewsthatsecurethecameraonthemountingbracket,and
thescrewsthatsecurethebracketonthewalloronthepole.
•Ifthescrewsareloose,tightenthescrewstopreventincidents,keeptheenvironmentalprotectionandlimitvibrations
(bracketscrews).Tightenthescrewswithregardstoeachspecictorquevalueinthedevice’sinstallationguide.
ExampleofQ6044
‐
E.(5)domeringscrews(1)domebracketscrews
Generalcameracondition
Purpose:Makesurethatthecamerapartsareintact.Brokenorscratchedpartscouldaffectthecamera’sgeneralperformance.
Actions:
•Cleanthesunshieldandthecameracasingwithanon-abrasive,solvent-freeneutralsoapordetergentwithwaterand
asoftcloth.
•Ifthecameraisseverelydamaged,contactaxis.com/supportforguidance,incooperationwiththecameraoperator.
Inspectthebracket
Purpose:Makesurethatthebracketisoperationalandprovidesthebestpossibleconditions.
Actions:
•Inspectthebracketandremoveinsectsanddirt.
•IfthecameraisinstalledonanAxisbracket,werecommendinstallingAXIST91A6PipeSealinsidethebracket.This
increasesthelevelofprotectionagainstinsects.
Cabling(ethernet)
Purpose:Avoidnetworkandcameraproblems,forexamplepowerdrops,bymakingsurethatthecablingmeetstherequirementsof
yourequipment.
Actions:
•Inspectthecablingtothecameraandmakesurethattheyarenotbentorbrittle.
•Ifneeded,changethecablesorimprovethepositioningofthecableruns.
•Formoreinformationaboutthecablingatinstallations,seethedevice’sInstallationguideorcheckoutAxisgeneral
guidelinesat:axis.com/learning/installation-and-conguration
8
 Loading...