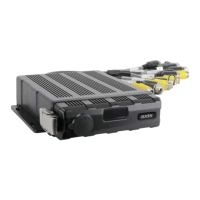
AXISCameraStationS1116MTRecorder
Manageyourdevice
3.1Enabled
3.2ClickOK.
CongureRAID
RAIDisusedtoprotectyoursolutionagainstdataloss.Itcanalsobeusedtohaveasinglelogicaldiskwithahigherspeedthroughput
andthetotalcapacityofallthedrivesaddedtotheRAIDvolume.
RAIDlevel0–Striping
Dataissplitintoblocksandiswrittenacrossalldrivesinthevolume.Itprovideshighercapacityandsuperiorperformance,butit
doesnotofferredundancy.
RAIDlevel1–Mirroring
Dataisstoredtobothamaindriveandaseconddrivewhichisaperfectmirrorofthemaindrive.Itdoesn’tprovideasmuchstorage
spaceasRAID0,butitdoesofferredundancy.
Note
•Itcantakelongtimetorebuildalostdrive,especiallyforbiggercapacityharddrives.
•Youmustuseharddriveswiththesamecapacity.
CAUTION
ConguringRAIDdeletesalldatainallharddrivesthatareusedintheRAIDvolume.
Workow
1.EnableRAIDforAXISS1 1 16MTrecordersonpage22
2.CreatetheRAIDvolumeonpage22
3.ConguretheRAIDvolumeinWindows®onpage23
EnableRAIDforAXISS11 16MTrecorders
Note
Youdon’tneedtoenableRAIDforAXISS1116Rackedrecorders.ThisisonlynecessaryforAXISS1 1 16MTrecorders.
1.PoweronyourdeviceandrapidlypressF12untiltheAxislogoappears.
2.IntheUEFIbootmenu,selectBIOSSetup.
3.IntheBIOSsettings,gotoSystemConguration>SATAOperation.
4.UnderSATAOperation,selectRAIDOn.
5.ClickApplyandOKinthepopupdialog.
6.ClickExitandyourAXISS1 1 16MTrecorderwillrestartautomatically.
CreatetheRAIDvolume
1.MakesurethediskstobeusedintheRAIDvolumearedetected.
1.1PoweronyourdeviceandrapidlypressF12untiltheAxislogoappears.
1.2IntheUEFIbootmenu,selectDeviceCongurationandpressENTER.
22