Page 14 AXIS T8412 User’s Guide
SETUP
Under SETUP are the menus for IP, AV, System, and Snapshot
Setup - IP
Setup - IP connection
These advanced settings are optional, and in most
cases you will not need to change them. The
settings that cannot be changed are intended for
future use. Leave other settings as they are, unless
specifically required.
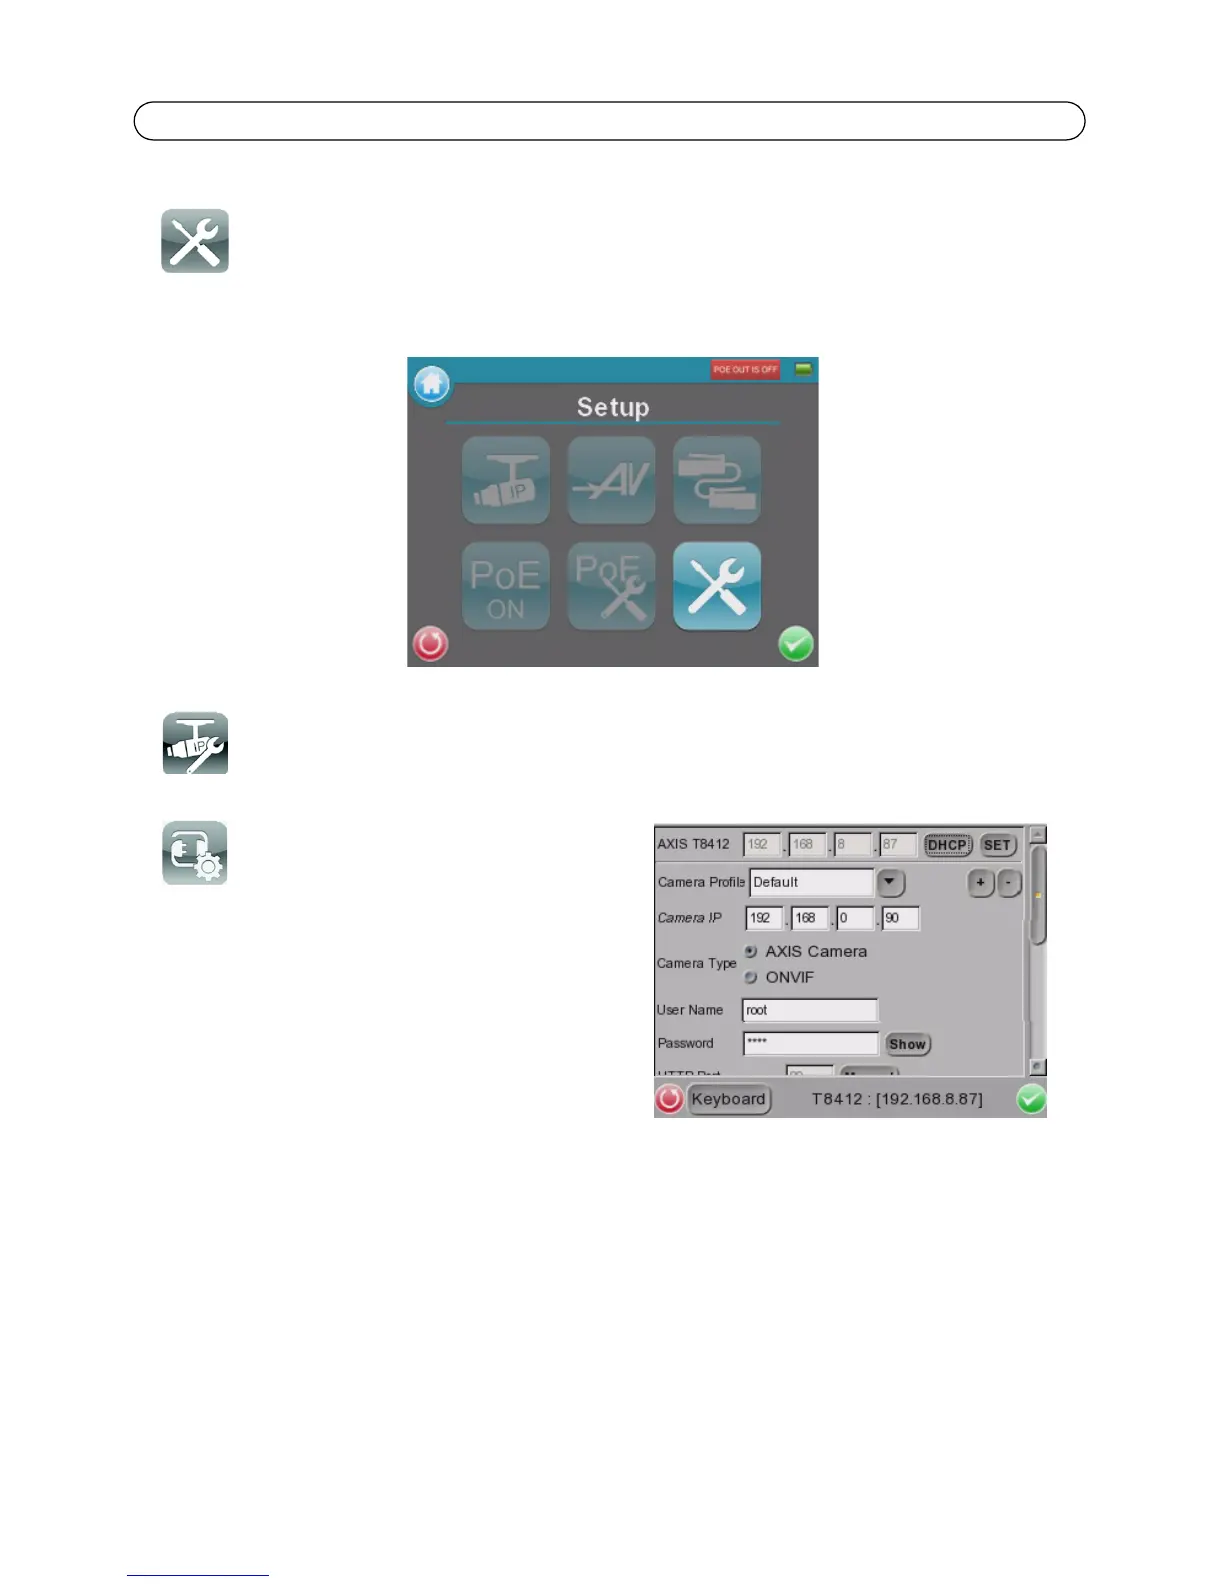
1. Tap the Setup- IP connection icon. Enter the
information in each field using the stylus.
AXIS T8412 - The IP address can be set to DHCP or to a fixed address. DHCP is the default set-
ting and should be used in most situations, even when there is no actual DHCP server available
via a network. The IP address is grayed out when set to DHCP. To set a fixed address, tap Set,
change the IP address and then tap the Enter icon.
Camera Profile - this allows you to select different camera profiles, for use in different situa-
tions. Select the profile from the list.
Camera IP - enter the network camera’s IP address.
Camera Type- AXIS Camera (default) or ONVIF-enabled camera.
User Name - enter the user name for the camera. By default Axis’ products use “root”
Password - enter the password for the camera. By default Axis’ products use “pass”. To reveal
the password being entered, tap Show.