Setting Up the Saw
18
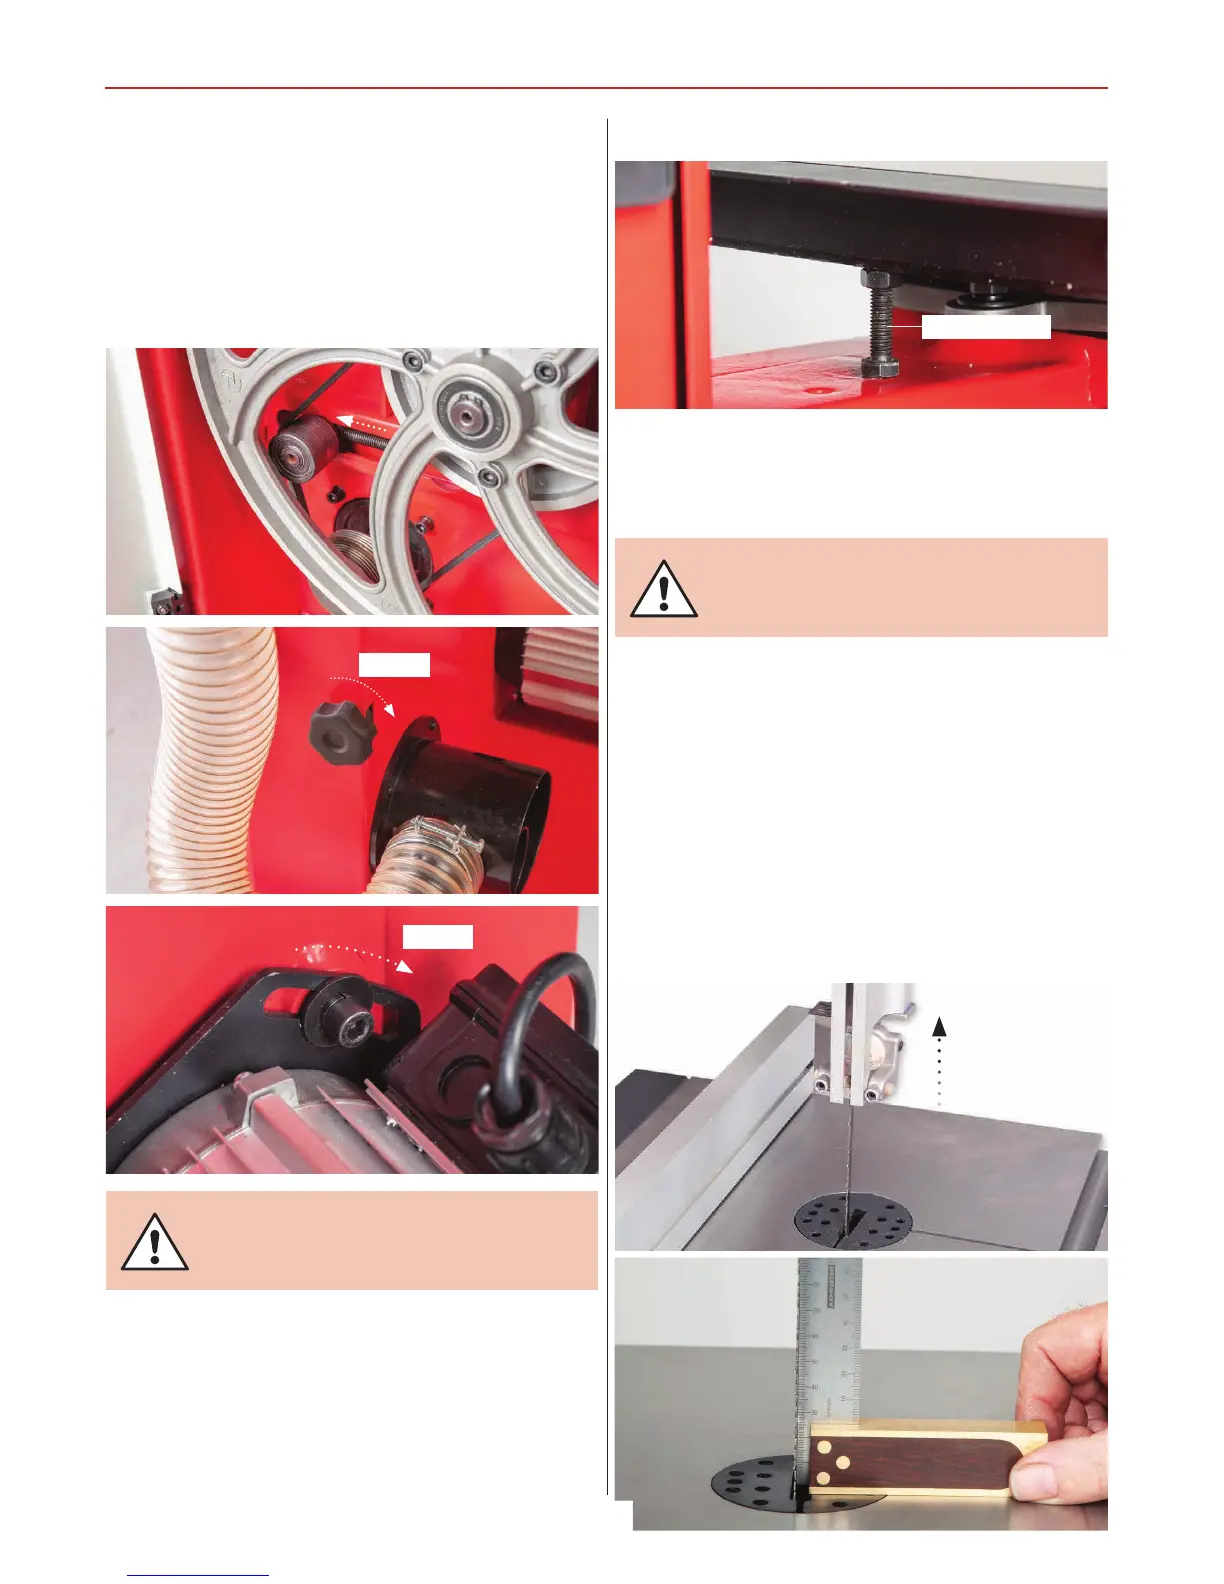
4) Check that the drive belt is tensioned correctly. If it is slack,
apply ‘take up’ pressure to the belt by adjusting the ‘Idler’ pulley,
using the knob at the side of the machine, see fig 31-32. Note
this applies only for model numbers AC2305B and AC2606B
bandsaws. To tension the drive belt on model AC1950B, loosen
the motors clamping Hex bolt and press the assembly down.
While holding motor in place retighten the Hex bolt, see fig 33.
Fig 31-32-33
5) Stand clear and start the saw. Check that the saw is running
smoothly, (no thumps, bumps, knocking or excessive vibration)
and the blade appears to be tracking correctly (in one place).
You can check this by holding a marker, e.g. a pencil, close to
the back of the blade (approach from the back of the blade
only) and check that the gap remains constant.
If it doesn’t, adjust the tracking until it does, see fig 29.
CONNECT THE SAW TO THE
MAINS SUPPLY!
DISCONNECT THE SAW FROM
THE MAINS SUPPLY!
Make very small adjustments and wait for the saw to react
before you adjust again, sometimes the reaction is not
instantaneous. Once you are satisfied that the tracking is
correct, switch the machine off and allow it to run to a stop.
Checking the Table is Square
1) Loosen the clamping handle beneath the table, lower the
table until it rests against its stop. This is a bolt with a lock nut
screwed into the underside of the table, see fig 34. The head
of the bolt acts as a stop when it strikes the machine frame.
Tighten the clamping handles.
2) Loosen the blade guide clamp and raise the upper blade
guide assembly as high as possible, see fig 35. Place a
90˚square on the table and move it up against the blade
(behind the teeth), see fig 36.
Fig 34
Fig 35-36
Table stop bolt
Tighten
Tension
 Loading...