SETTING UP THE SAW
22
Setting the Fence & Scale
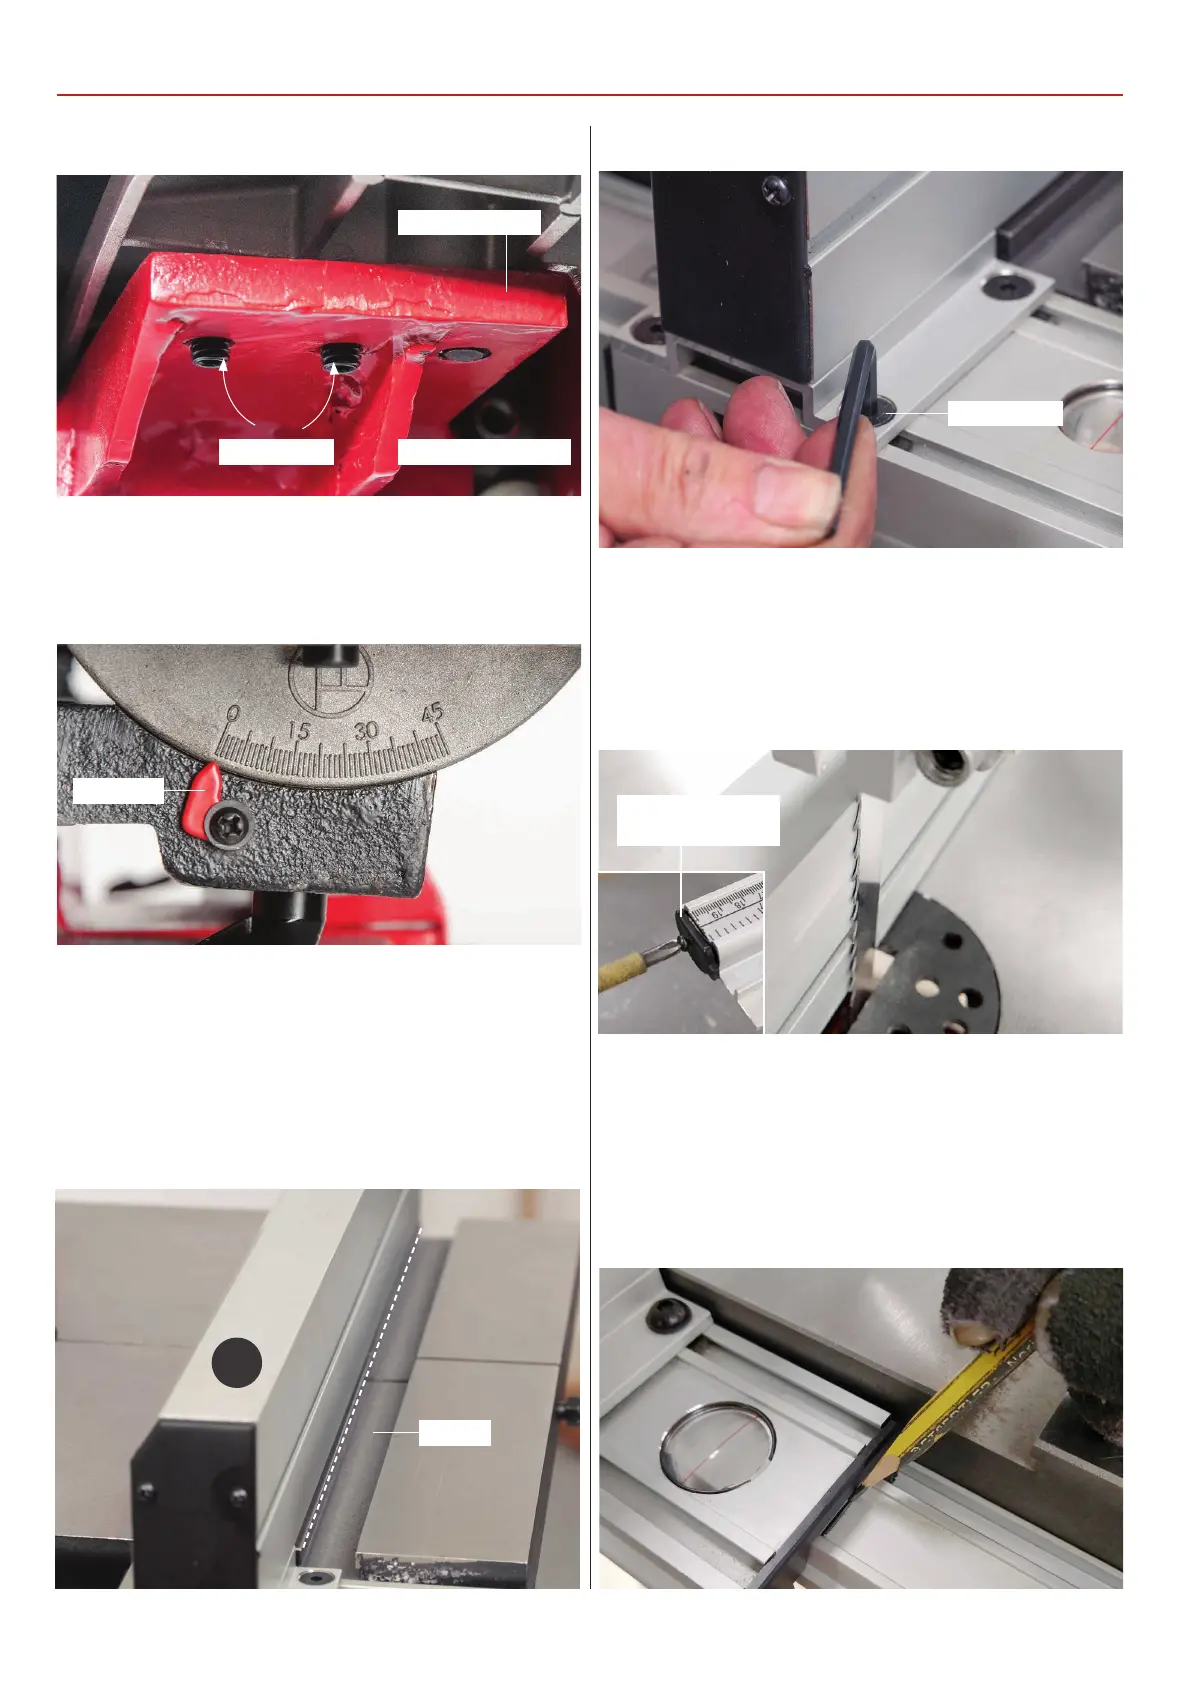
5) Lower the table down and check that the pointer of the tilt
scale reads zero, if not, loosen the screw and reposition the
pointer, see fig 58.
Fig 58
Pointer
1) Line up the fence (4) with the edge of the tables ‘T’ slot and
press down the locking handle., see fig 59. If the fence is out of
alignment, loosen the two Hex screws either side of the fence
clamping assembly. Adjust the fence until its in alignment with
the ‘T’ slot, retighten the Hex screws, see fig 60.
The fence scale does not come pre-mounted to the fence rail
and needs to be stuck in place. NOTE: Before sticking the
scale down make sure the table and fence assembly is
square to the blade. Follow the instruction below.
Fig 59
‘T’ Slot
Fig 60Fig 57
Hex screw
2) Position the fence against the blade and lock in place &
remove the fence rail end cap, see fig 61. Find a pencil and
draw a line on the fence rail to mark the position of the fence
assembly. Using a rule or vernier caliper, measure the distance
between the magnifying glass pointer and pencil line, see fig
62-63.
Fig 62-63
Fig 61
4
Model AW1950BGrub screws
Mounting plate
Remove the fence
rail end cap