SETTING UP THE SAW
23
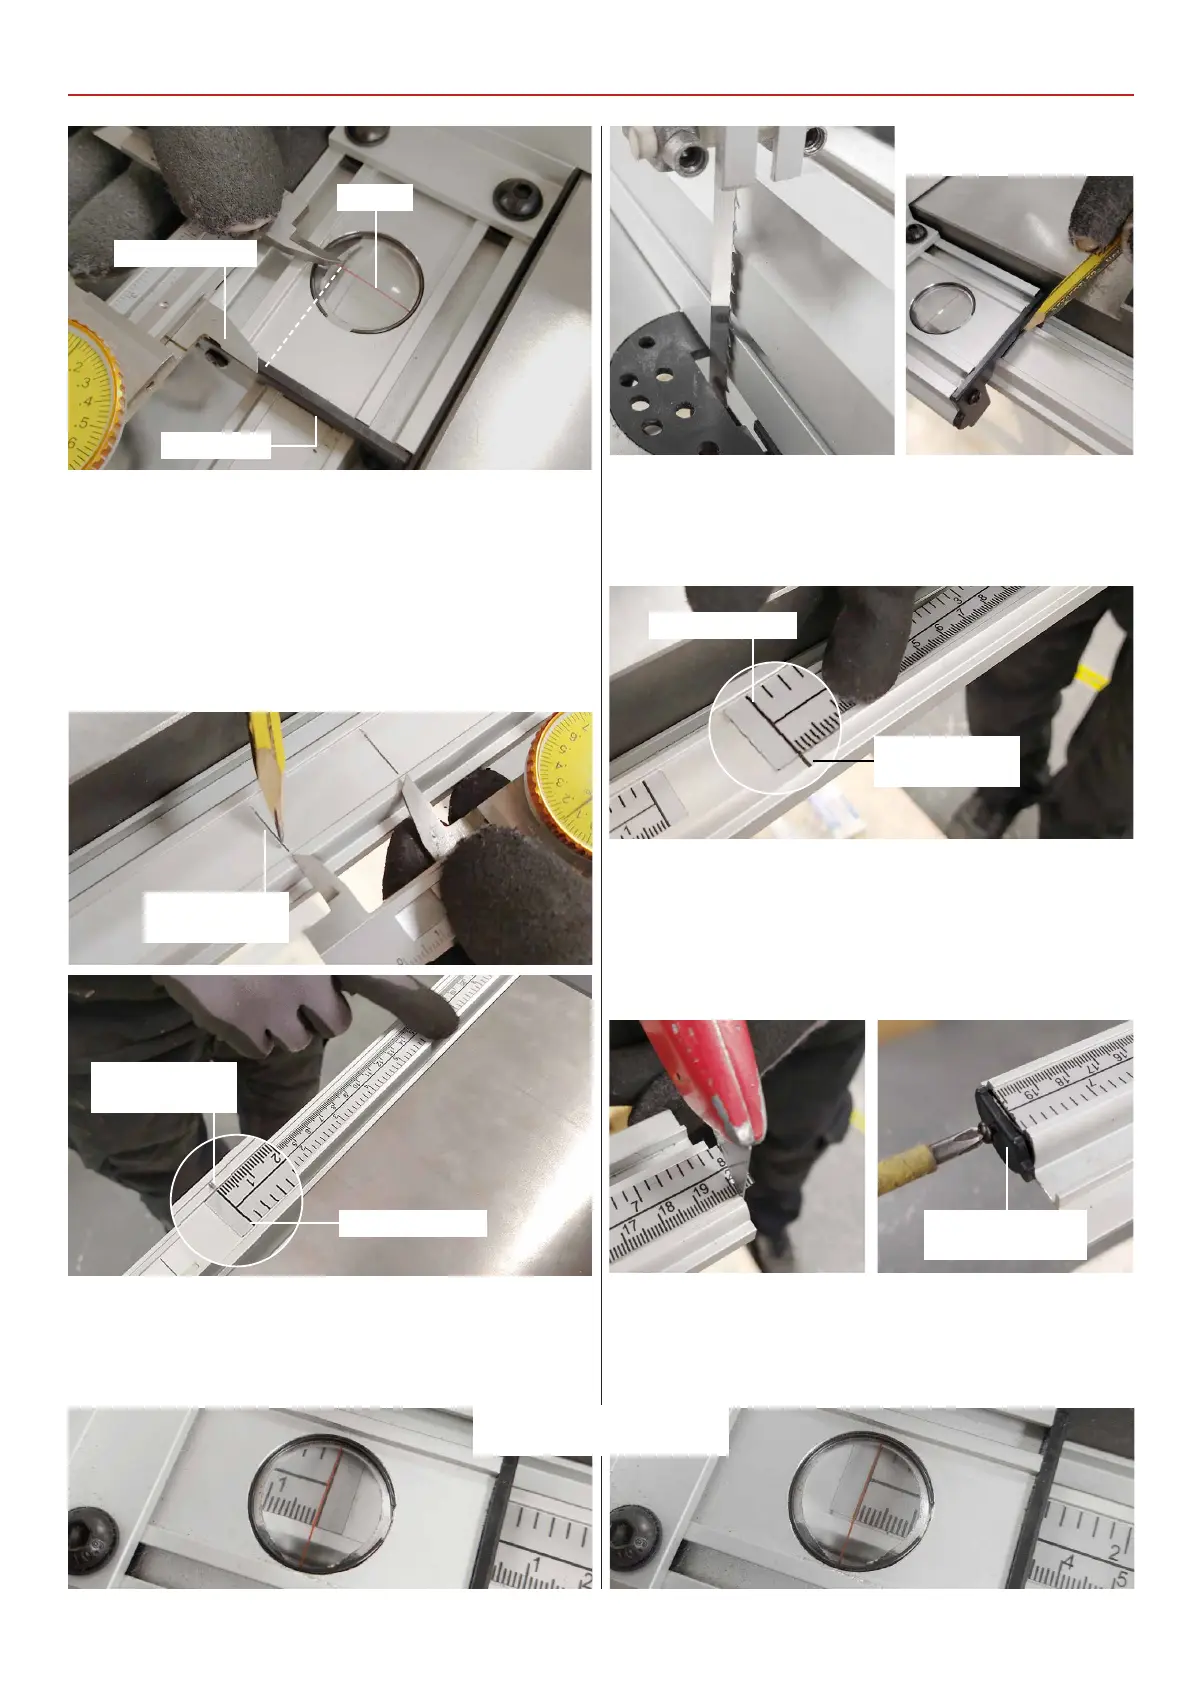
3) Remove the fence assembly and mark the position of the
magnifying glass pointer on the fence rail see fig 64.
4) Find the scale strips, peal off the backing from the long strip,
line-up the ‘Zero’ line on the scale with the pencil line and stick
it down onto the fence rail, see fig 65.
5) Re-place the fence and slide it against the blade, the pointer
should read ‘ZERO’ on the scale, see fig 66.
8) Re-place the fence and slide it against the blade, the pointer
should read ‘ZERO’ on the scale, see fig 70.
6) Position the fence to the opposite side of the blade and lock
in place, mark the position with a pencil as before, see fig 67.
7) Repeat step 3, peal the backing from the short scale. Line-up
the ‘Zero’ line on the scale with the pencil line and stick it down
onto the fence rail, see fig 68. Trim any excess material from the
end of the fence rail and replace the rail end cap, see fig 69.
Fig 67
Fig 66 Fig 70
Fig 64-65
Fig 68-69
Fig 69
Pointer
Vernier Caliper
Pencil line
Pointer position
pencil mark
Pointer position
pencil mark
Scale ‘Zero’ line
Pointer position
pencil mark
Scale ‘Zero’ line
Replace the fence
rail end cap
Magnifying Glass Pointer
set to ‘ZERO’
 Loading...