EasyManua.ls Logo

Axxess GMOS-06 User Manual

Axxess GMOS-06
8 pages
To Next Page IconTo Next Page
Page #1 background imageLoading...
Page #1 background image
GMOS-06
Installation instructions for part GMOS-06
REV. 10/5/2015 INSTGMOS-06
axxessinterfaces.com
metraonline.com
© COPYRIGHT 2004-2015 METRA ELECTRONICS CORPORATION
Axxess Integrate
CAUTION!
Metra recommends disconnecting the negative bat
-
tery terminal before beginning any installation, unless the vehicle
manufacturer recommends against so. Please check with your local
Dealership for more information. All accessories, switches, climate
controls panels, and especially air bag indicator lights must be con
-
nected before reconnecting the battery or cycling the ignition. Also,
do not remove the factory radio with the key in the on position, or the
vehicle running. It would be best to remove the key from the ignition
and then wait a few seconds before removing the factory radio.
Provides accessory power (12-volt 10-amp)
Retains R.A.P. (retained accessory power)
Provides NAV outputs (parking brake, reverse, and speed sense)
Retains chimes
Retains OnStar / OE Bluetooth
Adjustable volume for chimes and OnStar
Prewired ASWC-1 harness included (ASWC-1 sold separately)
High level speaker input
For use in amplified systems
Retains balance and fade
Micro B USB updatable
KIT FEATURES
• Cutting tool • Crimping tool • Tape • Connectors
(example: butt-connectors, bell caps, etc.)
TOOLS REQUIRED
Cadillac Bose Interface
1997-2005
GMOS-06
• GMOS-06 interface • GMOS-06 harness
• 16-pin harness with stripped leads
INTERFACE COMPONENTS
APPLICATIONS
CADILLAC
Deville 1998-2005
Eldorado 1998-2002
Seville 1998-2004
Catera 1997-2001
Question and Answer IconNeed help?

Do you have a question about the Axxess GMOS-06 and is the answer not in the manual?

Axxess GMOS-06 Specifications

General IconGeneral
BrandAxxess
ModelGMOS-06
CategoryAutomobile Accessories
LanguageEnglish

Summary

Interface Components and Tools

Interface Components

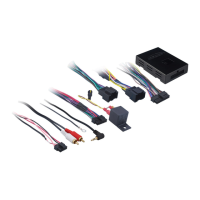
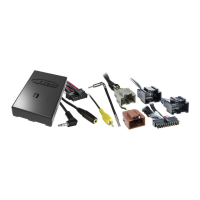
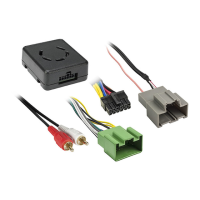
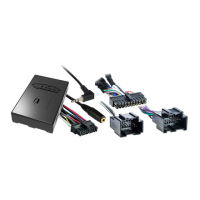
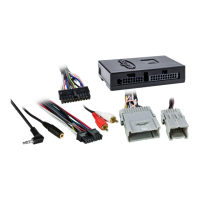
Lists the included GMOS-06 interface and associated harnesses for the installation.

Tools Required

Lists essential tools needed for the installation process, such as cutting tools and crimping tools.

Wiring Connections for Aftermarket Radio

Connections from 16-pin Harness

Details how to connect the 16-pin harness wires to the aftermarket radio's speaker outputs and other functions.

Connections for Navigation Radios

Specifies wiring connections for aftermarket radios with built-in navigation features like parking brake and speed sense.

Connections from GMOS-06 Harness

Outlines connecting the GMOS-06 harness wires to the vehicle's power, ground, antenna, and illumination.

ASWC-1 Harness Connection

Instructions for connecting the 12-pin ASWC-1 harness to retain steering wheel audio controls.

Installation, Testing, and Adjustment

Installing the GMOS-06

Step-by-step guide for physically installing the GMOS-06 interface into the vehicle system.

Testing the GMOS-06

Procedure to test the OnStar mute function and radio behavior after installation.

Audio Level Adjustment

Guide to adjusting the audio output level using a potentiometer on the GMOS-06 interface.

Chime Volume Adjustment

Instructions for adjusting the chime volume using the interface's potentiometer.

OnStar Level Adjustment

Procedure for adjusting the OnStar voice volume using steering wheel controls or a specific wire.

Important Support Information

Technical Support Contact

Provides a phone number for technical support if installation difficulties arise.

Installation Best Practices

Recommends reviewing instructions and having the vehicle ready before contacting support.

Related product manuals