If the average aspirated volume exceeds the permissible
value, the following should be done:
•Remove the pipetting pushbutton, (Fig. 4A),
Warning: The pipetting pushbutton consists of 2 parts:
the lower volume-setting section (Fig. 1A2) and the
upperbutton (Fig. 1A1). After removal of the pushbutton,
both parts will separate.
•Holding the volume setting knob to protect it against
rotation, insert the calibration key into the cuts of the
calibration screw, (Fig. 4B),
•Turn the key clockwise to reduce the aspirated volume,
or counter-clockwise to increase the volume. One full
turn of the calibration key changes the pipette aspiration
volume by the amount given in the table, (Fig. 4C),
•
Take out the key and fix the pipetting pushbutton (Fig. 4D).
The pipetting pushbutton should be fixed by placing the
lower section on the arbor first (Fig. 1A2) and then the
button
(Fig. 1A1).
Determine the average aspirated volume. The average
volume should be within the permissible range shown in
the table. If the volume exceeds the values stated, the
recalibration procedure should be repeated.
When pipetting liquids with physical properties considerably
different from those of water, follow the rules as
described in section 5.
9 - TROUBLESHOOTING
If you notice an improper pipette operation identify the
cause and eliminate the fault. To do this, follow the
instruction in the sequence provided. Replacement of
parts should be required only occasionally, and should
not occur under normal pipette use.
Droplets of liquid remain in the pipette tip.
Possible problem The tip is emptied too fast.
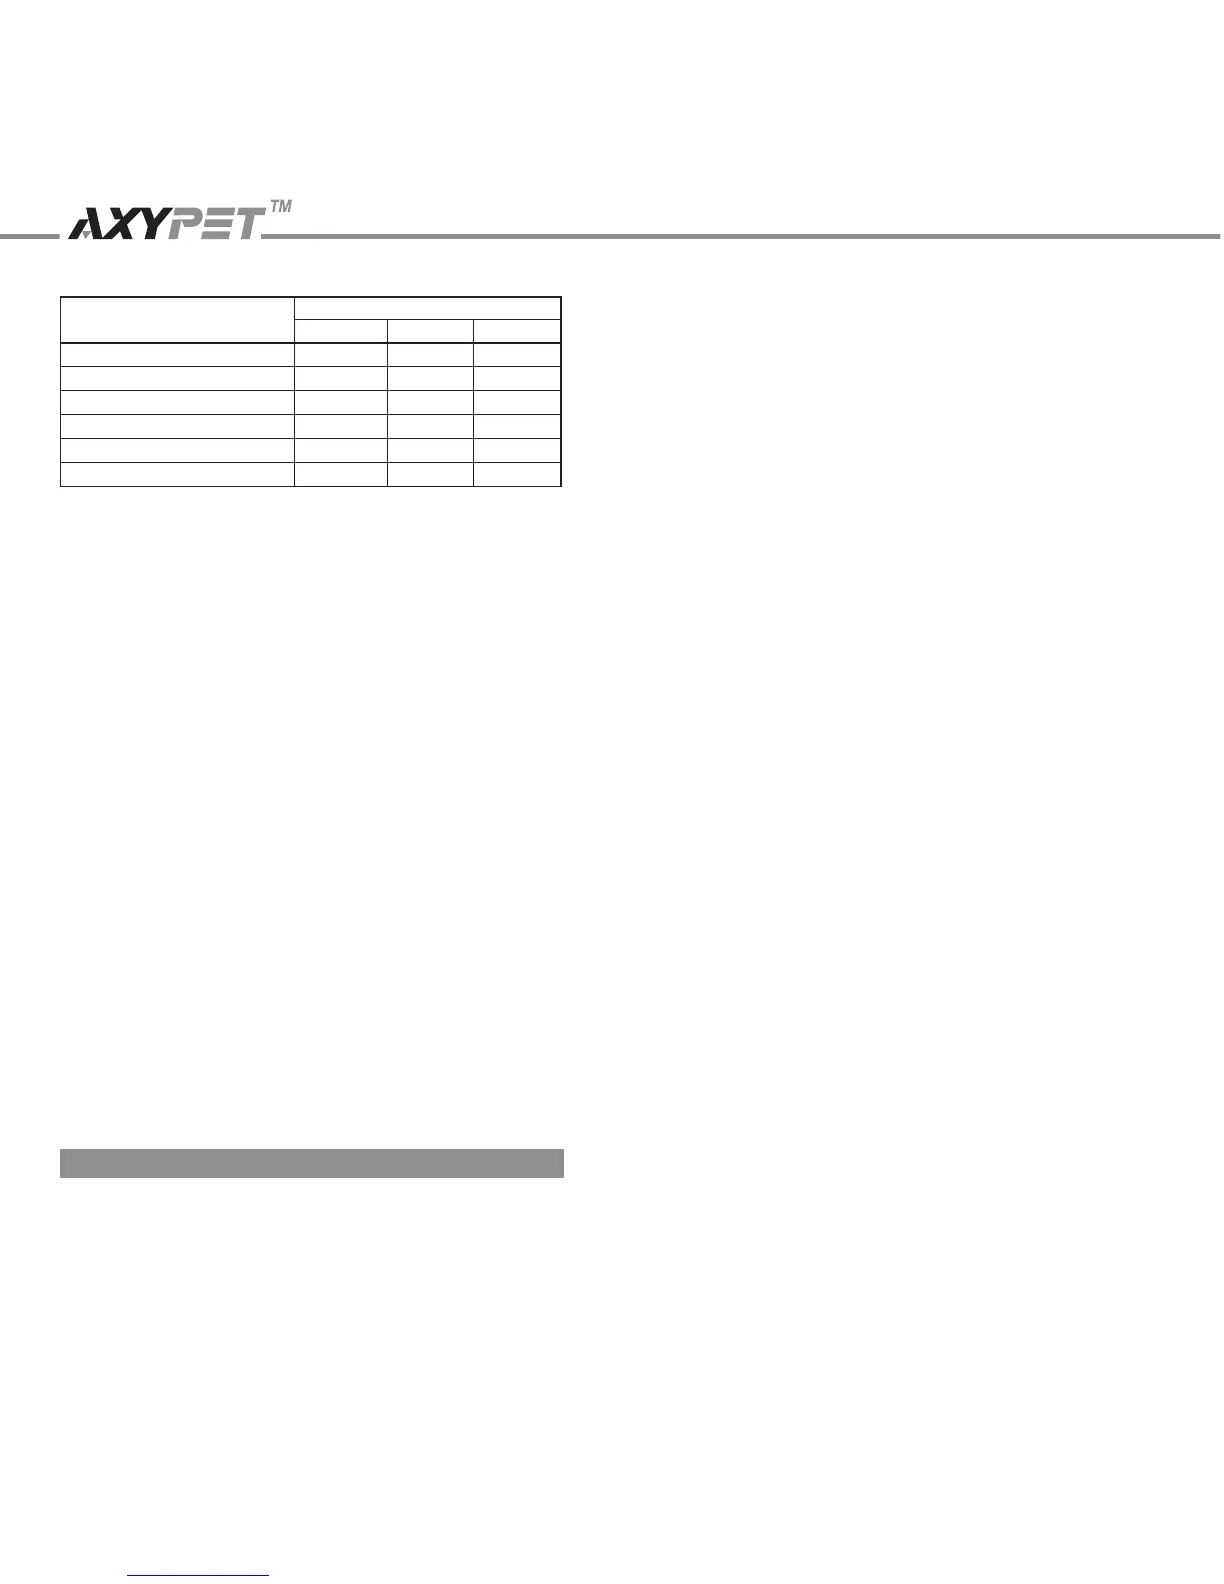
Temperature [°C]
Pressure [kPa]
95.0 101.3 105.0
20
21
22
23
24
25
1.0028
1.0030
1.0032
1.0034
1.0037
1.0039
1.0029
1.0031
1.0033
1.0035
1.0038
1.0040
1.0029
1.0031
1.0033
1.0036
1.0038
1.0040
ENGLISH
11
Action Decrease the speed of pressing the
pipette pushbutton.
Possible problem The tip wettability has increased due
to extensive use.
Action Replace the tip with a new one.
Droplets of air appear in the liquid aspirated into the tip.
Possible problem
The pipette tip immersion is too shallow.
Action Immerse the tip deeper according to
the instructions.
Possible problem The pipette tip is incorrectly pressed
onto the pipette shaft.
Action Press the pipette tip firmly.
Possible problem The tip is damaged or worn out due
to extensive use.
Action Replace the tip with a new one.
The pipette incorrectly aspirates the liquid or liquid
drops out from the tip.
Possible problem The pipette tip is incorrectly pressed
onto the pipette shaft.
Action Press the pipette tip firmly.
Possible problem The shaft nut is loose (Fig. 3F) in the
models AP-2 to AP-1000
Action Tighten the shaft nut.
Possible problem The sealing surface of the shaft is
cracked or scored.
Action Remove the tip ejector. Unscrew the
shaft nut, inspect the shaft and the
piston assembly. Replace the
damaged parts (see Section 12).
When reasembling the pipette, the nut
should be hand tightened.
In the models AP-2, AP-10 and AP-20,
the damage of the shaft may also
cause a damage of the piston assembly.
Replace the damaged parts (see
Section 12).
When reasembling the pipette, the nut
should be hand tightened.
To remove the tip ejector in models
AP-5000 and AP-10ML, remove the
ejector pushbutton (Fig. 3N) and
using a screwdriver unscrew the tip
12
 Loading...