EasyManua.ls Logo

Azbil C26

Azbil C26
16 pages
To Next Page IconTo Next Page
Loading...
J1
CP-UM-5288JE
デジタル指示調節計
形 C25/26
取扱説明書 設置編
このたびは当社製品をご購入いただき、まことにありがとうございます。
この製品を正しく安全にお使いいただくために、この取扱説明書を必ず
お読みになり、理解したうえでお使いください。
本書は、いつもお手元においてご使用ください。
ご注文・ご使用に際しては、下記URLより「ご注文・ご使用に際して
のご承諾事項」を必ずお読みください。
https://www.azbil.com/jp/product/factory/order.html
お願い
この取扱説明書は、本製品をお使いになる担当者のお手元に確
実に届くようにお取りはからいください。
この取扱説明書の全部、または一部を無断で複写、または転載
することを禁じます。この取扱説明書の内容を将来予告なしに
変更することがあります。
この取扱説明書の内容については、万全を期しておりますが
万一ご不審な点や記入もれなどがありましたら、当社までご連
絡ください。
お客さまが運用された結果につきましては、責任を負いかねる
場合がございますので、ご了承ください。
本書は使用上の注意事項と取り付け結線PVレンジ種類パラメー
タ一覧・おもな仕様などを説明したものです。詳しい取り扱い方法・
設定方法などは、別冊の「詳細編」をご覧ください。
各種機能の操作については次の説明書があります。必要に応じてお読
みください。
デジタル指示調節計 形 C25/C26 取扱説明書 詳細編 CP-SP-1149
デジタル指示調節計 形 C15/25/26/35/36
スマートローダパッケージ 形 C15SLP-C35 取扱説明書 CP-UM-5290
デジタル指示調節計 形 C25/C26 キー操作ダイジェスト CP-SP-1217
これらの資料はhttps://www.compoclub.comからダウンロードす
ることもできます。
確認してください
お買い上げいただいたC25/C26は次のものが同梱されています。
・ 取付器具 81409654-001 2個
・ 取扱説明書(本書) CP-UM-5288JE 1部
安全上の注意
当社が規定しない使い方をした場合、この製品に盛り込まれた安全保護は損
なわれます。
● 警告表示の意味
警告
取り扱いを誤った場合に、使用者が死亡または重傷を
負う危険の状態が生じることが想定される場合。
注意
取り扱いを誤った場合に、使用者が軽傷を負うか、ま
たは物的損害のみが発生する危険の状態が生じること
が想定される場合。
導電性の汚染が生ずる環境、もしくは結露などによって導電
性となる乾燥した非導電性の汚染が生ずる環境で使用しない
でください。トラッキング現象などによる部品故障や、その
部品故障に起因する火災を引き起こすおそれがあります。
本器の電源配線には仕様に記載されているヒューズを設けて
ください。トラッキング現象に起因する火災や、他要因によ
る部品故障に起因する火災のおそれがあります。
本器への通電前に配線が正しく行われていることを確認して
ください。本器への配線間違いは故障の原因になり、また危
険な災害を招く原因にもなります。
本器へ結線や取り付け、取り外しは電源の供給元を切った状
態で行ってください。
感電、故障の原因になります。
電源端子などの充電部には触らないでください。
感電のおそれがあります。
本器を分解しないでください。感電、故障のおそれがあります。
本器は、仕様に記載された使用条件(温度、湿度、電圧、振動、
衝撃、取付方向、雰囲気など)の範囲内で使用してください。
火災、故障のおそれがあります。
本器の通風穴をふさがないでください。
火災、故障のおそれがあります。
本器への結線は定められた基準に従い、指定された電源、お
よび施工方法で正しく配線してください。
火災、感電、故障のおそれがあります。
本器ケース内部に線くず、切粉、水などが入らないようにし
てください。火災、故障のおそれがあります。
端子ねじは仕様に記載されたトルクで確実に締め付けてくだ
さい。締め付けが不完全だと火災、感電のおそれがあります。
本器の未使用端子を中継端子として使用しないでください。
火災、感電、故障のおそれがあります。
本器の結線後は端子カバーを取り付けることをお勧めします。
感電のおそれがあります。
(本器は別売品の端子カバーを用意しています)
本器のリレーは仕様に記載された寿命の範囲内で使用してく
ださい。範囲を超えて使い続けると火災、故障のおそれがあ
ります。
雷サージのおそれがある場合には、サージアブソーバ(サージ
防止器)を使用してください。火災、故障のおそれがあります。
キー操作の際には先のとがったもの(シャープペンシルの先や
針など)で押さないでください。故障の原因となります。
各部の名称と機能
mode
display
enter
para
man
ev1
ev2
ev3
ot1
ot2
sp
out
pv
SDC26
SDC25
man ev1 ev2 ev3 ot1 ot2
sp
out
pv
mode
display
enter
para
①1表示部 PV(現在の温度など)や設定項目を表示します。
②2表示部 SP(設定温度など)や各設定項目の設定値を表示
します。第2表示部がSPを表示しているときは、
spが点灯し、操作量(MV)を表示しているときは、
outが点灯します。
③モード表示灯
man MANUALモード(手動)のとき点灯します。
ev1 ev3 イベントリレー出力がONしているとき点灯します。
ot1・ot2 制御出力がONしているとき点灯します。
④MS(マルチステータス)表示灯
点灯条件と点灯状態を組みにして、優先度のついた
3組を設定できます。
⑤[mode]キー 1 秒以上押し続けると、あらかじめ設定してある操
作ができます。
⑥[display]キー運転表示で表示内容を切り替えます。バンク設定表
示から運転表示に戻します。
⑦
[<][∨][∧]キー
数値の増減、桁送りに使用します。
⑧[para]キー 表示の切り替えをします。
⑨[enter]キー 設定の変更開始と変更中の数値の確定を行います。
⑩
ローダコネクタ
スマートローダパッケージに同梱されている専用
ケーブルを使用してパソコンと接続します。
設 置
取付場所
器を取り付けるときは、次のような場所に設置してください
•供給電源およびリレー接点出力を除く入出力モー
電圧:対大地間の電圧は、30Vr.m.s.以下、42.4V ピーク以
下、DC60V以下としてください。
•高温、低温、高湿度、低湿度にならない
場所
•硫化ガスなど腐食性ガスやシリコーンガスのない
場所
•粉じん、油煙などの少ない
場所
•直射日光および風雨の当たらないように適切な処理のされ
場所
•機械的振動、衝撃の少ない
場所
Question and Answer IconNeed help?

Do you have a question about the Azbil C26 and is the answer not in the manual?

Azbil C26 Specifications

General IconGeneral
BrandAzbil
ModelC26
CategoryController
LanguageEnglish

Summary

Digital Indicator Controller Installation Manual

Manual Handling and Usage Notices

General requests regarding manual handling and product usage.

Related Function Manuals

Lists other manuals for operating specific functions of the controller.

Pre-operation Checks

Items to check before operating the controller.

General Safety Precautions

Important safety warnings and precautions for correct usage.

Warning Symbol Meanings

Explains the meaning of warning and caution symbols used in the manual.

Part Names and Functions

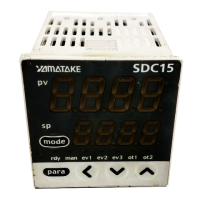
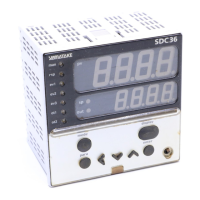
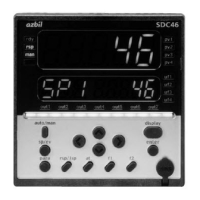
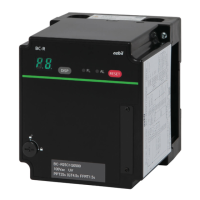
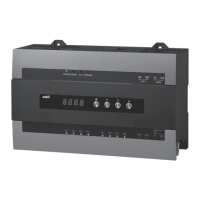
Identifies and describes the functions of each part of the controller.

Recommended Installation Locations

Specifies suitable locations for installing the controller.

Mounting and Wiring

Mounting Method

Details on how to mount the controller onto a panel.

Wiring Instructions

Procedures and precautions for wiring the controller correctly.

Handling Precautions

Important precautions for handling the controller.

Input, Settings, and Alarms

IO Isolation Explanation

Describes which parts are insulated from other signals.

PV Range Table

Lists available input types and their corresponding measurement ranges.

Setting Operation Guide

Explains the key operations for setting parameters.

PV Range Type Setting Example

Step-by-step example of setting the PV range type.

SP1 Setting Example

Step-by-step example of setting the SP1 value.

Alarm Code Table

Lists alarm codes, causes, and corrective actions for abnormal operations.

Maintenance and Specifications

Cleaning Instructions

Instructions on how to clean the controller.

Parts Replacement Notice

Advise against replacing parts.

Fuse Replacement

Guidance on replacing fuses for AC models.

Model Number Configuration

Details the configuration options based on model numbers.

Specifications

Detailed technical specifications of the controller.

Accessories

Lists included accessories with their model numbers.

Parameter Lists

Operation Display List

Explains the items displayed during controller operation.

Parameter Setting Display List

Lists parameters and their settings.

PID Bank Parameters

Parameters for PID control settings.

PA-A Parameter Bank

Parameters related to specific control methods like ON/OFF or PID.

SP Bank Parameters

Parameters related to SP (Set Point) settings.

Event Bank Parameters

Parameters for configuring internal events.

Setup Settings

Setup Setting Display List

Lists setup parameters and their initial values.

Setup Bank Parameters

Details parameters within the setup configuration bank.

Indicator and Input Assignments

MS Indicator Lamp Settings (Priority 1)

Configuration of the MS indicating lamp ON conditions for the first priority.

MS Indicator Lamp Status (Priority 1)

Configuration of the MS indicating lamp ON status for the first priority.

DI Assignment Bank Parameters

Parameters for assigning functions to digital inputs.

Output, Lock, and Hazard Information

DO Assignment Bank Parameters

Parameters for assigning functions to digital outputs.

Lock Bank Parameters

Settings for key lock, communication lock, and loader lock.

Instrument Information

Details like ROM ID, versions, and manufacturing date.

Hazardous Substances Information

Table indicating the presence of hazardous substances in components.

Related product manuals