AB-7258
10
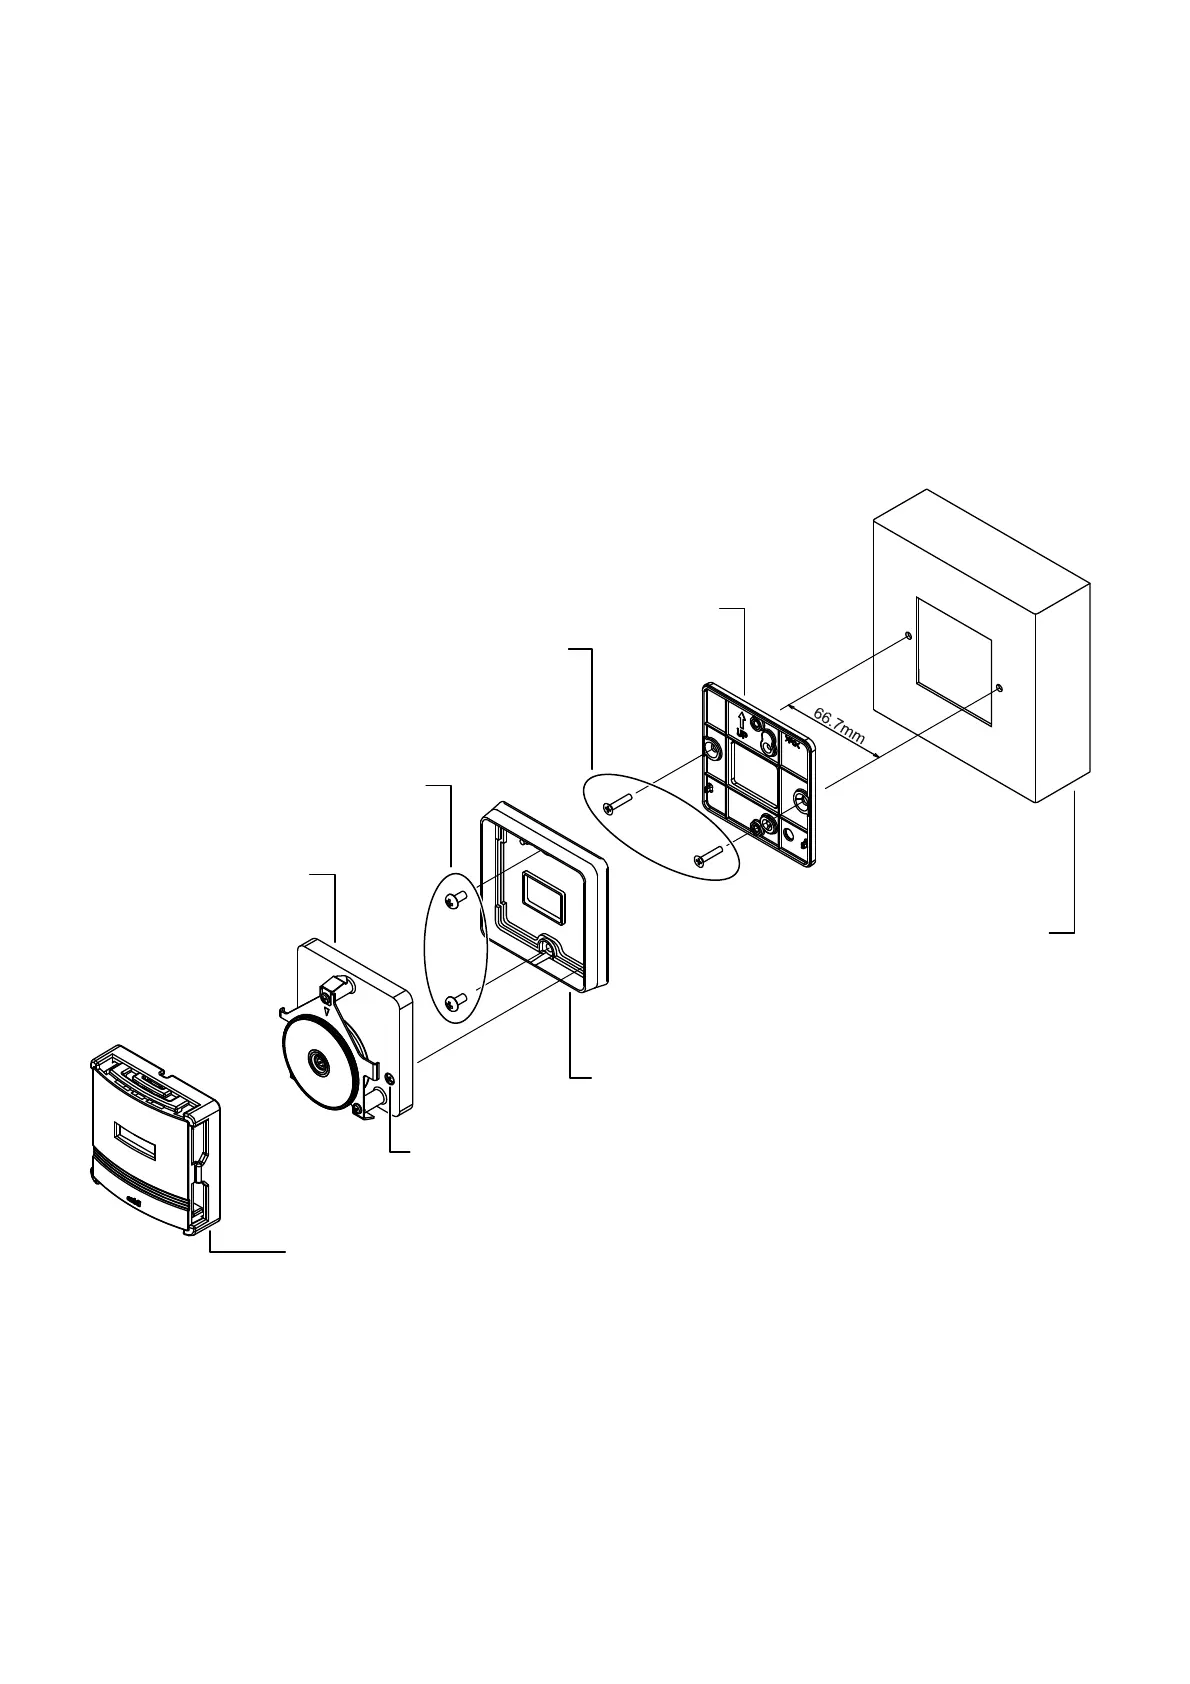
Installation steps: Neostat on Thermoplate for open wiring with the adapter
1) Remove the cover from Neostat. (See the Cover removal section.)
2) Unscrew the Neostat main unit screw. Then, hold and lift the guide to remove the main unit from the base.
Do not hold the setting dial to remove the main unit.
3) Attach the adapter to the Thermoplate for open wiring so that the arrow (indicated with "UP") points upwards, using two
flat-head screws (M4 x 10) supplied with the adapter. (Tightening torque: 78.5 Nꞏcm)
4) Attach the Neostat base to the adapter so that the arrow (indicated with "UP") points upwards, using two pan-head machine
screws (M4 x 6) supplied with the adapter. (Tightening torque: 78.5 Nꞏcm)
Note: Do not use pan-heat machine screw (M4 x 10) supplied with Neostat.
5) Wire Neostat. (See the Wiring section.)
6) Attach the Neostat main unit to the base, using the main unit screw (M3) preassembled with the Neostat main unit.
(Tightening torque: 39.2 N cm)
7) Attach the Neostat cover to the main unit. (See the Cover removal section.)
Figure 6. Installation: Neostat on Thermoplate for open wiring
Base of Neostat
2 pan-head machine screws (M4 x 6)
of the adapte
Main unit screw (M3)
preassembled with the main unit
Main unit of Neosta
Cover of Neostat
Thermoplate for open wiring
(Wires not led inside the wall,
sold separately)
Adapter (sold separately)
2 flat-head screws (M4 x 10)
of the adapte