The Aesculap Aeos® is a freestanding, digital surgical microscope designed for microsurgery, offering a look-over configuration without traditional microscope binoculars. It serves as an alternative to optical microscopes, with its software being an integral medical device component. The system's essential performance is defined by its robotic arm specifications.
Function Description:
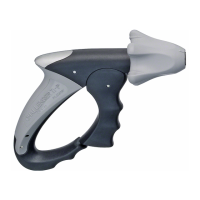
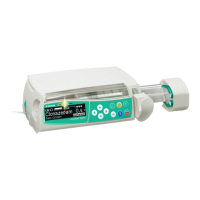
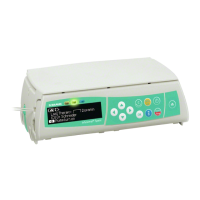
The Aesculap Aeos® system provides a magnified 3D view of the surgical field. Its core components include a 3D surgical screen for live surgical view, a control screen for interface, a six-jointed robotic arm, a camera with 3D capabilities, illumination, and handle controls, a base with embedded computers, a footswitch, visualization software, and a sterile drape. The robotic arm, a key feature, allows touch-guided manipulation through the workspace and can be controlled via handles, footswitch, or the control screen. A robot state indicator on the 3D display shows the arm's current status. The camera contains two sets of optics and high-resolution sensors to convert analog signals to a digital video stream. It features an LED indicator on its back panel, with blinking blue indicating startup, solid green for readiness, solid yellow for a minor error, and solid red for a major error requiring immediate switch to a backup system.
The system supports fluorescence functions, including DUV 400 and DIR 800 modules. The DUV 400 module visualizes near-UV fluorescent areas, with excitation in the 390-420 nm range and visualization in the >510 nm range. It allows switching between white light and blue-violet excitation light and recording fluorescent and auto-fluorescent light using the "Overlay" feature. The DIR 800 module visualizes infrared fluorescent areas, with excitation in the 740-800 nm range and visualization in the 820-900 nm range. It records and plays back video clips of fluorescent light emission in the infrared spectrum, which is not visible to the naked eye.
Important Technical Specifications:
- Weight: 300 kg / 661 lbs (basic hardware configuration including system's safe working load).
- Dimensions (unpacked, L x W x H): 826 mm x 1227 mm x 1938 mm (32.5" x 48.3" x 76.3").
- Power Input (max. values): 100 V~/110-120 V~/220 V~/230-240 V~, 9.6 A/8.7-7.5 A / 4.1 A / 4.0-3.7 A, 50 Hz / 60 Hz.
- Footswitch Battery Type: 3 x IEC-LR14 (Type C - "Baby").
- Wireless Characteristics (in combination with footswitch PV014): Power output: -6 dBm e.i.r.p. (0 dBm at 50 Ω), Frequency range: 2.400 MHz to 2.483,5 MHz.
- Voltage Selector Setting: Nominal mains voltage (V~) options include 230-240 (setting 240), 220 (setting 220), 110-120 (setting 120), and 100 (setting 100).
- Safe Working Load: PV011 monitor arm: 8.5 kg / 18.7 lbs; Robotic arm: 5 kg / 11 lbs; Drawer: 2 kg / 4.4 lbs.
- Robotic Arm Workspace: Max. radius of 1.24 m, with specific dimensions for min/max working distance (200 mm to 450 mm) and max radius (1.24 m).
- 3D Display Arm Extension and Height: Max. length (arm fully extended) 2.34 m, max. monitor height 2.03 m, min. monitor height 1.47 m, highest point (roll through doors) 1.86 m, radius 1.24 m, minimum width to roll through doors 0.668 m.
- Ambient Conditions (Use): Temperature 10 °C to 30 °C, Relative humidity 30 % to 90 % (non-condensing), Atmospheric pressure 700 hPa to 1060 hPa.
- Ambient Conditions (Transport/Storage): Temperature -10 °C to 50 °C (PV010), -18 °C to 55 °C (PV014); Relative humidity 10 % to 90 % (non-condensing); Atmospheric pressure 500 hPa to 1060 hPa (PV010), 500 hPa to 1120 hPa (PV014).
Usage Features:
The Aesculap Aeos® is primarily controlled via buttons on the camera handles, which can be customized in the software's "Handles" settings. An emergency stop button is located on top of the base to remove power from the arm in case of unintended movement. The system includes an uninterruptible power supply (UPS) for safe powering of components during power interruptions, providing at least 5 seconds of buffer. If no case is started, the system shuts down after 2 minutes without mains power; if a case is started, power is supplied until batteries are empty.
The control screen is 2D and non-sterile, allowing system control. External video streams can be connected for display in conjunction with the 3D camera image. The system can also connect to a potential equalization system and PACS/RIS servers via Ethernet. The 3D display uses circularly-polarized, micro-polarizing filters, requiring polarized 3D glasses for optimal visualization. Secondary displays can be connected to simultaneously show the live view.
The wireless footswitch (PV014) allows system control, with customizable button commands. Its status LEDs indicate radio connection, battery level, and pairing mode. The system includes a keyboard with an integrated touchpad for USB connection.
Application Workflow:
- Positioning: Position the 3D display 1-2 meters from the surgeon, perpendicular to and at the same height as the surgeon's eyes.
- System On: Press the main power button on the base. The system initializes automatically (approx. 90 seconds).
- Footswitch Enable: After software restart, confirm footswitch usage by pressing a button on the paired footswitch.
- Robotic Arm Setup: Rotate the robotic arm using the universal coupler as needed. Move the arm from "Storage" to "Drape" position.
- Draping: Apply the sterile drape (PV012SU) to the camera and distal portion of the robotic arm, following packaging instructions. Attach adhesive tapes, ensuring cables are not squeezed. Remove the protective lens film.
- Functional Test: Perform all checks before surgery, including verifying handle button functionality, image color/focus/alignment, smooth robotic arm movement, footswitch pairing, and fluorescence module functionality using reference cards.
- Case Start: Select a surgeon profile and patient in the "Case" tab, then press "Start Case."
- Live View: Take videos and snapshots using the buttons in the upper left corner.
- Case End: Select "End Case." Options to save changes, overwrite profile, or create a new profile appear.
- Media Saving: If media was recorded, users are prompted to save it. Patient information can be updated. Media can be copied to external drives or uploaded to a DICOM server.
- Case Management: View completed cases, copy/upload data (snapshots/videos) to external drives/DICOM servers.
- Drape Removal: Move the robotic arm to "Drape" position, release adhesive tape, remove lens housing, invert and remove drape, and dispose according to regulations.
- Shutdown: Follow proper shutdown procedure: press Exit button, move robotic arm to "Storage" position, then press "Shut Down." Turn off system power with the main power button.
Software Features:
The home screen provides access to setup, case management, and system status. The "Setup" panel allows moving the robotic arm to preset positions (Drape, Storage, Semi-Sitting), rebalancing the Aesculap Aeos®, entering recovery state, and reconfiguring the coupler. "Robot Recovery" is an emergency function to move the robot if other controls fail.
The "Live screen" displays camera, robotic arm, recording, fluorescence controls, and settings. The "Control panel" includes tabs for Camera, Robot, Setup, Waypoints, Surgical Displays, Screen Layout, and Digital Aperture.
- Camera Controls: Adjust zoom, focus, white light level, and fluorescence light level for DUV 400 and DIR 800. Autofocus is disabled during fluorescence.
- Robot Controls: Pan and rotation movements, "Lock On Target" function to rotate around a focal target, and speed adjustment. Auto Focus modes include Continuous, After Move, and Manual.
- Waypoints: Set, navigate to, and delete waypoints for robotic arm positions.
- Surgical Displays: Configure 3D format and 180° rotation settings for connected monitors.
- Screen Layout: Enable/disable focus indicator, configure camera parameters (Auto-Hide, Show, Hide), and Picture in Picture (PiP) location and input source.
- Digital Aperture: Enable a digital overlay to restrict the live image to a central circle with a dark mask.
- Quick Access Bar (QAB): Configurable bar for top four most-used functions (Viewport, Swap Sources, Autofocus, Image Mode).
- Image Modes: Five predefined image modes (Mode 1-5) to adjust image vividness and brightness.
- Software Settings: Panels for Color, Recording, Display, DICOM, Handles, Footswitch, About, and DUV 400 (Fluorescence).
- Color: Adjust gain and perform white balance.
- Recording: Configure movie/snapshot formats (AVI/MOV, JPEG/PNG), auto-record, fullscreen recording, frame rate, quality, and 2D/3D recording for local/DICOM patients.
- Display: Modify view type (Control, Surgery, Assistant 180/90 CW/CCW), 3D format (Monoscopic, Row-Interleaved, Side-By-Side, Top-Bottom), and "Swap 3D" for polarity.
- DICOM: Set up networking for uploading/downloading media to/from a server database.
- Handles/Footswitch: Customize button functions for robotic arm movement, zoom, focus, white light, image modes, waypoints, recording, and fluorescence.
- About: View software version, technical support info, language selection, user manual link, system log files, and regulatory information.
- DUV 400 (Fluorescence): Adjust hue and opacity for the overlay, and "Auto-Overlay" timer.
Maintenance Features:
- Mandatory Maintenance: System maintenance is required every 12 months, or after any repair, dropping, damage, or non-intended use.
- Activities: Visual inspection, software/firmware updates, function checks, safety measurements, and documentation of test results.
- Personnel: Maintenance must be performed by Aesculap-trained and authorized personnel.
- Footswitch Battery Change: Shut down the system, open battery housing, remove old batteries, insert new alkaline batteries (Type C - "Baby") with correct polarity, and close housing. Remove batteries for long periods of non-use to prevent leakage.
- Disposal: Adhere to national regulations for disposing of or recycling the product, its components, and packaging. The recycling pass is available as a PDF document. Products with the WEEE symbol are subject to separate collection of electrical and electronic devices.
- General: Use according to instructions, follow safety/maintenance, operate by trained personnel, store in dry/clean/safe place, check product before use, keep instructions accessible.
- Product-Specific: Do not open product, connect only to protective earth, avoid multiple socket-outlets, observe EMC notes, combine only with Aesculap products, adhere to standards, connect external video before turning on, lay cables flat to prevent tripping hazards, do not use robotic arm as armrest/cart, do not place objects on E-stop/camera/arm, unplug USB devices before case, ensure E-stop is not locked, use soft stop for unintended robot arm movement, use E-stop only if soft stop malfunctions, check fluorescence functionality with reference card, ensure camera working distance 20-45 cm, perform fluorescence tests before surgery, avoid touching system components and patient simultaneously, do not push/pull by display/camera/power cable, use only Aesculap-supplied 3D glasses, do not use polarized prescription glasses, return robot to storage position before shutdown, store camera with lens cap.
- Light Emission: Retinal blue light and Near-UV emission risk. Do not stare at lamp, minimize exposure to eyes/skin, use shielding, ensure no light enters patient's eyes.
- Fluorescent Surgery: Use approved fluorescent agents, avoid looking at illumination, use lowest comfortable light intensity, ensure no tissue damage from excessive illumination, operate in darkened room, perform functional test with reference cards.
- Place of Use: Not suitable for flammable anesthetics, do not use in explosive atmospheres, do not expose to rain/moisture.
- Footswitch: Carry/lift by handle, place on hanger when not in use, switch off before cleaning/maintenance, keep within 10m range, avoid strong magnetic fields, do not use more than four wireless systems in same area, use specified alkaline batteries, remove batteries for long periods of non-use, avoid touching battery contacts and patient simultaneously. Max mechanical load 1350 N.
- Sterile Products: PV012SU sterile drape is the only sterile component. Place before surgery, do not use if damaged/defective, replace if damaged intraoperatively, EO-sterilized, do not use from open/damaged packaging or after use-by date, do not reuse, do not reprocess.