Spray-gun cleaner Starter Page 15
equipment and facility engineering
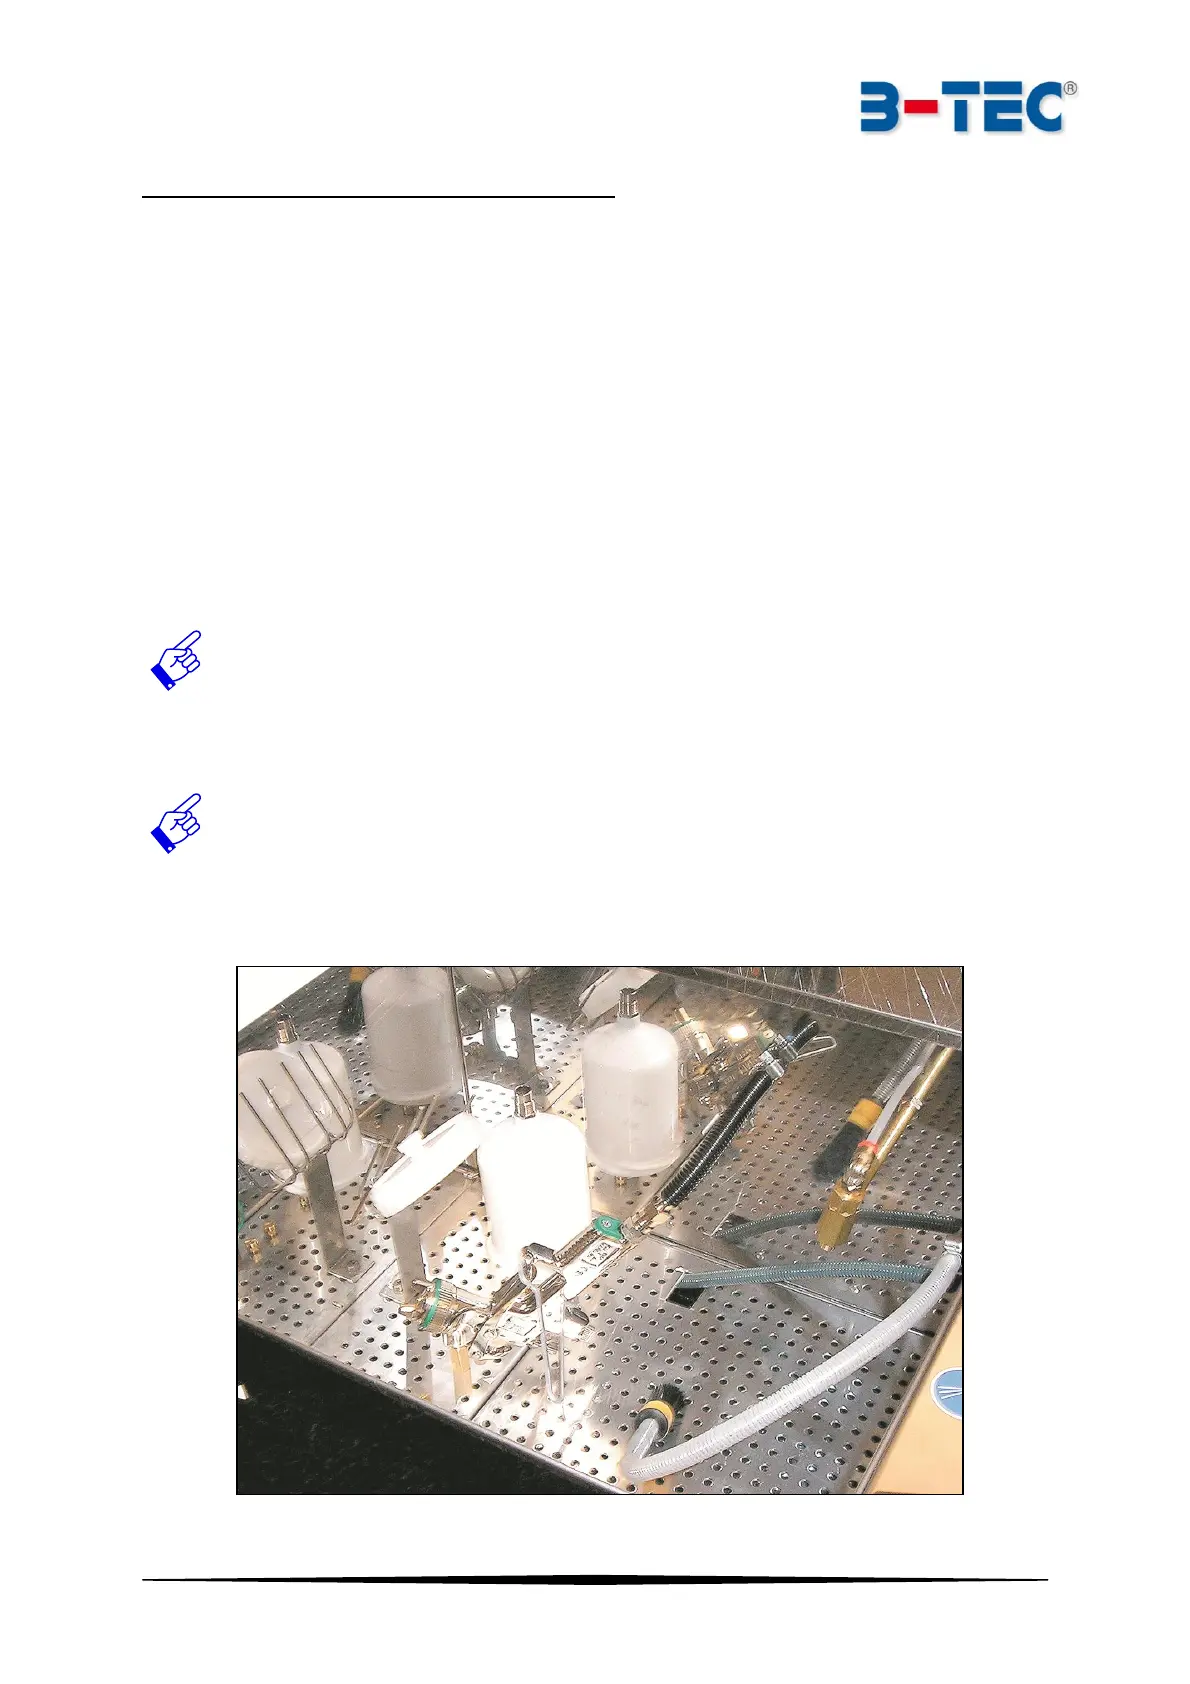
Operating the automatic washer section ( Starter-01)
Open the hinged door. The exhaust system starts automatically. Then install the gun as described
below:
1. Remove the lid of spray gun and place it in the lid holder. Make certain that the paint-soiled
inner surface faces downwards → towards the interior of the washer.
2. The paint cup has to be removed. The strainer has to be removed from the spray gun and
placed on a peg of the lid holder. After that, the spray gun has to be placed upside-down on
the middle jet.
3. The paint cup has to be placed upside-down on the jet in front of the middle jet
4. The spray gun trigger is pulled back with the trigger clamp located in the
washing chamber. This ensures that solvent flows through the paint channel
of the spray gun. In addition, it is necessary to ensure that the set screw is in "opened"-
position so that the air flow is possible.
5. Connect black compressed air hose to the connection on the spray gun.
This ensures that air is forced into the air channels of the spray gun during
the cleaning process and that solvent and paint residues are prevented from
entering.