Fb
&'(!)%(*+#(%
(%)&*#&%&+#
D
!([=><T+A'#$(#Y[)T<D[/LKB$FB\
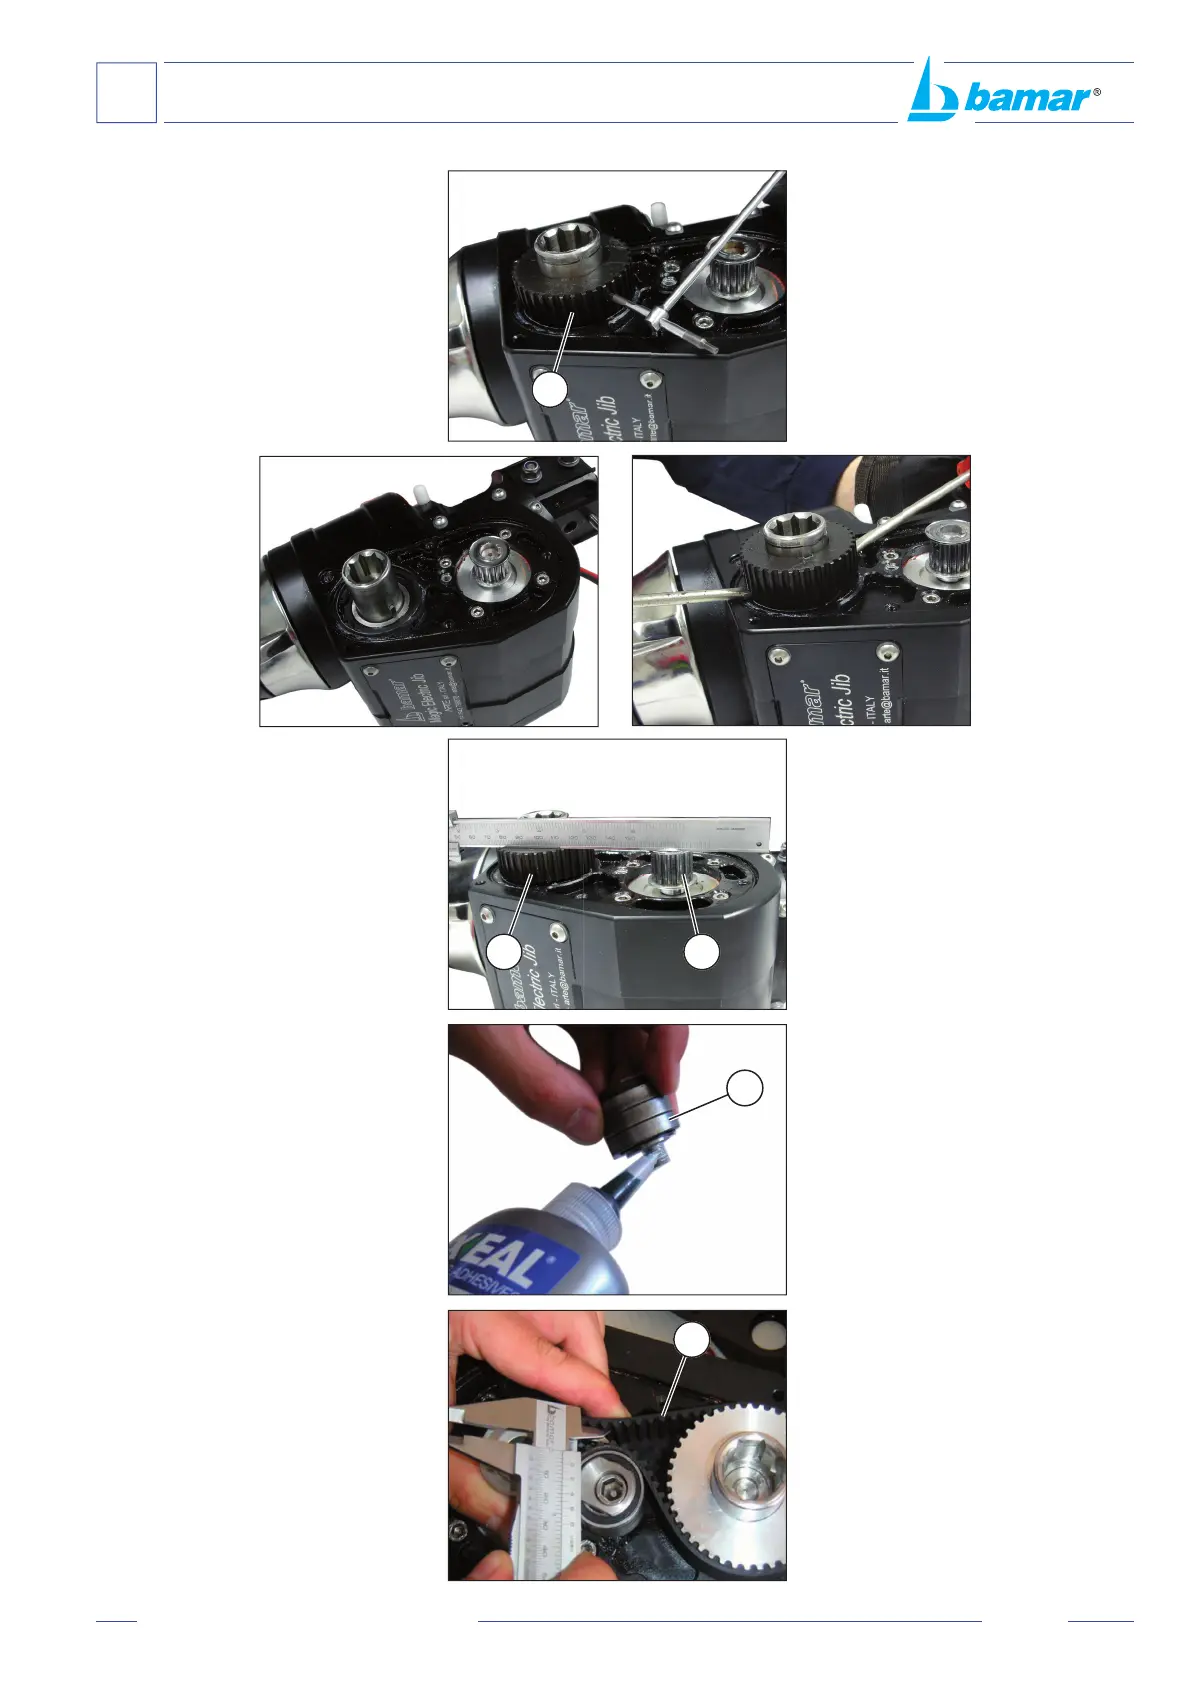
• Dopo aver tolto il galoppino (@) e
la cinghia (%), svitare il grano che
blocca la puleggia condotta (D) con
una chiave a brugola n. 2.5 e con
l’aiuto di due cacciaviti e toglierla.
• Montare
la nuova puleggia condotta e
controllare che l’altezza sia in linea
con la puleggia conduttrice (?).
Se le due puleggie non dovessero
trovarsi alla stessa altezza, allora
bisogna abbassare la più piccola
con l’aiuto di un martello.
• Riposizionare il perno eccentrico
(@) dopo aver coperto di loctite il
suo letto.
• Rimontare la cinghia (% ) e
controllare la sua tensione, come
descritto nel capitolo D-2.3.
• After having taken off the eccentric
pin (') and belt (#), unscrew the
Allen screw holding the sheave (@)
into place with an Allen key n. 2.5.
Helping yourself with two screw
drivers, take off the sheave.
• After having tted the new sheave,
check its height is in line with the
drive sheave (<). If the two sheaves
are not at the same height, then
hammer down the drive sheave
(the smaller one) helping yourself
with a hammer.
• Put the eccentric pin (') into place
after having covered its thread with
loctite.
• When you t the drive belt (#) again,
check its tension, as described
above on chapt. D-2.3.
D
?
@
%
D