601–0445 /05 Loki24
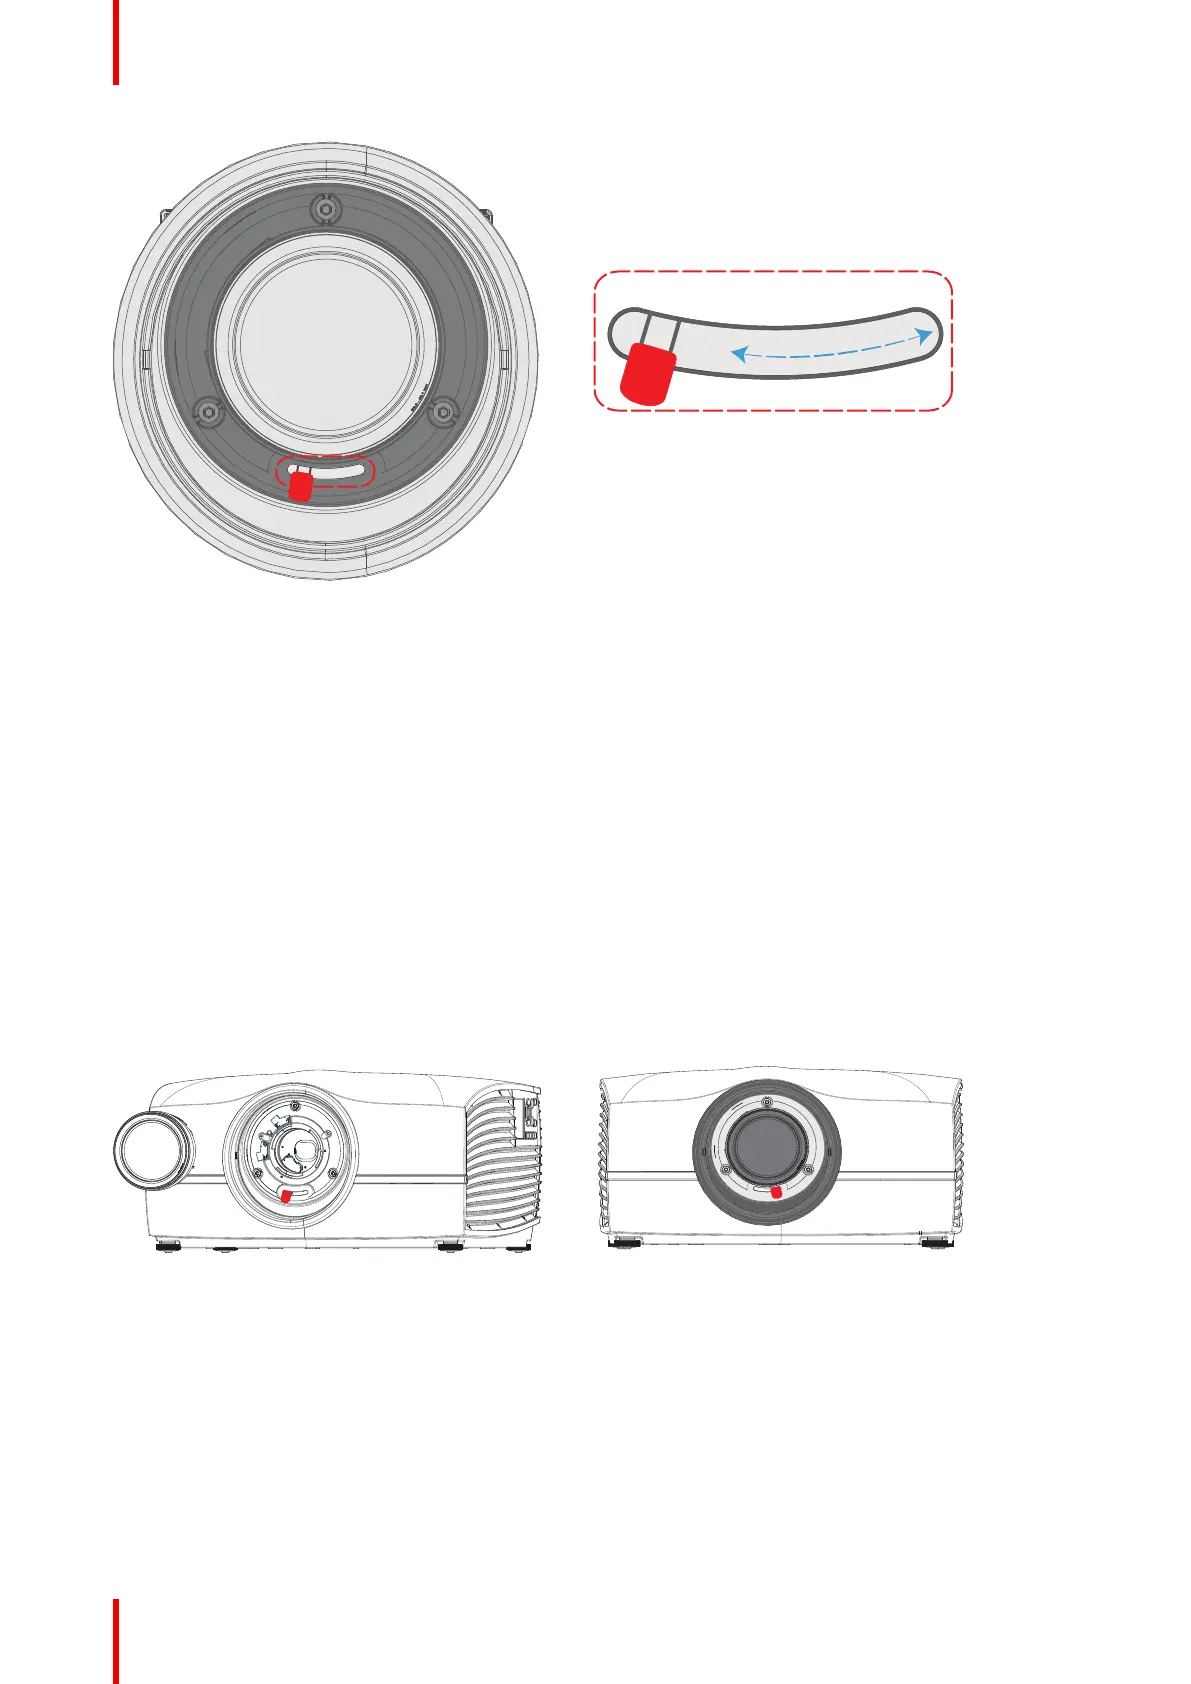
Image 2-2
Install a lens
1. Verify that the projector shutter is deactivated (shutter is deactivated when the shutter icon on the projector
keypad is red).
2. Verify that the lens release lever is in its default position at the far left of the slide, as illustrated.
3. Remove the protective cap at the lens bayonet end
4. Align the lens so that the red marking on the bayonet is facing upwards, towards the red marking on the top of
the projector cabinet.
5. Position the lens bayonet into the projector lens mount and support in place with one hand.
6. Slide the lens lever to the far right.
7. Verify that the lever is firmly in place at the far right end of the slide before removing your hand from the lens.
Image 2-3
Remove a lens
1. Support the lens with one hand.
2. Use the other hand to slide the lens release lever to the far left position..
3. Pull the lens straight out of the projector lens mount.
4. Replace with another lens, or install the projector lens cap.
Lenses

 Loading...