USE AND MAINTENANCE MANUAL
2-Speed Gearboxes Series CE
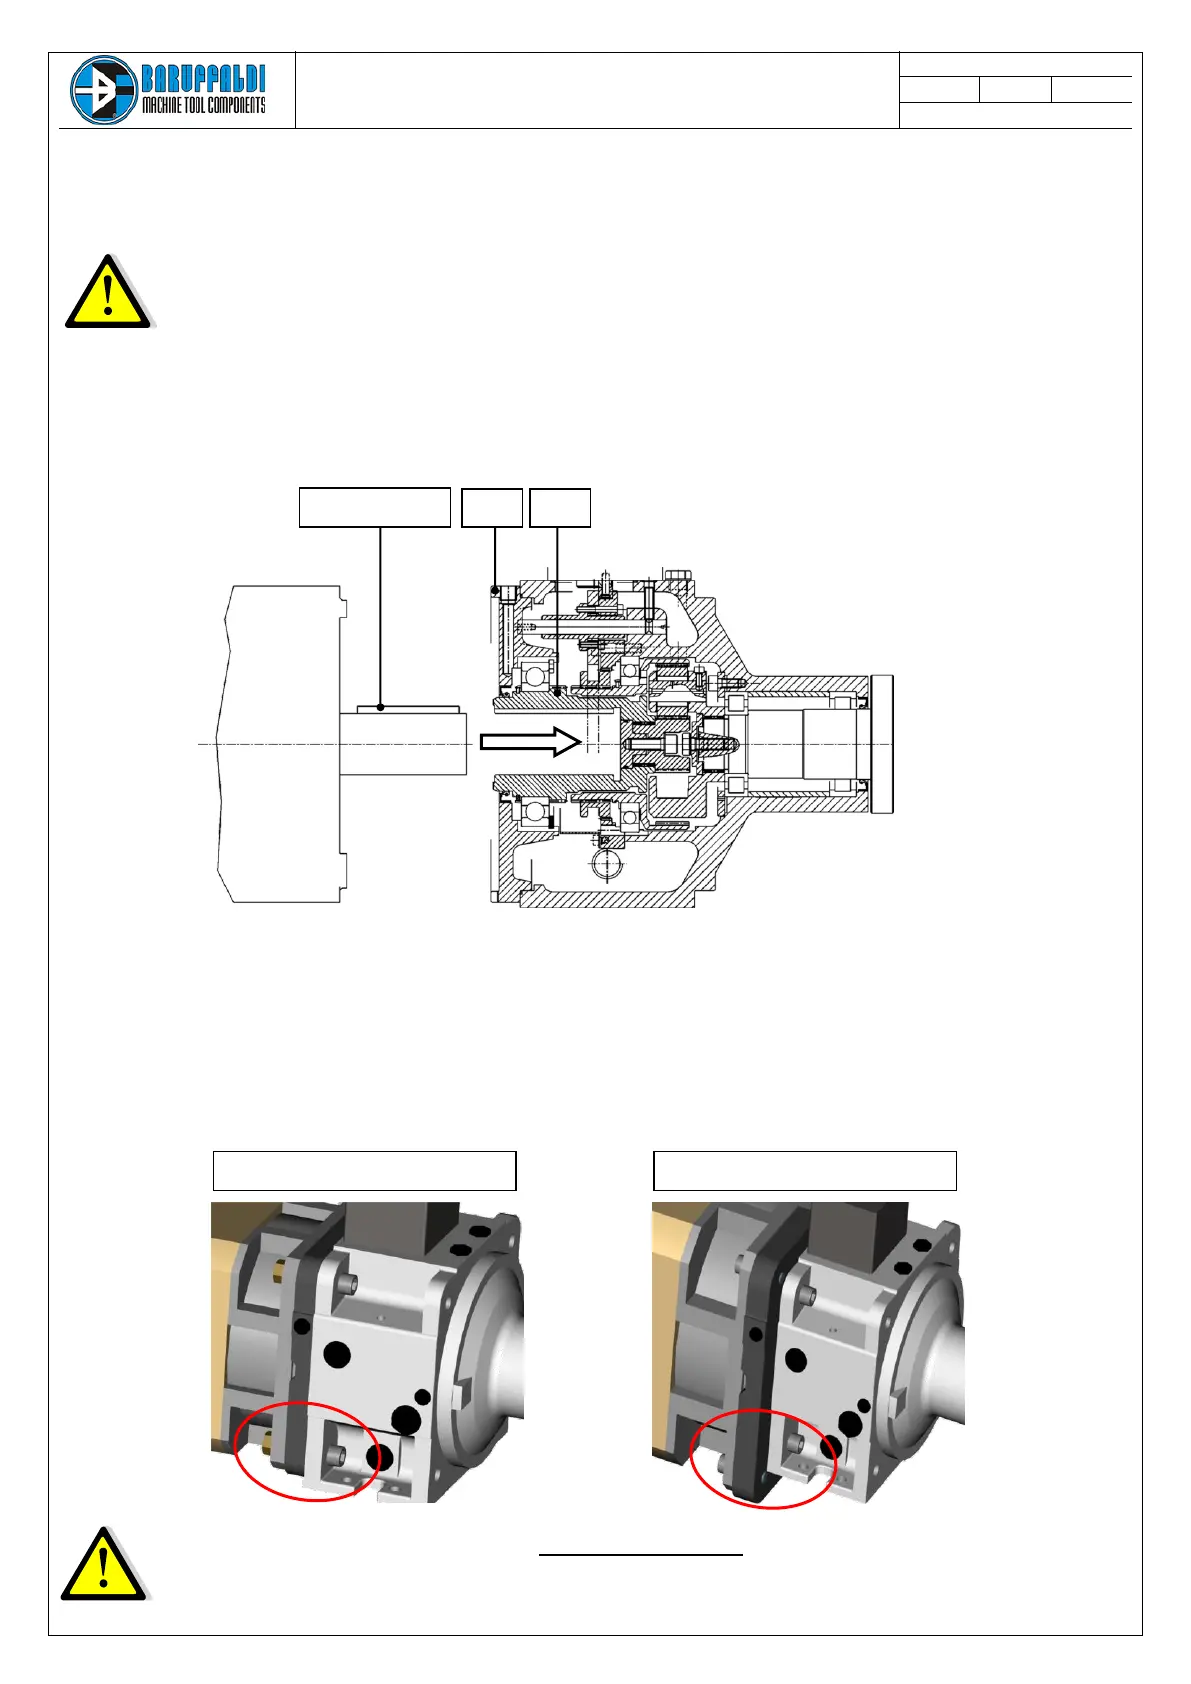
3.2 ASSEMBLING THE MOTOR ON THE GEARBOX - GEARBOX CE 11 - 13 - 13+ - 16 - 18 - 20
3.2.1 Motor shaft with key
a) Turn the motor shaft until the key is on top
b) Align the pinion (09) slot with the motor key
c) Gently fit the motor on the gearbox
d) Tighten the screws
03 Motor flange
09 Pinion
Always check the full motor code and the gearbox code before proceeding.
Before assembling the motor, always refer to chapter 3.1.3 for the proper balancing of
the pinion.
Gearboxes type CE11-13-16-18-20 for motors with key, come as a complete unit that
must not be disassembled, not even if the screws must be changed (see above)!
Do not remove the motor flange from the gearbox, the seal might be damaged!
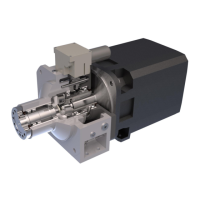
The gearbox flange (03) is fixed to the gearbox housing by means of screws.
If the PCD of the flange-fixing screws is the same as the PCD of the motor-fixing screws, it is
necessary to remove the screws (generally n°2) supplied and put longer screws and nuts for
final assembly (see picture below, left).
If the PCD of the flange fixing screws is different to the PCD of the motor-fixing screws, then
you just have to fix the motor to the flange with proper screws