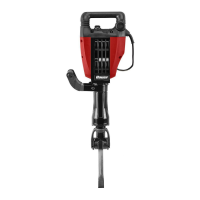
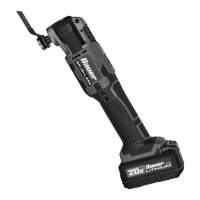
Page 10 <&(%$*4.8"4,7%J'*#$"&8#K%/7*,#*%4,77%HLMMMLMIILNOPO1 Item 63438
?@<6AQ RS6;@ACRE D@CEA6E@ET6?6AFS
R/*(,$"83%C8#$('4$"&8#
% ;*,9%$.*%6EAC;6%CDSR;A@EA%?@<6AQ%CE<R;D@ACRE%#*4$"&8%,$%$.*%+*3"88"83%&2%$."#%
5,8',7%"847'9"83%,77%$*\$%'89*(%#'+.*,9"83#%$.*(*"8%+*2&(*%#*$%'/%&(%'#*%&2%$."#%/(&9'4$1
A&&7%?*$%F/
AR%S;6!6EA%?6;CRF?%CEjF;Q%<;RD%@TTCX6EA@G%RS6;@ACRE-%
D,Z*%#'(*%$.,$%$.*%A("33*(%"#%"8%$.*%&22L/&#"$"&8%,89%'8/7'3%$.*%$&&7%2(&5%"$#%
*7*4$("4,7%&'$7*$%+*2&(*%/*(2&(5"83%,8>%/(&4*9'(*%"8%$."#%#*4$"&81
Chisels come with or without collars.
Figure B shows installation of a chisel without a collar
(the included chisel is without a collar).
Figure E shows installation of a chisel with a collar.
T@FACREk Chisel may be HOT after use. Avoid contact
with skin and use protective gloves to remove.
D&'8$"83%T."#*7#%)"$.&'$%,%T&77,(
1. CDSR;A@EAk%%U"/*%47*,8K%$.*8%3(*,#*%4."#*7_#%
#.,8Z%'#"83%"847'9*9%T."#*7%V(*,#*1
E&$*- Keep chisel shank clean. Do not lay in dirt or dust.
2. Pull the Lock Lever to the side, just
far enough to allow the Chisel to be
inserted, as shown in Figure B.
<7,$%
E&$4.
a
f
G&4Z%
G*Y*(
<"3'(*%W
E&$*- Flat Notch on Collar-less Chisel
must face the Lock Lever.
3. Insert Chisel with the Flat Notch facing the Lock
Lever as far as it will go, as shown in Figure C.
G&4Z%G*Y*(
<"3'(*%T
4. Pull the Lock Lever back until it locks the
Chisel into place. See Figure D.
E&$*- Lock Lever will not lie flat against the chuck.
<"3'(*%X
5. When the Chisel is installed, there will be play
along the Flat Notch of the shank. Physically
check that the Chisel is secure before operating.