Page 8 ;&(%$*4.8"4,7%<'*#$"&8#=%/7*,#*%4,77%>?@@@?@AA?BCDC1 Item 57179
EF;6GH IJ6KFGLIM NFLMG6MFMO6E6GPJ
E/*4"2"4,$"&8#
Electrical Rating 120 VAC / 60 Hz / 15 A
Rated No Load Speed 4500 RPM
45° Cross Cut Capacity 3-1/2" x 9"
90° Cross Cut Capacity 3-1/2" x 12-1/2"
Maximum Bevel 48° Left and Right
Maximum Miter 52° Left – 60° Right
Saw Blade
10" Diameter,
5/8" Round Arbor
4500 Minimum RPM Rating
E*$'/%?%S*2&(*%P#*-
%K*,9%$.*%6MGLK6%LNJIKGFMG%EF;6GH%LM;IKNFGLIM%#*4$"&8%,$%$.*%+*3"88"83%&2%$."#%
5,8',7%"847'9"83%,77%$*Z$%'89*(%#'+.*,9"83#%$.*(*"8%+*2&(*%#*$%'/%&(%'#*%&2%$."#%/(&9'4$1
M&$*- For additional information regarding the parts listed in the
following pages, refer to Parts List and Diagram on page 22.
N&'8$"83
1. Use the four bolt holes provided in the Base
to mount the Miter Saw to a stable support
before use. Mounting hardware not included.
2. Ensure that the Miter Saw is always stable
and secure (e.g. fixed to a bench).
F##*5+7V
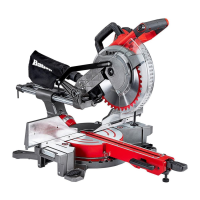
1. Slide the Dust Collection Bag over the Dust Outlet at
the rear of the Saw Head Assembly.
2. Install the Right Sliding Fence:
a. Loosen the Fence Lock Knob
counter-clockwise.
b. Insert the Right Sliding Fence into the slot
and slide the Fence to the desired position.
c. Tighten the Fence Lock Knob.
U'#$%
S,3
U'#$%
I'$7*$
;"3'(*%F%
;*84*%%
T&4X%Y8&+
K"3.$%E7"9"83%
;*84*
;"3'(*%S%

 Loading...