Page 10 For technical questions, please call 1-888-866-5797. Item 59583
SAFETY OPERATION MAINTENANCESETUP
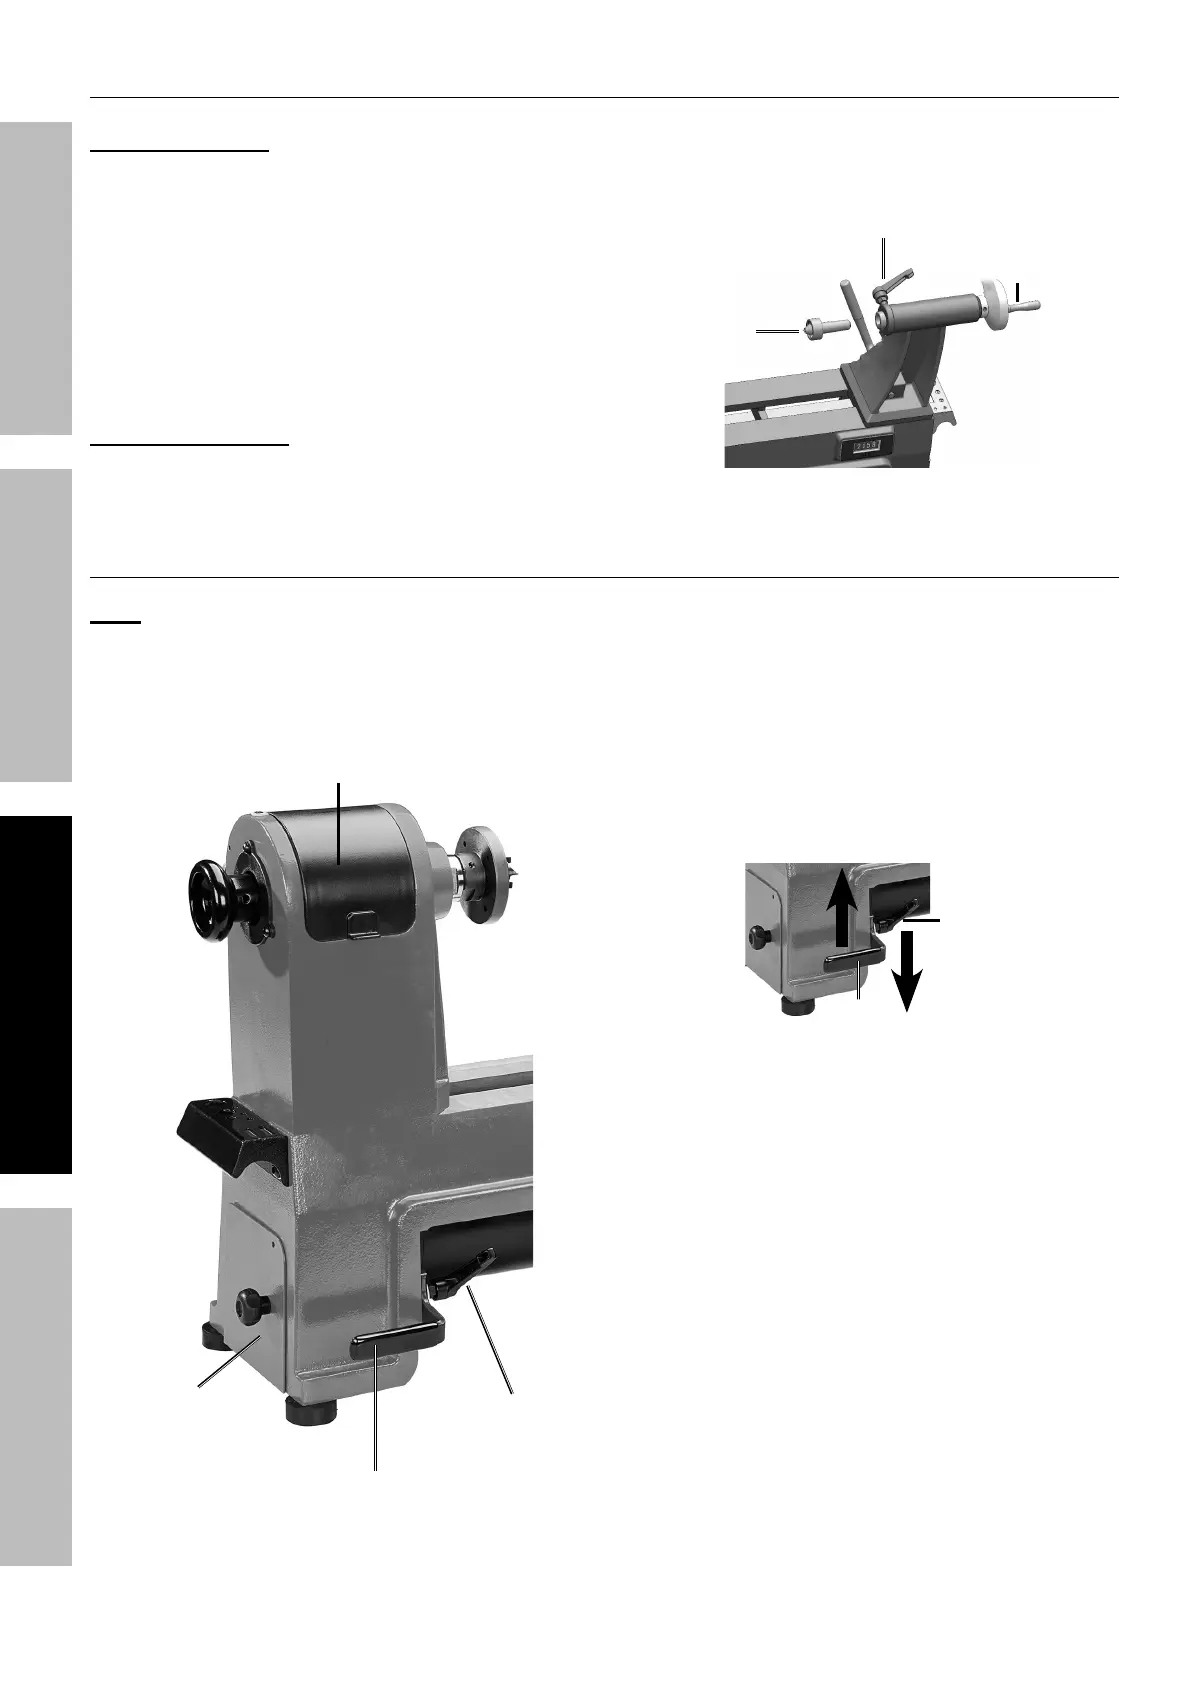
Setting Up Tailstock Live Center
Install Live Center:
a. Rotate the Handwheel clockwise three
times to move Quill forward.
b. Make sure the mating surfaces are clean.
Push the Live Center (37) into the Quill.
c. If the Quill becomes fully retracted when the
Live Center is mounted, it will dismount the
Live Center. This is normal. Remount Live
Center by extending the Quill approximately
0.5 inch and pushing the Live Center in place.
Remove Live Center:
a. Hold the Live Center to prevent it
from falling. Use a cloth to protect
your hand from the sharp edges.
b. Rotate Handwheel counterclockwise
to retract the Quill until the Live Center
is released from the Quill.
Handwheel (43)
Live
Center (37)
Quill Lock (40)
Adjusting Speed
Note: Start at slower speeds for rough cuts and
larger workpieces. Use faster speeds for refined
cuts and detailed work. Set the desired speed
range by adjusting the Belt position. Change the
speed within a speed range using the Speed Dial.
Speed is displayed on the Digital Readout.
Motor Position
Lock
Motor Tension Lever
Belt Pulley Hatch
Belt Access Door
1. Always turn off and unplug machine
before changing Belt position.
2. Open Belt Access Door (27).
3. Loosen Motor Position Lock (3). The Screw (9)
at the center of the Lock can be loosened
to rotate Handle to an optimal position.
4. Pull upwards on the Motor Tension
Lever (202) to relieve tension on the Belt.
Lock
Lever
5. Tighten Motor Lock to hold position.
6. Pull Belt Pulley Hatch (223) open using its knob.
7. Adjust the Belt’s position on both Spindle
Pulley (204) and Motor Pulley (203) to the
desired speed range setting. Ensure that the
Belt is vertically aligned on both pulleys.
8. Loosen Motor Position Lock and lower the Tension
Lever to its original position, then push down
on the Tension Lever using 15 lbs of pressure
until there is approximately 1/2″ deflection when
pressing the Belt midway between pulleys.
9. Tighten the Motor Position Lock.
10. Close both the Belt Access Door
and Belt Pulley Hatch.
11. Turn Speed Dial while spindle is moving to
select speed within the established range.