Page 11For technical questions, please call 1-888-866-5797.Item 59583
SAFETYOPERATIONMAINTENANCE SETUP
Using the Indexer
Note: Indexing creates evenly spaced features around
the circumference of the workpiece while keeping
the Spindle locked. There are 24 index positions in
the spindle Pulley, each 15° apart, to help rotate the
workpiece evenly for accurately spaced features.
1. Turn off Lathe and disconnect from power.
2. Push in Indexer Knob and rotate Spindle
by hand until Knob engages with hole
on indexer pulley. Make sure the Spindle
is locked before starting to Index.
3. Disengage Indexer Knob when done.
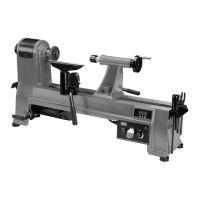
Upper Belt Access Panel
Spindle Pulley
Indexer
Knob
CAUTION! Always disengage the Indexer
Knob before restarting the lathe.
Workpiece and Work Area Set Up
1. Designate a work area that is clean and well-lit.
The work area must not allow access by children
or pets to prevent distraction and injury.
2. Lathe must be located on a surface capable of
bearing the combined weight of Lathe and intended
workpiece. The surface must be able to withstand
the vibration generated by Lathe during operation.
3. Lathe must be level, left-to-right and
front-to-back, or spindle may rotate
improperly and become damaged.
4. Route the power cord along a safe route to reach
the work area without creating a tripping hazard or
exposing the power cord to possible damage. The
power cord must reach the work area with enough
extra length to allow free movement while working.
5. There must not be objects, such as utility lines,
nearby that will present a hazard while working.
General Operating Instructions
1. Make sure that the Switch is in the off-position,
then plug in the tool.
2. Make sure the workpiece is suitable for turning.
No extreme bows, knots, or cracks should exist.
3. Prepare and trim workpiece with a bandsaw
or table saw to make it roughly concentric.
4. Install workpiece between centers, or
attach it to faceplate or chuck.
5. Adjust tool rest according to type of operation,
and set minimum clearance between
workpiece and lip of tool rest to 1⁄4″ gap.
6. Rotate workpiece by hand to verify
spindle and workpiece rotate freely
throughout full range of motion.
7. Verify that pulley speed range is set for type
of wood and size of workpiece installed.
8. Verify that Speed Dial is turned fully
counterclockwise so that the Spindle does
not start at an excessive speed.
9. Verify that Directional Switch is
in the neutral position.
10. Put on safety glasses, face shield, and respirator.
11. Set Directional Switch to forward or reverse,
start Spindle, adjust spindle′s speed, and
begin turning operation, keeping chisel against
Tool Rest the entire time that it is cutting.
12. Turn Spindle OFF when cutting
operation is complete.
13. Remove Safety Key and unplug tool from
its electrical outlet. Clean, then store the
tool indoors out of children′s reach.