B
D
A
C
INSTRUCTIONS FOR THE USER
e
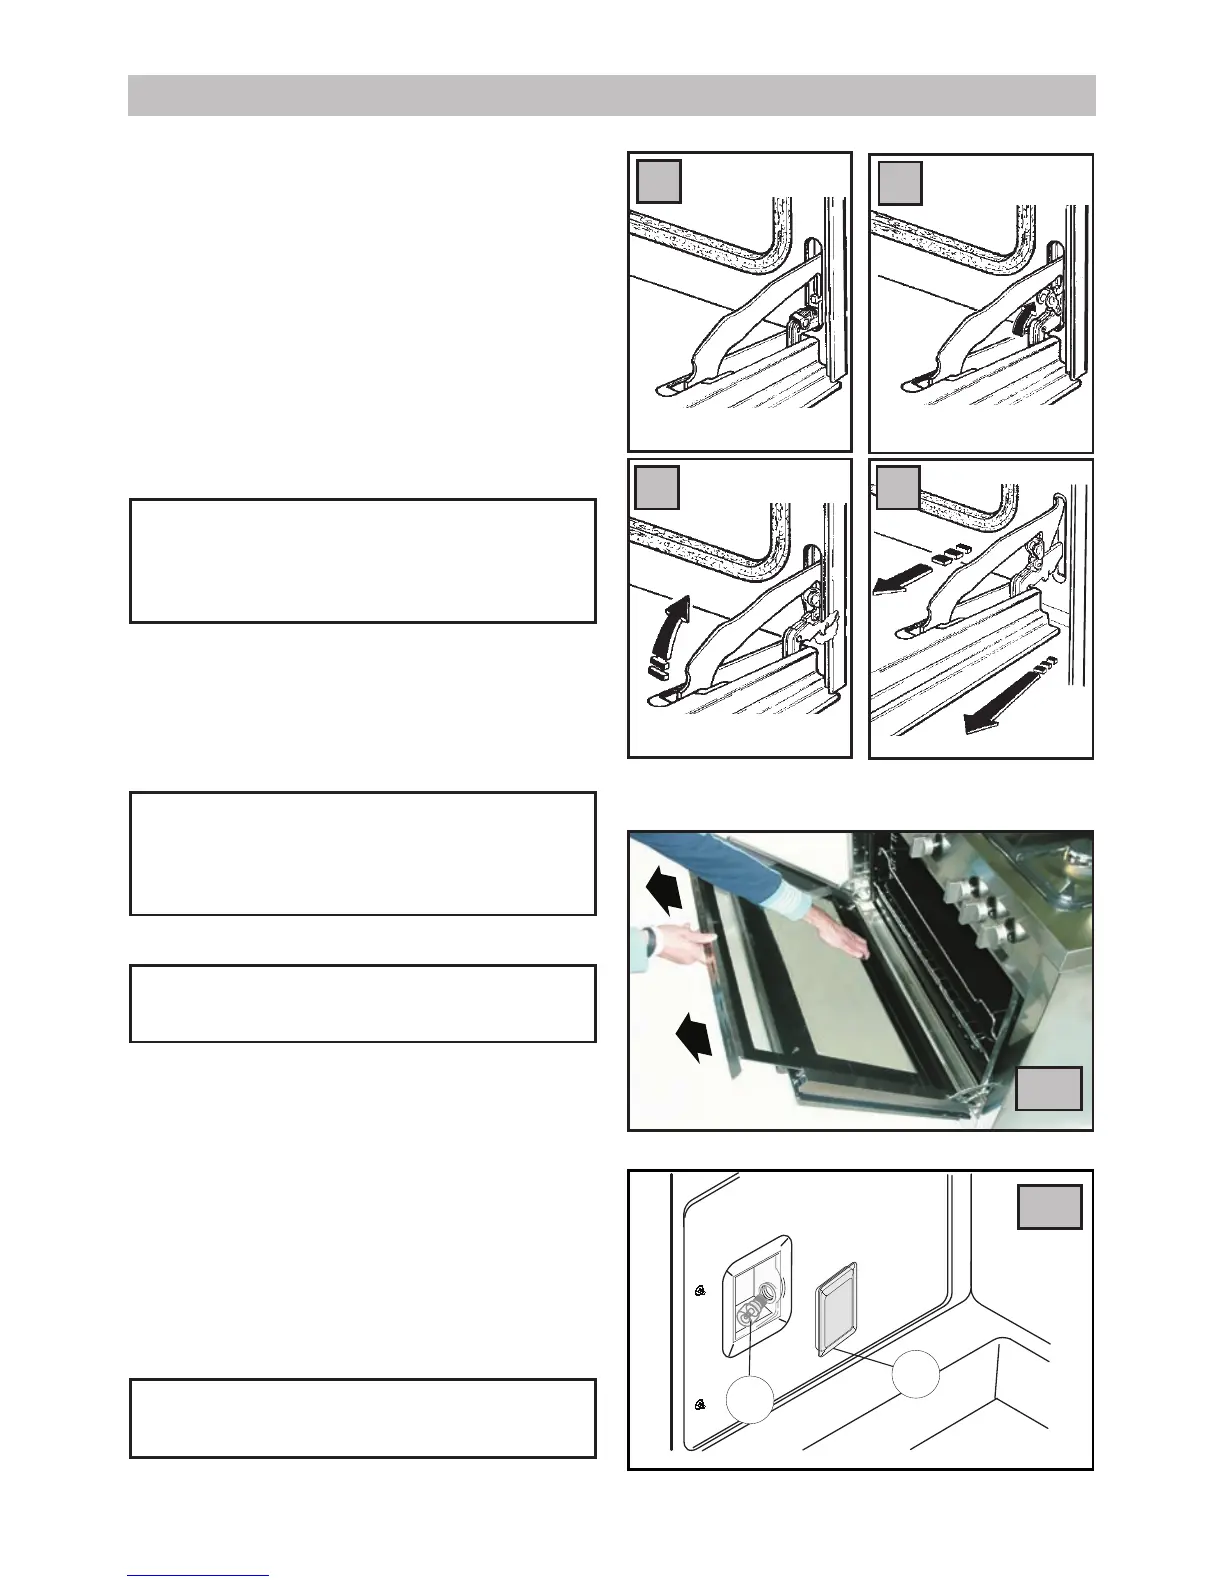
OVEN DOOR REMOVAL
The oven door can be removed to give easier access to
the oven when cleaning. To remove, proceed as follows:
• Open the oven door and move the release U-shape
element (g. A) forwards until it is over the tooth in the
upper sector of the hinge (g. B).
• Partially close the door and at the same time, force the
door upwards to release the lower sector of the hinge
(g. C) then pull the door and at the same time, slightly
raise the door upwards to release the upper sector of
the hinge (g. D).
• To reassemble proceed in reverse order. Ensure you
insert the upper sector of the hinge in its housing rst
and then the lower sector of the hinge.
ATTENTION!!
After cleaning the oven and before you close
the oven door, ensure the release U- shaped
elements are COMPLETELY LOWERED as
indicated in g. A
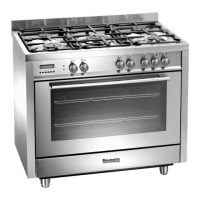
HOW TO CLEAN THE INNER OVEN DOOR GLASS
One of the features of our cookers is that the inner
oven door glass can be easily removed for cleaning
without the aid of specialized personnel. Just open the
oven door and remove the support securing the glass
(g. E).
ATTENTION!!
This operation can be done also with the door
tted on appliance, but in this way, pay attention
that when the glass is pull upwards, the force of
the hinges can close the door roughly.
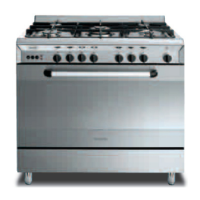
REPLACING THE OVEN LAMP (g. 12)
Ensure the appliance is switched off before
replacing the lamp to avoid the possibility of
electric shock..
In the event oven lamp need replacing, the new lamp must
comply with the nominal data indicated on page 27 and
must be resistant to high temperature (300°C).
Draw out the side guide rails as described above.Then,
remove the glass protection cap (V) from the bulb socket,
lifting it with a screwdriver placed between the cap and the
oven wall and replace the lamp (L). Fit the accessories
back in reverse order.
OVEN SEAL
The oven seal guarantees the correct functioning of
the oven. We recommend you:
• clean it, avoiding abrasive tools or products.
• check its state now and then.
If the oven door seal has become hard or is
damaged, contact our Service Centre and avoid
using the oven until it has been repaired.
12