INSTALLATION INSTRUCTIONS
15
MAINTENANCE
Before carrying out any maintenance, always disconnect the appliance from the electricity
supply and, if appropriate, the gas supply.
During the guarantee period, in case of need all service interventions should be referred
back to the Baumatic Ltd Service department. Please note that intervention or repair by
any unauthorised personnel will invalidate such guarantee.
Maintenance of gas appliances must only be carried out by a CORGI Registered Engineer
(all Baumatic Service Engineers are CORGI registered).
GAS TAP MAINTENANCE
If a gas tap or control becomes stiff to operate, proceed as follows:
1) Isolate the appliance from the electricity and gas supplies.
2) Remove the control knobs, pan supports and burner assemblies.
3) Undo the side fixing screws and front corner brackets to allow the hob to be lifted.
4) Remove the two fixing screws, separate the gas tap assembly then clean the cone and seating
with a cloth dampened with solvent.
5) Lightly smear the cone with high temperature grease, reassemble into position and rotate a
few times. Remove the cone again and remove any excess grease making sure that the gas
ducts are not obstructed with grease.
6) Carefully reassemble the components and check for gas soundness.
If it becomes necessary to replace a gas tap, proceed mainly as described above but this time
disconnect the gas pipe from the tap then:
1) Disassemble the gas rail from the hob and remove the fixing screws to release the tap.
2) When fitting the new tap, ensure a new gasket seal is used.
3) Re-connect the gas pipe to the tap, check for gas soundness and reassemble all components.
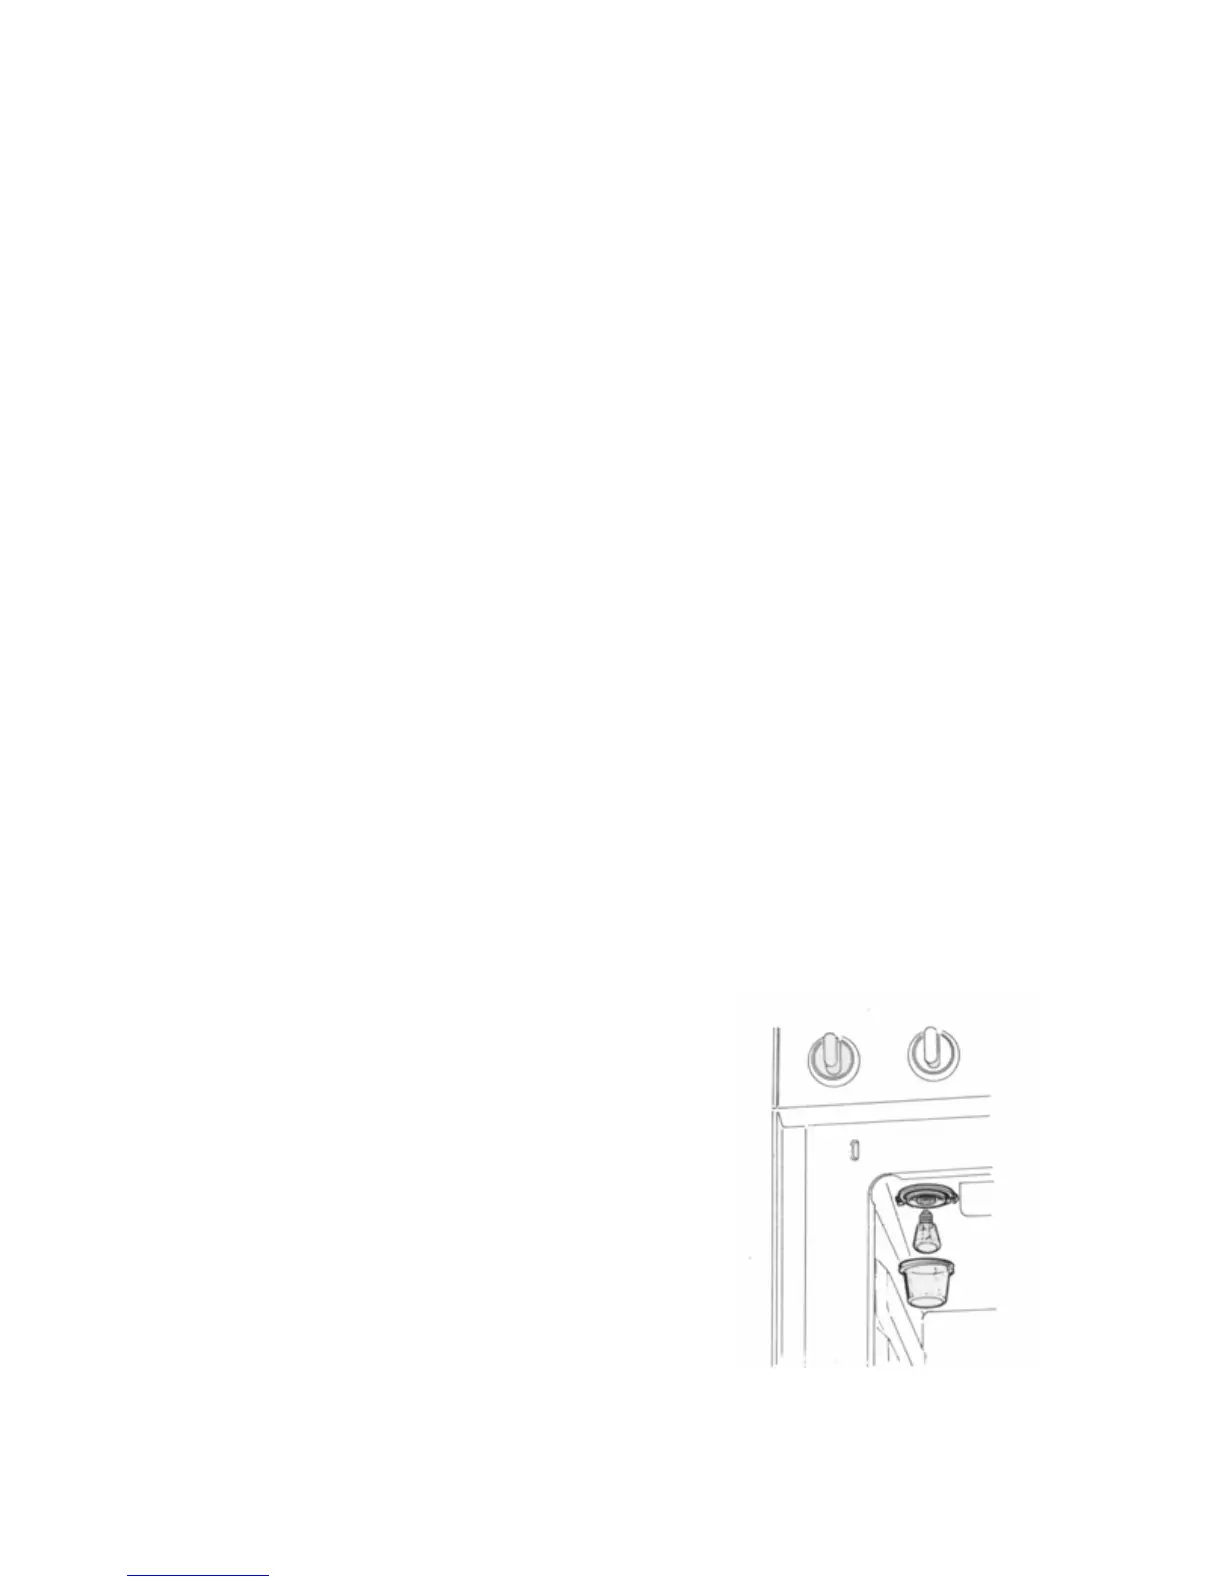
REPLACING THE OVEN LIGHT BULB
(not covered by the appliance warranty)
Disconnect the appliance from the electricity supply and
remove the oven shelves. If it is more convenient, the oven
door can be removed as previously described.
Remove the protective glass light cover by twisting anti-
clockwise.
Unscrew the old bulb and discard safely. Replace with the
type specified in the Technical Data and refit the glass
cover.
NOTE – the glass cover may be tight and may require a
tight grip to release.
Fig. 4 Replacing the Oven Light Bulb