– 18 –
UPDATE THE PROOFER FIRMWARE VIA BOOTLOADER
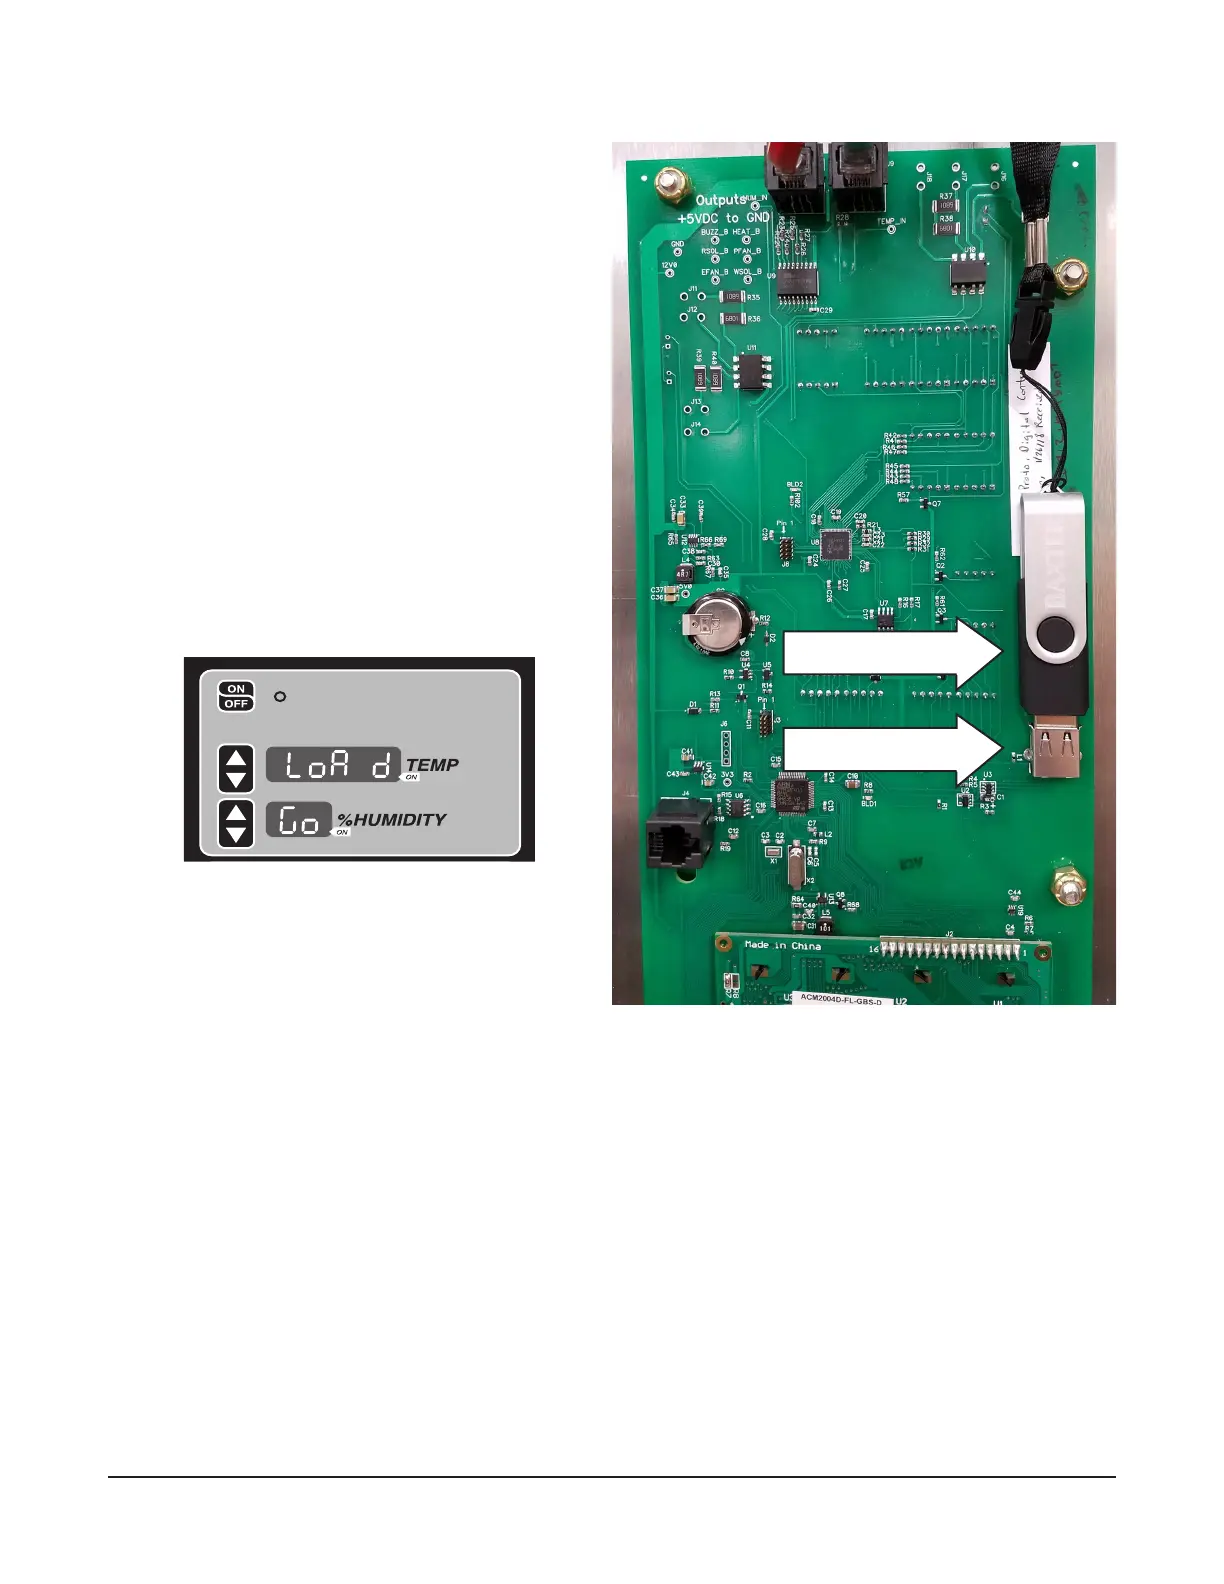
1. Load the rmware le named proofer.bin
onto a FAT formatted ash drive.
2. Turn o the Proofer with the ON/OFF button.
3. Insert the ash drive into the proofer’s USB
socket (Fig. 24).
4. Hold these three buttons, in this order for
5 seconds.
• HUMIDITY DOWN ARROW
• TEMPERATURE UP ARROW
• ON/OFF button.
5. Keep holding the three buttons until "conF" is
shown in the Temperature display (Fig. 23).
6. Press either TEMP UP or TEMP DOWN
arrow until "LoAd" is displayed in the TEMP
display (Fig. 25).
7. The word "Go" is displayed on the HUMIDITY
display.
8. Press HUMIDITY UP button to start the
update.
9. "UPdt" will be displayed in the TEMP display for 1 second.
10. "Strt" will be displayed in the TEMP display for 1 second.
11. The image le will be validated.
• On a successful update "Succ" will be displayed on the TEMP display for 2 seconds. The control
board will reboot. Remove ash drive and turn on the proofer with the ON/OFF button. Verify
the correct proofer operating mode and parameters.
• On an unsuccessful update "Err" will be displayed on the TEMP display, this will be permanently
displayed and the proofer will need the power cycled to clear this error. Depending on the cause
of the failure either the old application will run if still present or the system will enter into the
bootloader so you can attempt to ash again.
Fig. 24
USB Socket
Flash Drive
Fig. 25
MANUAL PROOF ON
SELECT RECIPE >