EasyManua.ls Logo

Baxton Studio 340C User Manual

Baxton Studio 340C
2 pages
To Next Page IconTo Next Page
Page #1 background imageLoading...
Page #1 background image
ASSEMBLY INSTRUCTION
MODEL : 340C
Read this instruction carefully. Remove all wrapping material, staples and straps from the
carton. See hardware and furniture part list
For guidance. Be sure you have all wooden furniture parts on a clean and flat soft surface,
such as a carpet or rug, to prevent from being scratched.Follow the figure to start assembling.
CAUTION :
1. Do not FULLY - TIGHTEN the nut or screw untill all is ready to assemble.
2. Do not OVER - TIGHTEN the nut or screw to avoid causing damages to the thread.
3. Keep all hardware part out reach of children.
PART LISTNO QTY
A
BACK REST
B
FRONT LEG
C
SIDE RAIL 2 PCS
D
WOODEN SEAT WITH SCOOP 1 PC
1 PC
1 PC
5
1
4
DESRIPTIONNO
QTY
1
2
3
4
5
JCBC SCREW M6 X 50MM
WOOD DOWEL Ø8 x 30MM
CSK SCREW M4 x 30MM
SPRNG WASHER M6
M4 ALLEN KEY
6 PCS
4 PCS
3 PCS
6 PCS
1 PC
COMPELETE ASSEMBLE
STEP 1
Attached C to B according to
the hole and tighten it using
hardware number 1,2,4, and 5 .
C
C
B
2
4
1
5
STEP 2
Align the whole part from STEP1
to A . Tighten the part of C and
A using hardware number 1,4
and 5 .
C
A
STEP 3
Stick D to the whole assemble
part and fully-tighten it with
hardware number 3 .
STEP 4
C
A
D
3 X 3PCS
Question and Answer IconNeed help?

Do you have a question about the Baxton Studio 340C and is the answer not in the manual?

Baxton Studio 340C Specifications

General IconGeneral
BrandBaxton Studio
Model340C
CategoryIndoor Furnishing
LanguageEnglish

Summary

Assembly Instructions and Safety Precautions

Assembly Caution

Provides critical warnings regarding assembly, including not fully tightening parts and keeping hardware away from children.

Step 1 Assembly

Instructions for attaching part C to part B using specific hardware numbers.

Step 2 Assembly

Guidance on aligning parts from Step 1 to part A and tightening with specified hardware.

Step 3 Assembly

Instructions for attaching part D to the assembled unit and fully tightening with hardware number 3.

Table Top Assembly

Table Top Caution

Safety warnings for assembly, emphasizing partial tightening and avoiding over-tightening of fasteners.

Step 1: Attach Legs

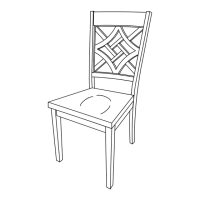
Instructions for the first assembly step, likely attaching legs to the table top using hardware.

Step 2: Final Assembly

Completing the table assembly, indicating the final state of the product.

Related product manuals