Do you have a question about the Baxton Studio BBT6376 and is the answer not in the manual?
Assemble the main frame components including headboard and footboard.
Connect the side rails to the assembled headboard and footboard.
Attach the center support rail and legs to the bed frame.
Assemble the headboard support rails and connect to the frame.
Prepare and position the bed slats for installation.
Attach the bed slat side fitters to the side rails.
Install the bed slats onto the fitters and center support.
Complete the bed assembly and ensure all parts are secure.
Assemble the main structure of the night stand.
Install the drawer and attach the handles to the night stand.
Complete the night stand assembly, ensuring drawers function.
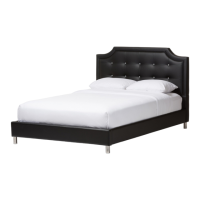
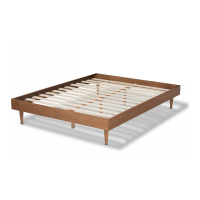
This document provides assembly instructions for the BBT6376 Queen Bed and the BBT3106 Night Stand.
Function Description: The BBT6376 Queen Bed is a furniture item designed for sleeping. It features a headboard, footboard, side rails, and a slat system to support a mattress. The assembly instructions detail a step-by-step process for constructing the bed frame, ensuring all components are correctly fitted and secured. The bed frame is designed to be sturdy and provide a stable foundation for a queen-sized mattress.
Important Technical Specifications: The bed frame consists of various wooden furniture parts and hardware components.
Usage Features: The bed frame is designed for a queen-sized mattress. The assembly process involves attaching the headboard, footboard, side rails, and center supports, followed by installing the bed slats. The bed slats are secured with side fitters and center fitters, ensuring even distribution of weight and mattress support. The headboard features a padded design, adding to the aesthetic appeal and comfort. The center support legs are crucial for stability and must be adjusted to be straight when moving the bed to prevent damage.
Maintenance Features:
Function Description: The BBT3106 Night Stand is a compact furniture piece designed to be placed beside a bed, typically for holding personal items, a lamp, or an alarm clock. It features two drawers for storage, helping to keep the bedside area tidy. The assembly instructions guide the user through the process of attaching the handles to the drawers and then inserting the drawers into the night stand frame.
Important Technical Specifications: The night stand consists of a main frame and drawer components.
Usage Features: The night stand is designed for convenient bedside storage. It includes two drawers, providing enclosed space for items. The handles are attached to the drawers, allowing for easy opening and closing. The assembly process is straightforward, primarily involving the attachment of handles and the insertion of pre-assembled drawers into the main night stand frame.
Maintenance Features:
| Brand | Baxton Studio |
|---|---|
| Model | BBT6376 |
| Category | Indoor Furnishing |
| Language | English |