SSS3416TC
Owner’s Manual
7
Assembly Instructions
Remove all
contents
from the carton packaging. Make sure all
parts are present before
attempting assembly.
Once
the grill is
fully assembled, go back and check to make certain all the bolts are secure. Tighten again
using the screwdriver provided if
necessary.
Estimated assembly
time:
30
minutes.
AA
M6 x 15 Bolt
2 PCS
BB
Spring washer
2 PCS
CC
Flat washer
2 PCS
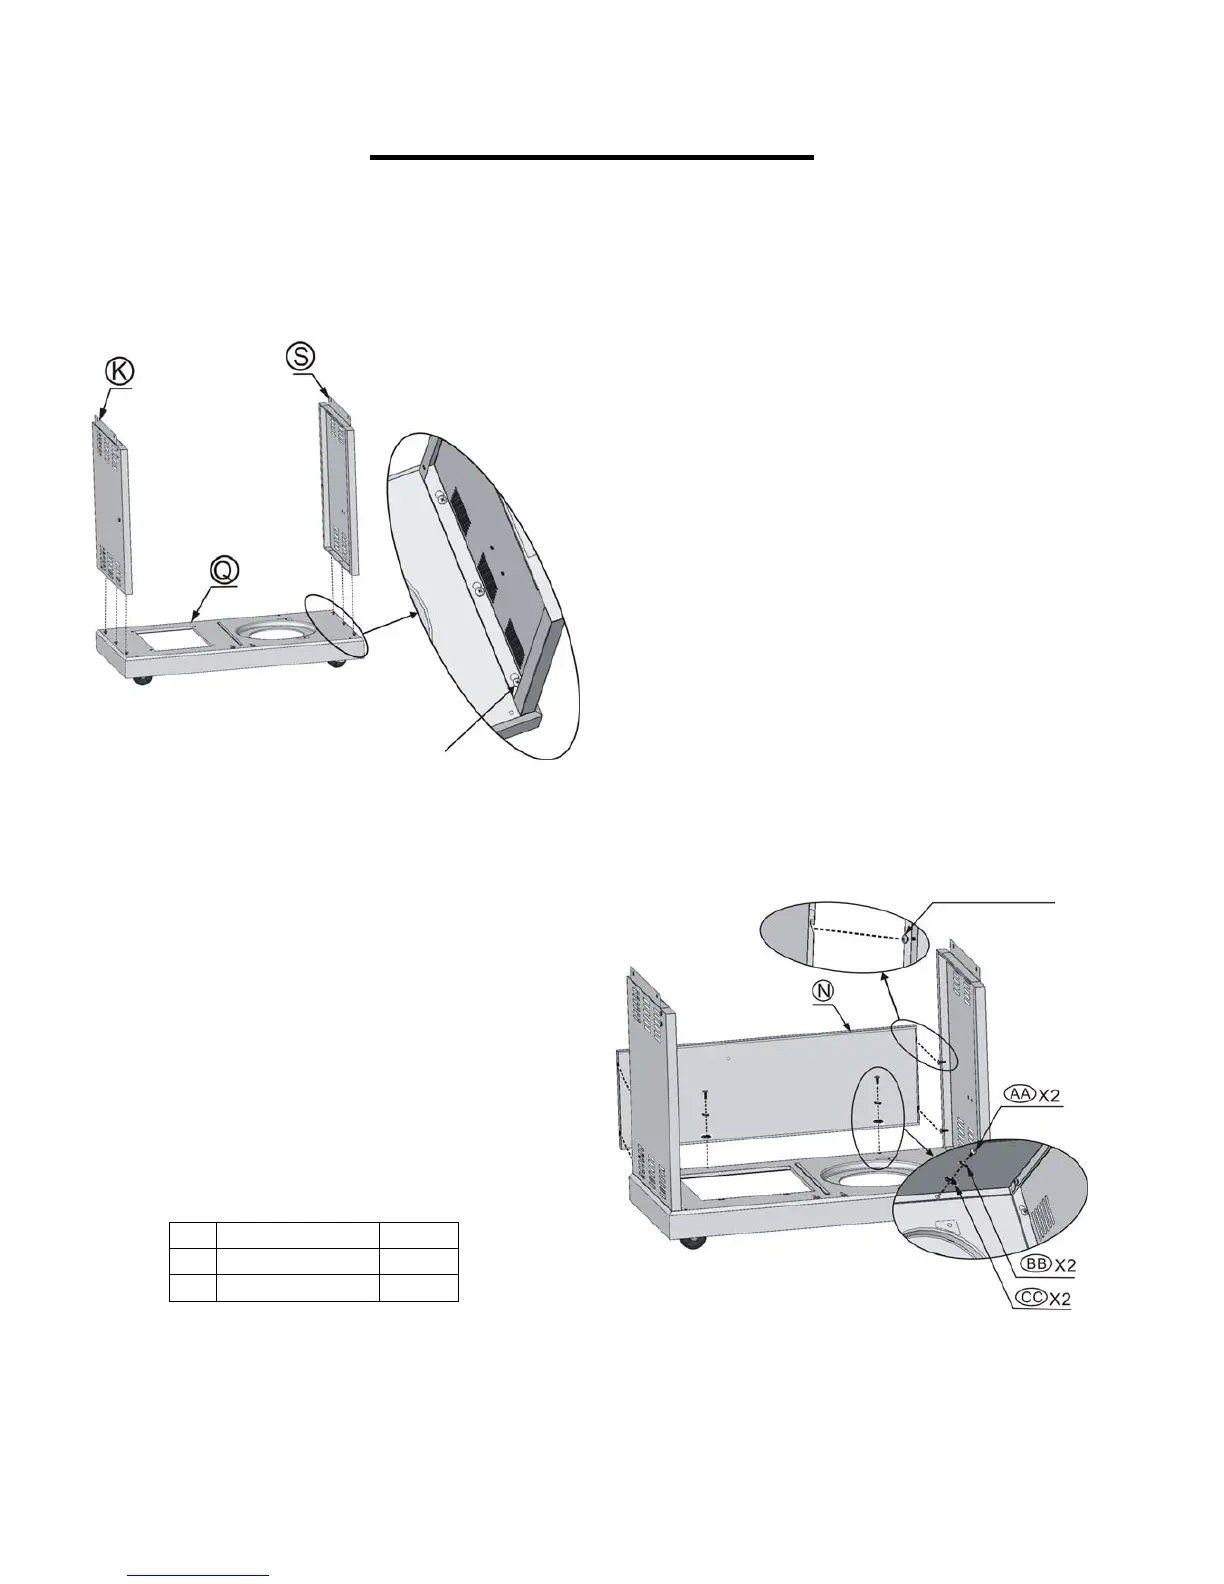
Step 1 (
C
art side panel assembly
)
Note: Before beginning assembly, make certain the two swivel
casters on the cart base (Q) are locked.
a) Loosen the six pre-installed bolts on the cart base (Q) and
allow 1/4 bolt’s length to extend from the cart base (Q).
b) Align the holes upon the left side of cart base (Q) with the
holes on the cart left side panel (K) and tighten the
pre-installed bolts by hand.
c) Repeat the procedure with the cart right side panel (S) on
the upper right side of cart base (Q).
d) Go back and tighten all bolts using the screwdriver
provided.
Step 2
(C
art back panel assembly
)
a) Loosen the four pre-installed bolts on the cart back
panel (N) and allow 1/4 bolt’s length to extend from
the cart back panel (N).
b) Align the holes on cart left side panel (K) with the
holes on the cart back panel (N).
c) Insert one M6 x 15 bolt (AA), spring washer (BB)
and flash washer (CC) into each pre-drilled holes
and tighten the bolt s by hand.
d) Repeat the procedure with cart right side panel (S)
and cart back panel (N).
e) Go back and tighten all bolts using the screwdriver
provided.
Pre-installed Bolt (x 6)
Pre-installed Bolt (x 4)


 To Next Page