EN
68
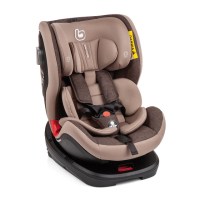
GROUP II + III (15-36 KG)
INSTALLATION AND INSTRUCTIONS FOR USE
Note:
1. For group II + III there is only one position level which
is level 2.
2. Correct installation for group ll + lll is in the forward
facing position and is suitable for children from 15 to
36
kg.
3. Before using the seat as a group ll + lll device, remove
the insert and the 5-point safety harness.
4. Pull the strap in the buckle rmly to make sure that
the buckle is in the correct position.
5. Universal installation is only suitable for vehicles tted
with 3-point seat belts and approved under ECE regu-
lation No. 16.
6. Semi-universal installation is only suitable for vehicles
tted with ISOFIX anchor systems approved under ECE
regulation No. 16.
a- UNIVERSAL ll+lll (15-36 kg): 3-POINT SEAT
BELT
Step 1: as shown in gure 1, turn the child safety seat
forwards (see the rotation function section on page 8).
Then, pull the seat position adjustment handle to set it
to level 2.
Step 2: as shown in gure 2, with one hand pull the ISO-
FIX adjustment handle and press the ISOFIX connectors
towards the base with the other hand.
Step 3: as shown in gure 3, settle the child in the seat
and adjust the headrest to a comfortable height. Make
sure that the seat belt passes through the group II and
III guide hook at a slanted angle, check that the lap belt
goes through the two harness guides and insert the
seat belt clip into the buckle making sure it clicks rm-
ly locked into place. Lastly, make sure that the lap belt
holds the child’s pelvis securely.
b- SEMI-UNIVERSAL ll+lll (15-36 kg): ISOFIX +
3-POINT SEAT BELT
Step 1: as shown in gure 1, turn the safety seat forwards
(see the rotation function section on page 8). Then, pull
the seat position adjustment handle to set it to level 2.
Step 2: as shown in gure 2, release the ISOFIX connec-
tor. Pull the ISOFIX adjustment handle and the ISOFIX
connector will automatically come out.
5