14
15
Read this operator’s manual and safety
rules before operating your generator.
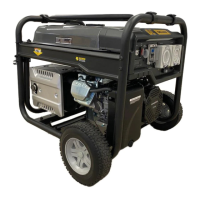
BE-12000ER 12000WATT
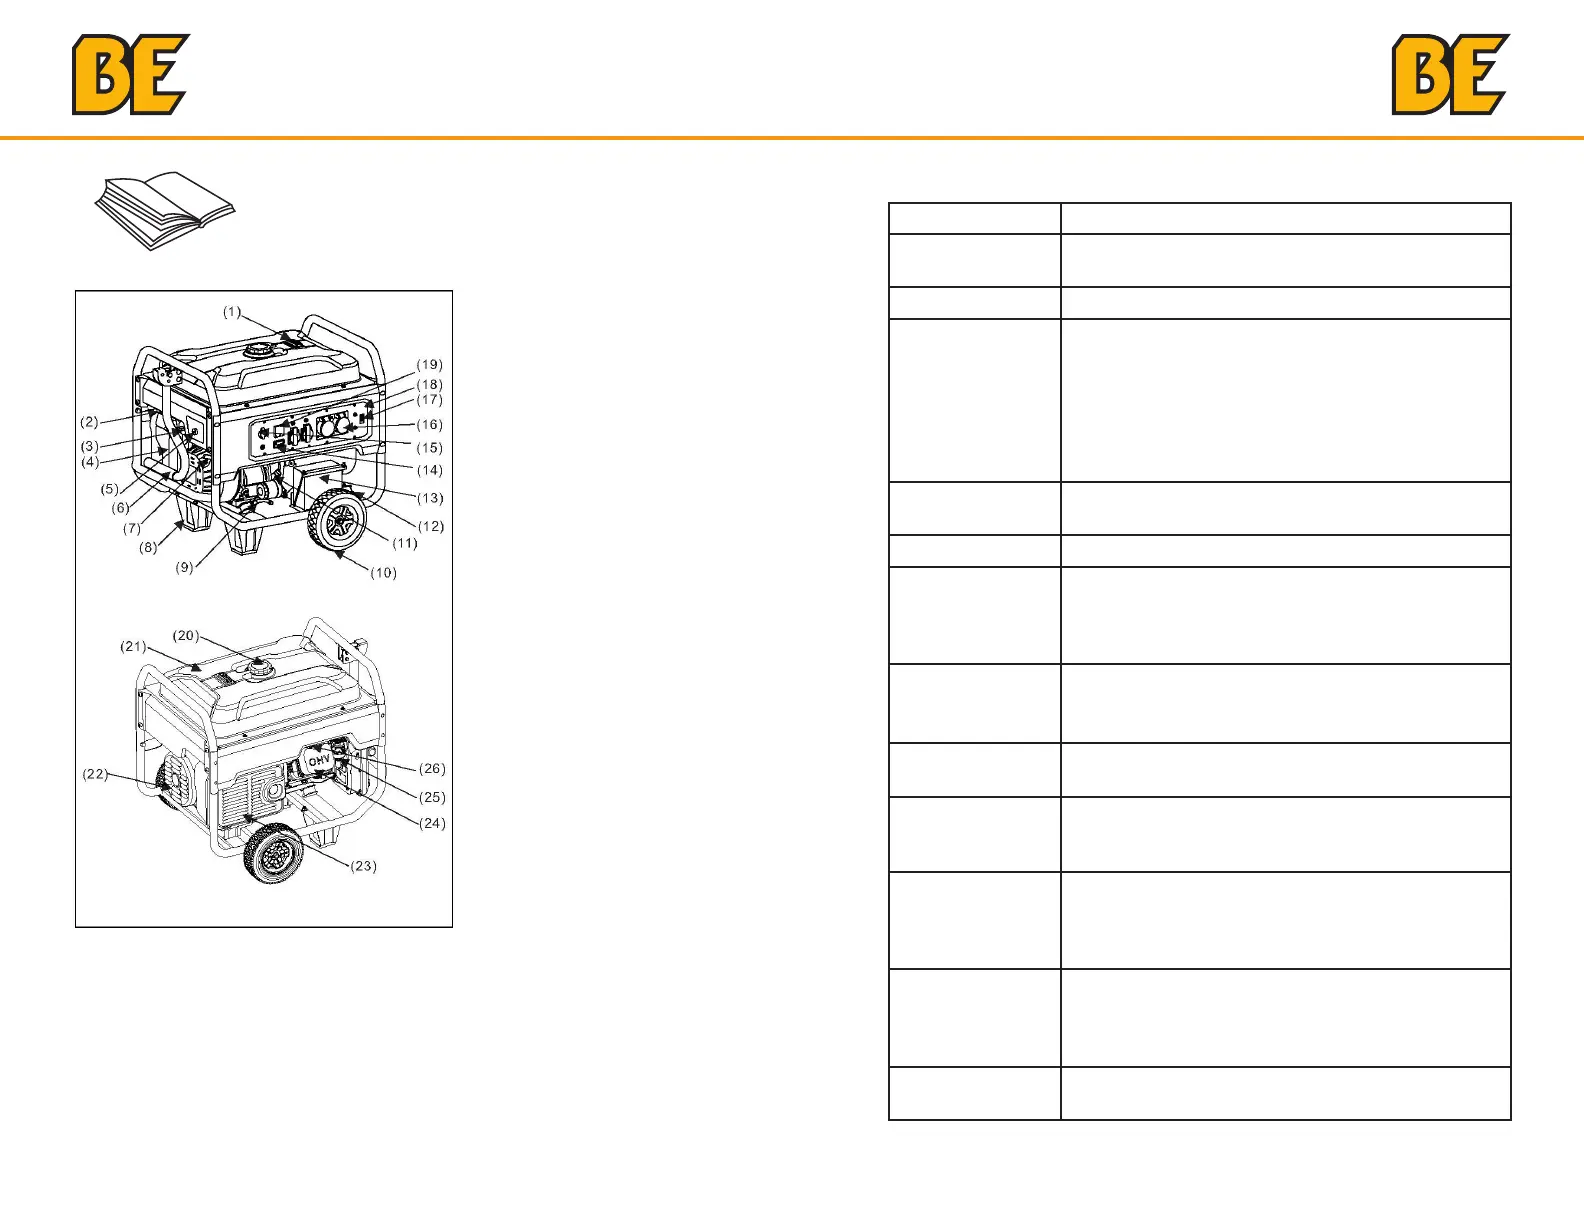
1) Fuel Gauge
2) Choke Valve
3) Fuel Valve Lever
4) Air Cleaner
5) Engine Switch
6) Handle
7) Starter Grip
8) Foot (x2)
9) Oil Drain Bolt
10) Wheel
11) Oil Filler Cap
12) Ground Terminal
13) Battery
14) Timer
15) DC Output
16) AC Output
17) AC Circuit Breaker
18) Panel Seat
19) Voltmeter
20) Fuel Tank Cap
21) Fuel Tank
22) Cover, Generator End
23) Muffler
24) Cylinder Head
25) Carburetor
26) Spark Plug
SPARE PARTS LIST
Fuel Tank Used to hold fuel. Use unleaded, fresh gasoline.
Fuel Tank Cap
Seals the gas tank. After filling the tank. screw the
cap back in by hand until a secure seal is formed.
Fuel Gauge Indicates how much fuel is left in the tank.
AC Output
AC output socket provides the power supply.
Please refer to the models parameter table for its
rated power. Load of each socket cannot exceed
its rated current and total power of electric device
cannot surpass rated power of the generator. Do
not start up several electric devices simultaneously.
Instead, connect each item one at a time
AC Circuit
Breaker
This component will “break” to protect the device
when the current is too heavy.
Output Indicator Indicates power supply status. .
DC Output
The DC output is 12V with a maximum of 8.3A. It
is only used for automotive battery charging with
rated 12V. Pay attention to connecting the positive
and negative electrode correctly.
Engine Switch
Used to start up (applicable to electrical starting
only) and switch off the engine. Turn to the off
position while the generator is powered down.
Wheel (optional)
Allows the generator to be moved more easily from
one location to the next.
Battery
Starts up the generator.
If the unit has not been
used for more than 3 months, it may need to be
replaced.
Oil Filler Cap
Measures the engine’s oil level. Make sure engine’s
oil level is between MIN and MAX in the dipstick
of oil filler cap before use. Oil can be added after
removing the oil filler cap, but do not overfill.
Oil Drain Bolt
Unscrew this bolt when replacing engine oil. Drain
out the old engine oil and dispose of it properly
according to local laws, avoiding damage to the
environment.
Foot
Supports the generator. Ensure the unit is placed
on a flat surface.
GENERATOR COMPONENTS GENERATOR COMPONENTS