1
3
2
*
*
Page 2 of 8 75.5892.04 KEYPADS 20201007
READ BEFORE BEGINNING INSTALLATION/PROGRAMMING/SET-UP
Shut off all power going to header before attempting any wiring procedures.
Maintain a clean and safe environment when working in public areas.
Always check placement of all wiring before powering up to ensure that moving door parts will
not catch any wires and cause damage to equipment.
Ensure compliance with all applicable safety standards (i.e. ANSI A156.10) upon completion of
installation.
!
CAUTION
PRECAUTIONS
MOUNTING
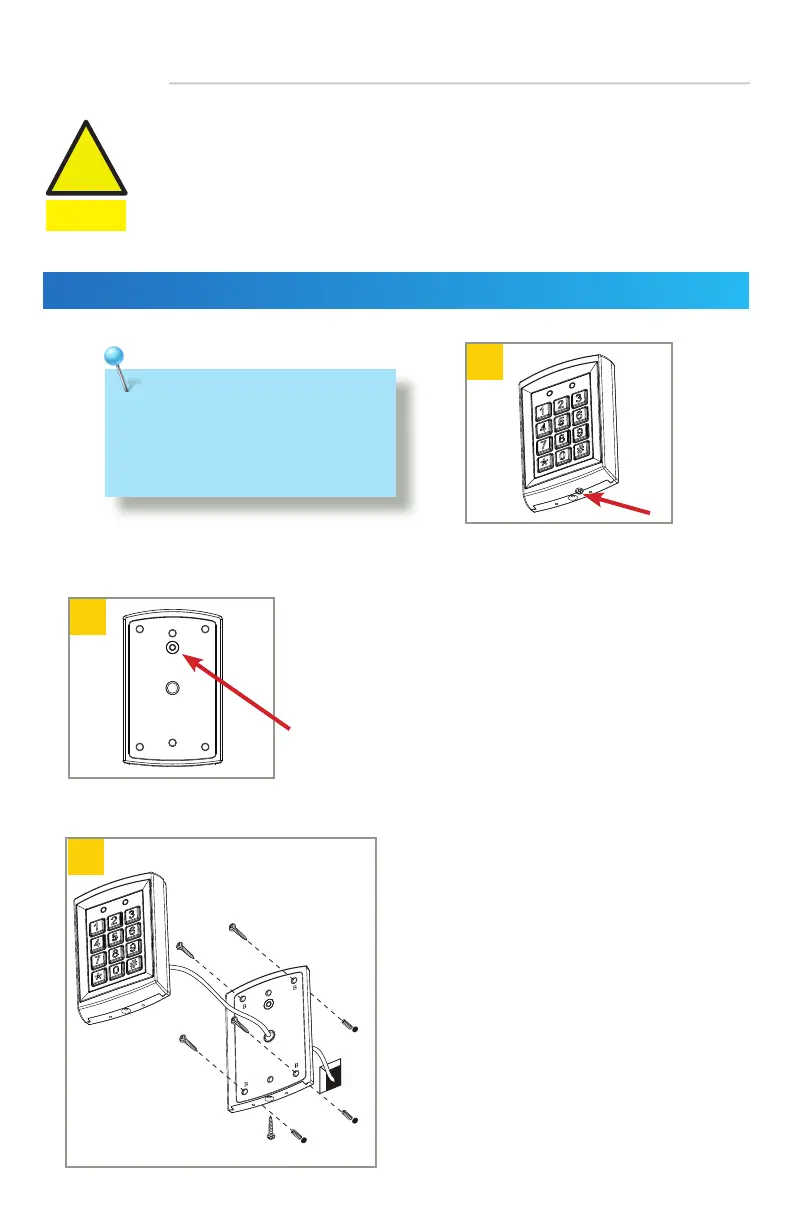
INSTALLATION TIPS
Using the supplied hex key, remove the
backcase screw from the keypad bottom.
Mount backcase on the wall with provided screws.
Make sure to pull keypad cable through the center
hole.
Keep keypad horizontal to the floor.
Use the drilling template and drill required holes.
For surface mounting, drill the 4 corner holes in the image.
For single-gang box mounting, drill the 2 holes marked with
an asterisk in the image.
NOTE: Do not damage the tamper sensor.
• Handle the equipment with care.
• Add threadlocker to all screws before
installing.
• Firmly tighten screws.