29 EN
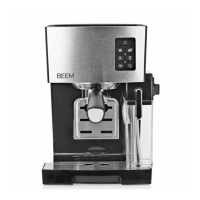
Inserting / Removing the Filter in the Portafi lter
Place the fi lter you want into the portafi lter (12). The fi lter must fi t securely in the portafi lter so
that it cannot fall out when coffee powder is removed.
Small fi lter for single espresso, normal cappuccino, normal
latte macchiato
Large fi lter for double espresso or two espressos, strong
cappuccino, strong latte macchiato
To remove the fi lter from the portafi lter, reach either with your fi ngernails or with a thin, hard
object between the fi lter and portafi lter.
Filling the Filter with Coffee Powder
1. Use the measuring spoon to pour the quantity of coffee powder you want into the desired
fi lter in the portafi lter (12). Make sure that you do not overfi ll the portafi lter!
One heaped measuring spoon is equivalent to roughly one fi lled small fi lter.
2. Press down the coffee powder in the fi lter with the plunger.
Only ever use pure espresso / coffee powder which is not ground too fi ne. Coffee substi-
tute or coffee extract contain sticky substances which can block the sieves.
Inserting / Removing the Portafi lter
• Inserting: Insert the portafi lter (12) into the device so that the two locking lugs on the
portafi lter sit in the recesses which are provided for them on the device. Twist the portafi lter
anticlockwise to fi x it in place (Picture C).
• Removing: Twist the portafi lter a little clockwise and then pull it out downwards.
• Removing the used coffee powder: Tap the portafi lter gently against an edge (e.g. of a
dustbin, a bowl or similar object) so that the compressed coffee powder can be released.
Cup Warmer
The device features a cup warmer (15) which is heated automatically as soon as the device is
switched on. Turn over the cups which are to be heated and place them on the cup warmer for
approx. 5 – 10 minutes (Picture D).
Switching On / Off
When the device is fi rst switched on, the red control lamp (18) fl ashes along with the but-
tons
(17) and (24) and a beep is heard to indicate that the device is not yet ready for
operation.
1. Fill the water tank (2) and if necessary the milk tank (9) (see the previous chapter).
2. Place a cup or a small vessel beneath the coffee outlet (14).
3. Press the
button (20). The device draws water and fi lls the water system with liquid. A
small amount of water always runs through. The device is now ready for operation.
03428_DE-EN-FR-ES-IT_A5_V4.indb 2903428_DE-EN-FR-ES-IT_A5_V4.indb 29 22.07.2019 10:13:2222.07.2019 10:13:22