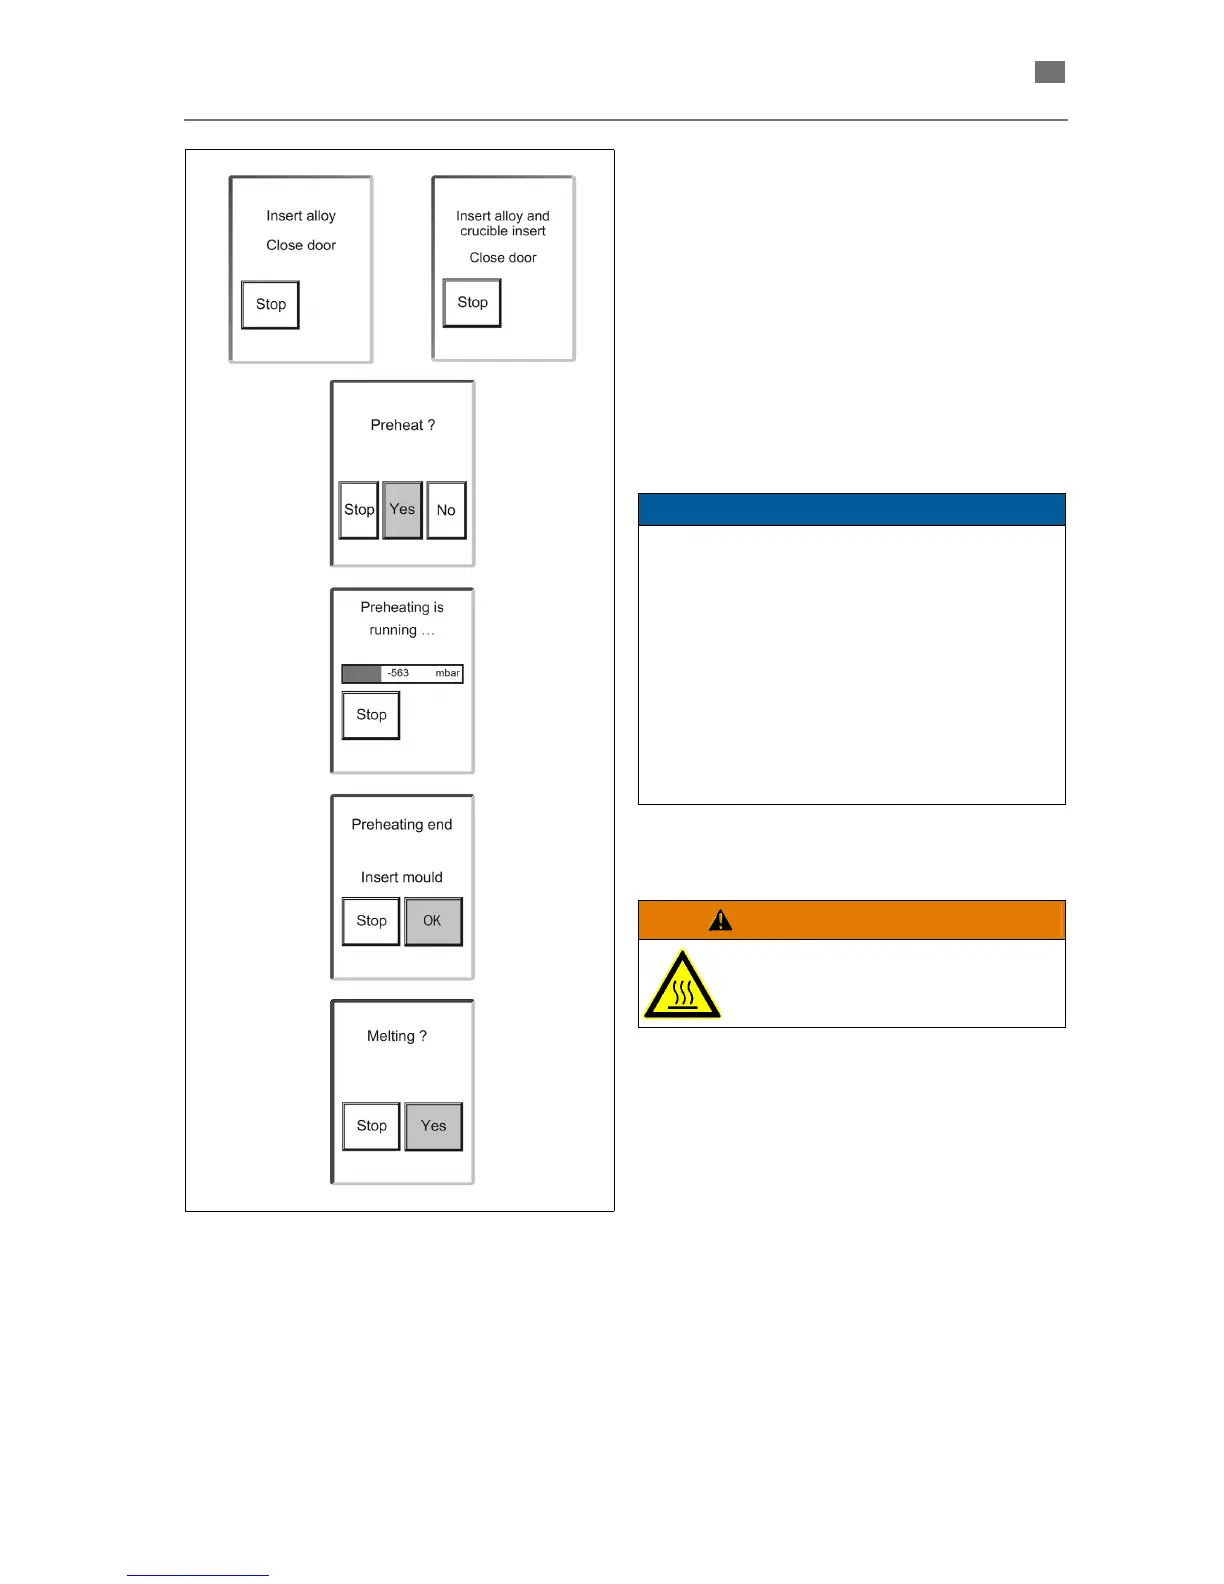
9. (The display on the right only appears for
alloys that require a crucible insert, see pro-
gram table.)
10. When the crucible door is closed, the next dis-
play is shown.“
11. Confirm the preheating with „Yes“, or skip with
„No“.
In the case of crucible inserts, preheating must
be carried out: "No" is missing on the display.
The chamber is evacuated during preheating.
12. If the alloy appears to be sufficiently preheated
after visual evaluation, end the preheating by
pressing!
13. After preheating is finished, insert the moulds
as rapidly as possible!
14. The next display is shown when the mould
door is closed.
15. The melting must now be confirmed with „Yes“.
At the same time, observe:
• Precious-metal and Pd alloys with / without cru-
cible insert Preheat until the first cast pieces
deform, but do not melt.
• CoCr and NiCr alloys
Preheat until the cast pieces glow bright red;
the cast pieces are still solid.
Important: Do not preheat for too long as
otherwise the alloy will fuse. The sinking-in of the
last solid part is, however, required for the start of
the timer!
 Loading...