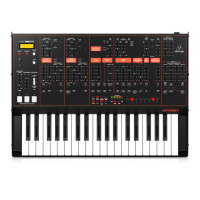
Synthesizer Section
1. TUNE – adjust the frequency of the internal VCO oscillator, approximately one octave either side of center.
2. CUTOFF – adjust the cutoff frequency of the low-pass VCF filter. Frequencies above the cutoff will be attenuated, such
as the higher-order harmonics.
3. RESONANCE – adjust the amount of emphasis given to the signal level at the cutoff frequency.
4. ENVELOPE – select the depth of modulation applied by the envelope generator to the VCF cutoff frequency.
5. DECAY – control the amount of time taken for the envelope to decay from the current level to minimum.
6. ACCENT – adjust the amount of accent given to the output for any notes programmed with an accent.
Patch bay (3.5 mm TS input and output connections)
7. FILTER IN – this input allows the connection of an external audio signal instead of the internal VCO oscillator.
8. SYNC IN – this input allows the use of an external clock and start/stop signal.
9. CV OUT – control voltage output of 1V/octave.
10. GATE OUT – gate output.
11. PHONES – connect your headphones to this 3.5 mm TRS output. Make sure the volume is turned down before putting
on headphones.
Distortion Section
These controls only have an effect when the DISTORTION switch (20) is ON. The circuit is located in the signal path
just before the volume control and the final audio output.
12. DRIVE – adjust the amount of distortion.
13. TONE – adjust the tone.
14. LEVEL – adjust the distortion output level.
General Controls
15. TEMPO – adjust the rate at which the pattern and tracks play, from slow to fast.
16. WAVEFORM – select the waveform of the internal VCO oscillator from reverse sawtooth or pulse.
17. TRACK/PATTERN GROUP – select from TRACK 1 to 7 when writing or playing tracks, and PATTERN GROUP I, II,
III, IV when writing or playing patterns. Patterns in group I are only available for use in track 1 or 2, patterns in group II
for tracks 3 or 4, group III for tracks 5 or 6, and group IV for track 7.
18. MODE – select from Track Write, Track Play, Pattern Play, Pattern Write.
19. POWER LED – indicates that power is supplied to the unit and the rear-panel power switch is on.
20. DISTORTION ON/OFF – when OFF, the distortion is bypassed, and the DRIVE, TONE, and LEVEL controls have no
effect.
21. VOLUME – adjust the output level from the rear-panel output and the headphones output. Make sure the volume is
turned down before putting on headphones.
Sequencer Section
22. D.C./BAR RESET/CLEAR – this is used to clear a pattern from memory, to return a track to the beginning, and to
signal that the last pattern is being added to a track.
23. PITCH MODE – selects the pitch mode on or off. The LED will light when in pitch mode. This mode is used to enter the
notes when creating patterns.
 Loading...